Create a Widget-based Smart Recommender Campaign
- 08 May 2024
- 1 Minute to read
Create a Widget-based Smart Recommender Campaign
- Updated on 08 May 2024
- 1 Minute to read
Article Summary
Share feedback
Thanks for sharing your feedback!
You can create your Smart Recommender campaigns with your widget. In this campaign type, you use Insider’s InOne panel during the campaign creation process and use Insider's existing widget templates to show recommendations on your website.
To start with, navigate to Experience > Discover > Web Smart Recommender.
1. Click the Create button on the main page. Select the Integration method and name your campaign.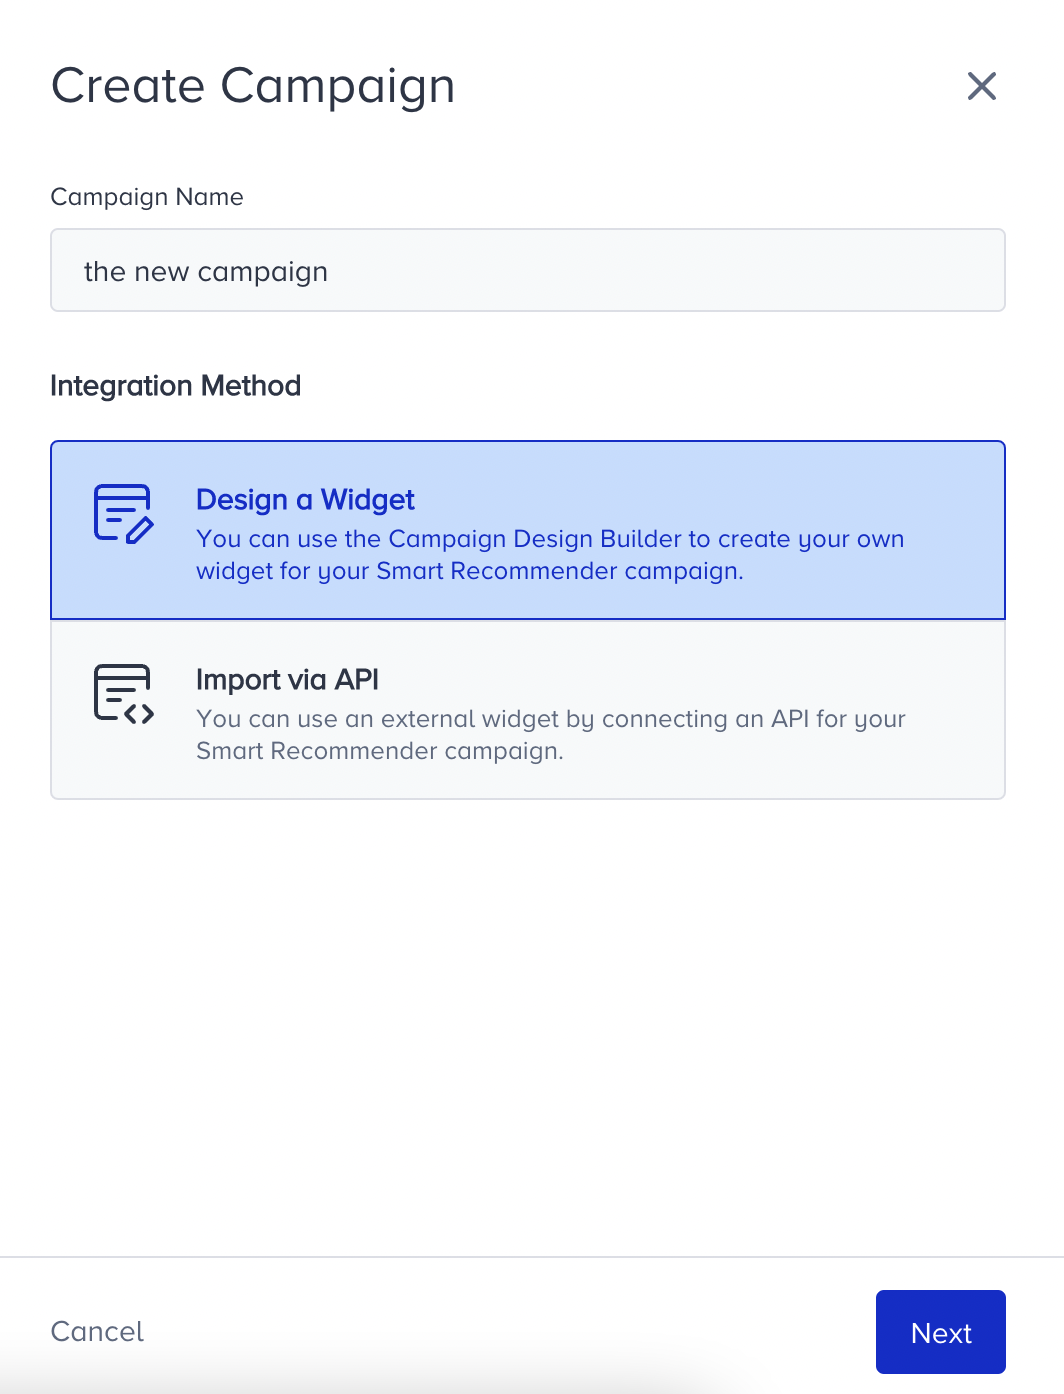
2. Select the platform and page type where you want to add your widget. Then, click the Next button.
Your title goes here
If you have not configured your page links before, make sure to complete the configuration before selecting a page type.

3. Configure your segments for a narrowed-down audience.
4. The page type you select at the beginning is selected by default. In addition to this, you can customize your rules. You can also configure Display Time to set when and how long the users will see your campaign.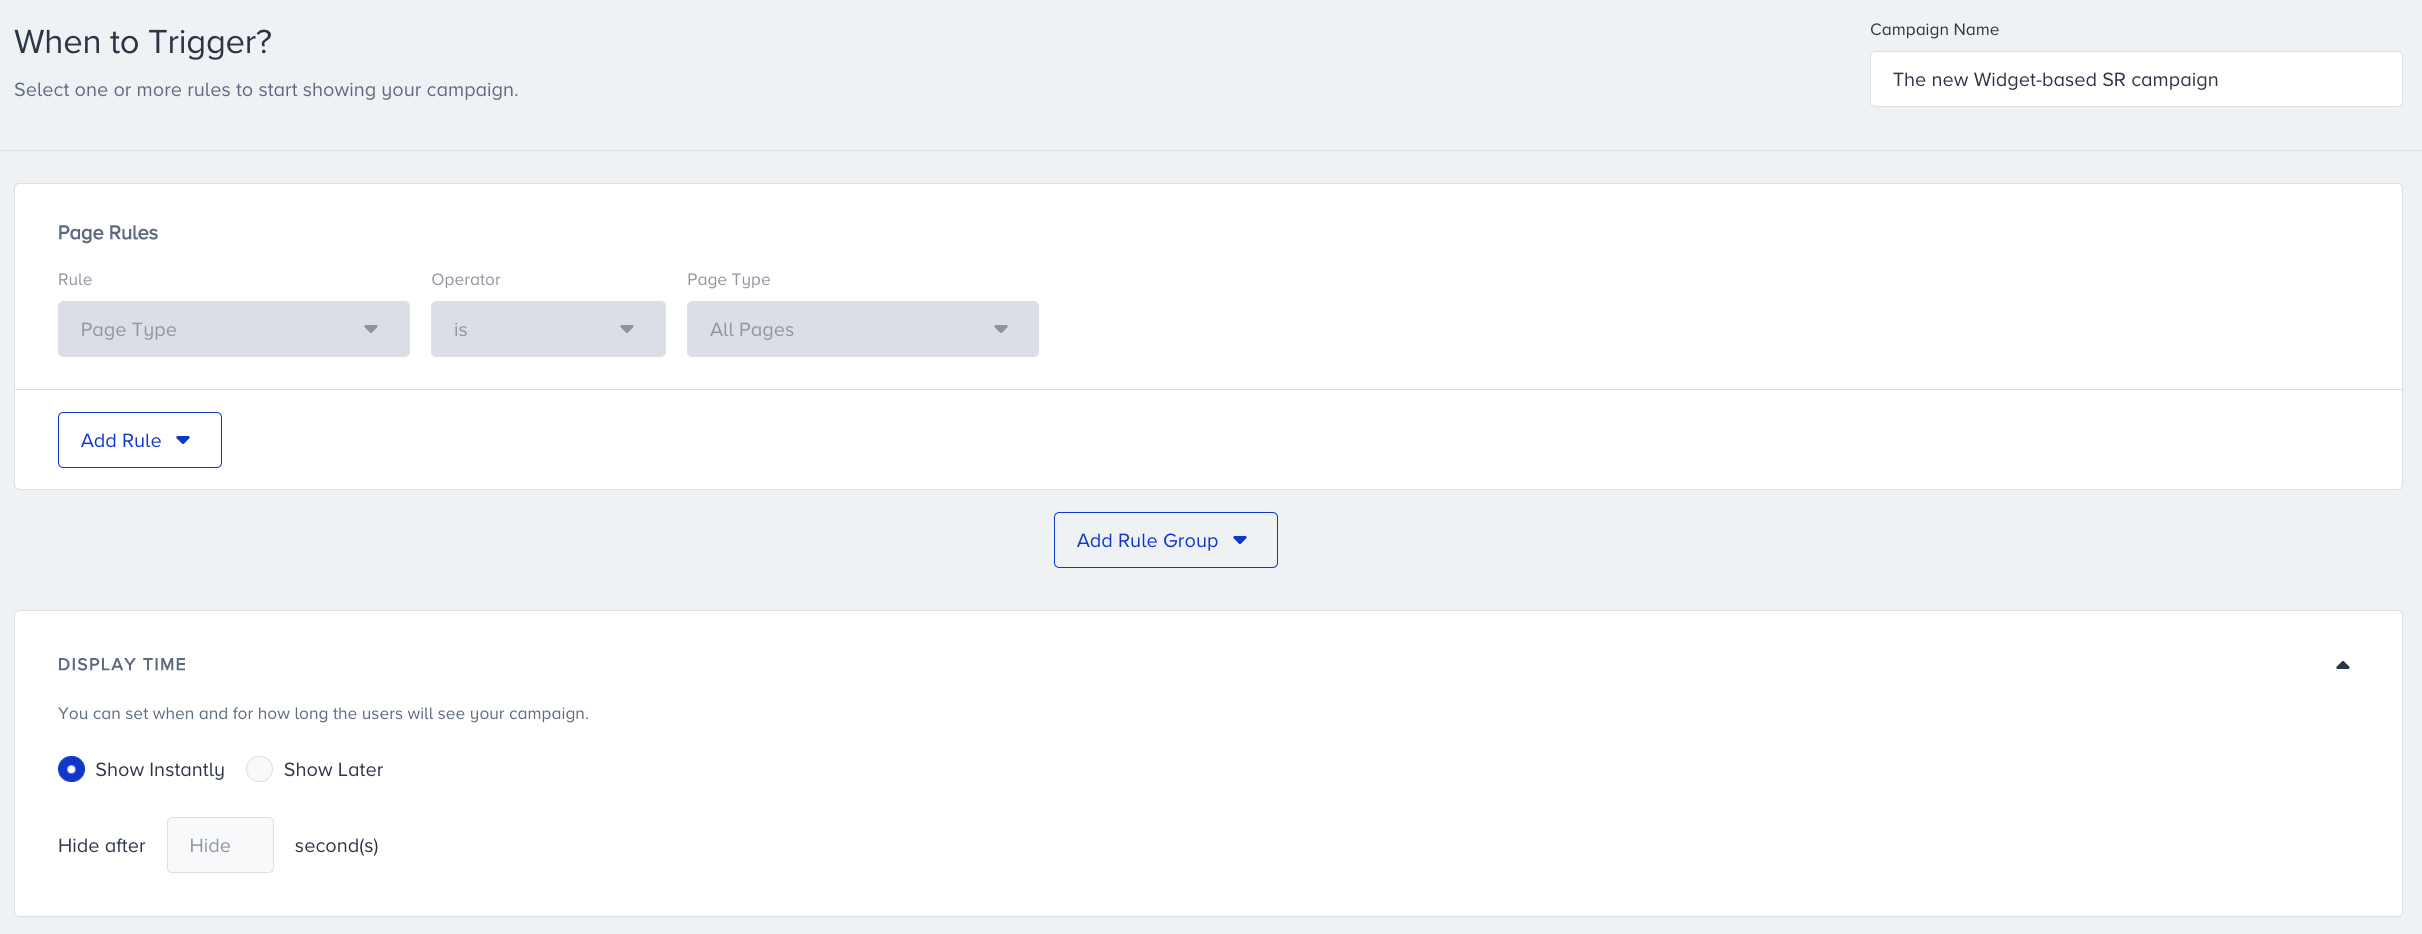
5. Proceed with the Design step and click Add a new variant. The panel will direct you to the platform to design your Smart Recommender. You can refer to Anatomy of a Widget-based Smart Recommender for further details.
You can define the number of products to display in your campaign, recommendation strategy, and exclusions of your widget. For more information, read Recommendation Settings. Once you finish your design, click Save.
Decide on the traffic allocation of your variant(s) to get and track the results of your campaign:
- If you have one variant and want to show it to every user, then set it as 100%.
- If you want to compare it with a control group, then allocate 100 between your variant and the control group.
- If you have multiple variants and want to have a control group too, then allocate them accordingly.
6. Configure your goals.
7. On the Launch step, configure your language selection, activation time, display settings, and advanced settings as applicable.
8. Save your campaign on the Active, Test, or Passive status based on your need. Then, click Launch.
Was this article helpful?