Create a Dynamic Segment
- 03 May 2024
- 5 Minutes to read
Create a Dynamic Segment
- Updated on 03 May 2024
- 5 Minutes to read
Article Summary
Share feedback
Thanks for sharing your feedback!
Dynamic segments let you automatically update the segments according to actual user status based on the events and attributes you set.
How to create a dynamic segment
To create a Dynamic Segment, navigate to Audience > Segments > Saved Segments.
1. Click the Create button on the top right.
2. Select Dynamic Segment type and enter a name for your segment. It is better to keep the name short while giving the key message of the segment. You can select tags to reach and filter your dynamic segment easily.

3. After you click Next, you are redirected to a screen with various segmentation types. Choose a segment to categorize your users. For further information, refer to the types of segments.

4. In the segment creation steps, you can add or remove any segment or segment groups and change AND/OR conditions as per your preference. You can also apply filters.
Your title goes here
You can select multiple values for an attribute, which enables you to select more than one value to filter users in one box. You can choose them easily from the value dropdown menu.
This feature is available to select data whose type is string or array for attributes. Number, numbers and boolean types are not supported.
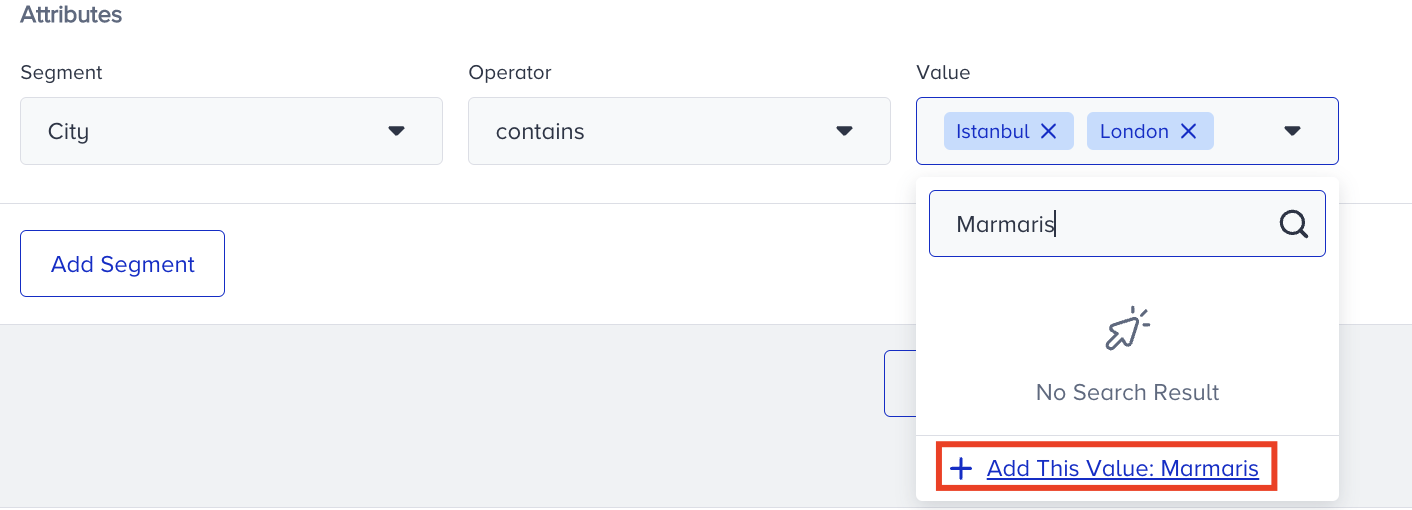
You can find an example below for a segment that will target users whose likelihood to purchase value is high and whose total purchase amount is equal to 50 in the last 30 days AND also whose city contains the name "Istanbul" or "London". When you’re ready to save your filters, click Save.
You can also add any new value that doesn't exist for an attribute in the dropdown. When you start to type, the Create option appears.
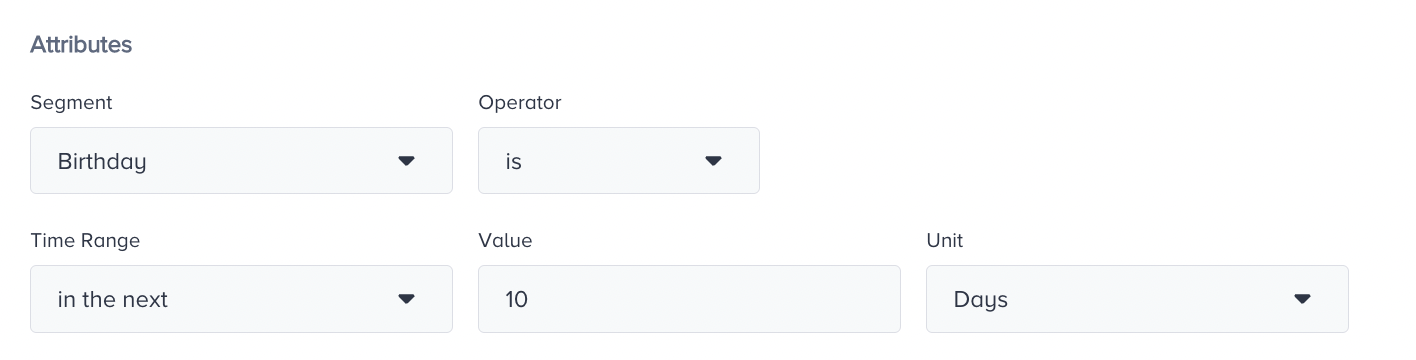
If the attribute is birthday which has the DateTime data type, you can now have the following operators:
- is
- is not
- is empty
- is not empty
As for the time range, you can have the following options:
- in last (specify days, weeks, and months)
- in the next (specify days, weeks, and months)
- on date (date picker)
- between (date range)
- after (date picker)
- before (date picker)
When you Add Event Parameter, you can also apply multiple values selection, which enables you to select more than one value to filter users in one box. You can choose them easily from the value dropdown menu.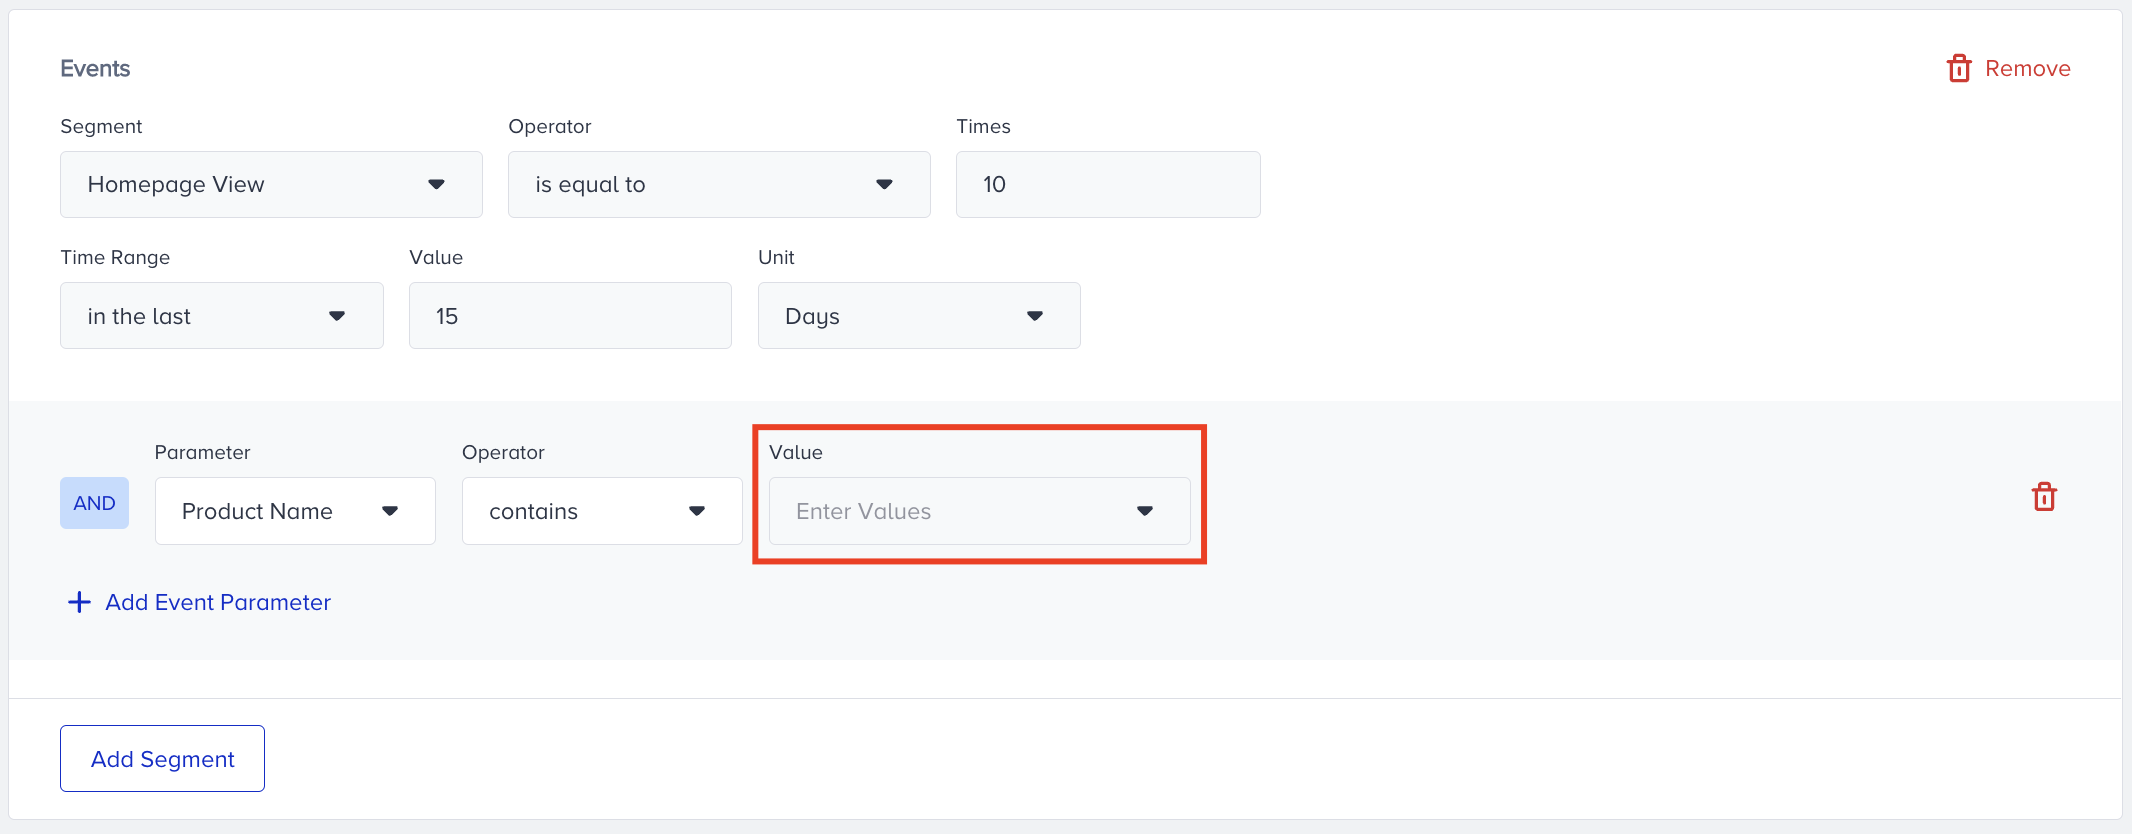
For example, for the product name, if you want to target cap and beanie, you do not need to add event parameters separately; instead, you can keep them together.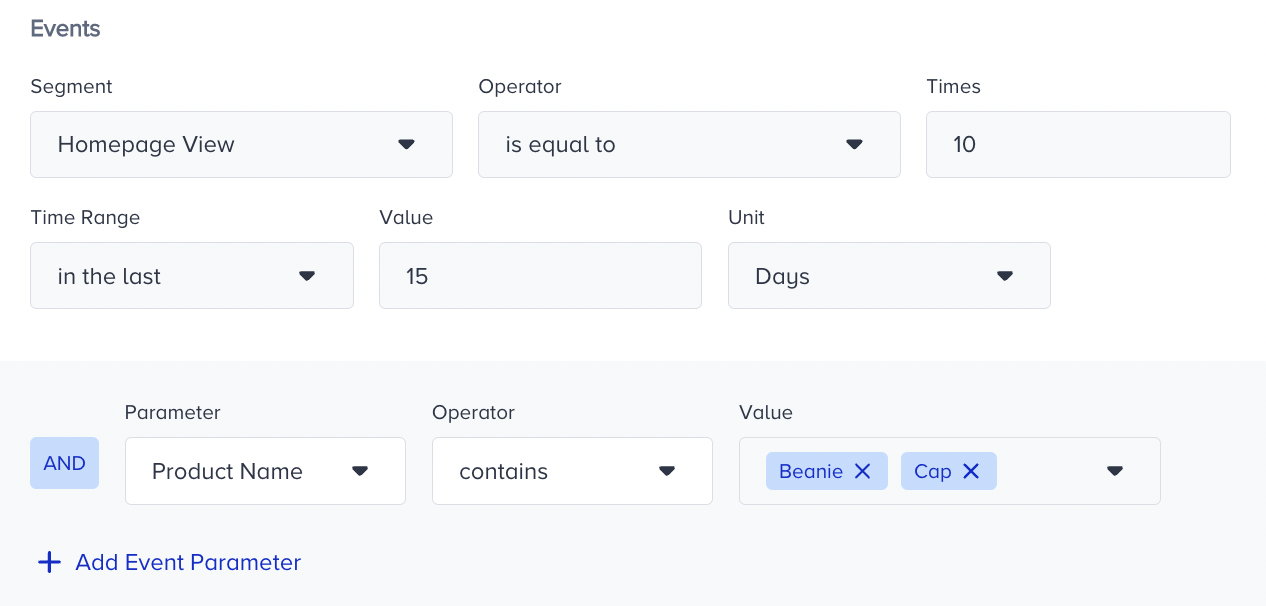
Your title goes here
You can use this feature to select all types of data except for date and boolean for event parameters.
Your title goes here
Note that when you delete the segment, the campaigns in which your segment is used will not be affected until that campaign is rescheduled.
You can send your Dynamic segments to the channels listed below:
- Google Ads
- Facebook Ads
- TikTok Ads
Your title goes here
All remarketing segments undergo an update during the nightly sync job.
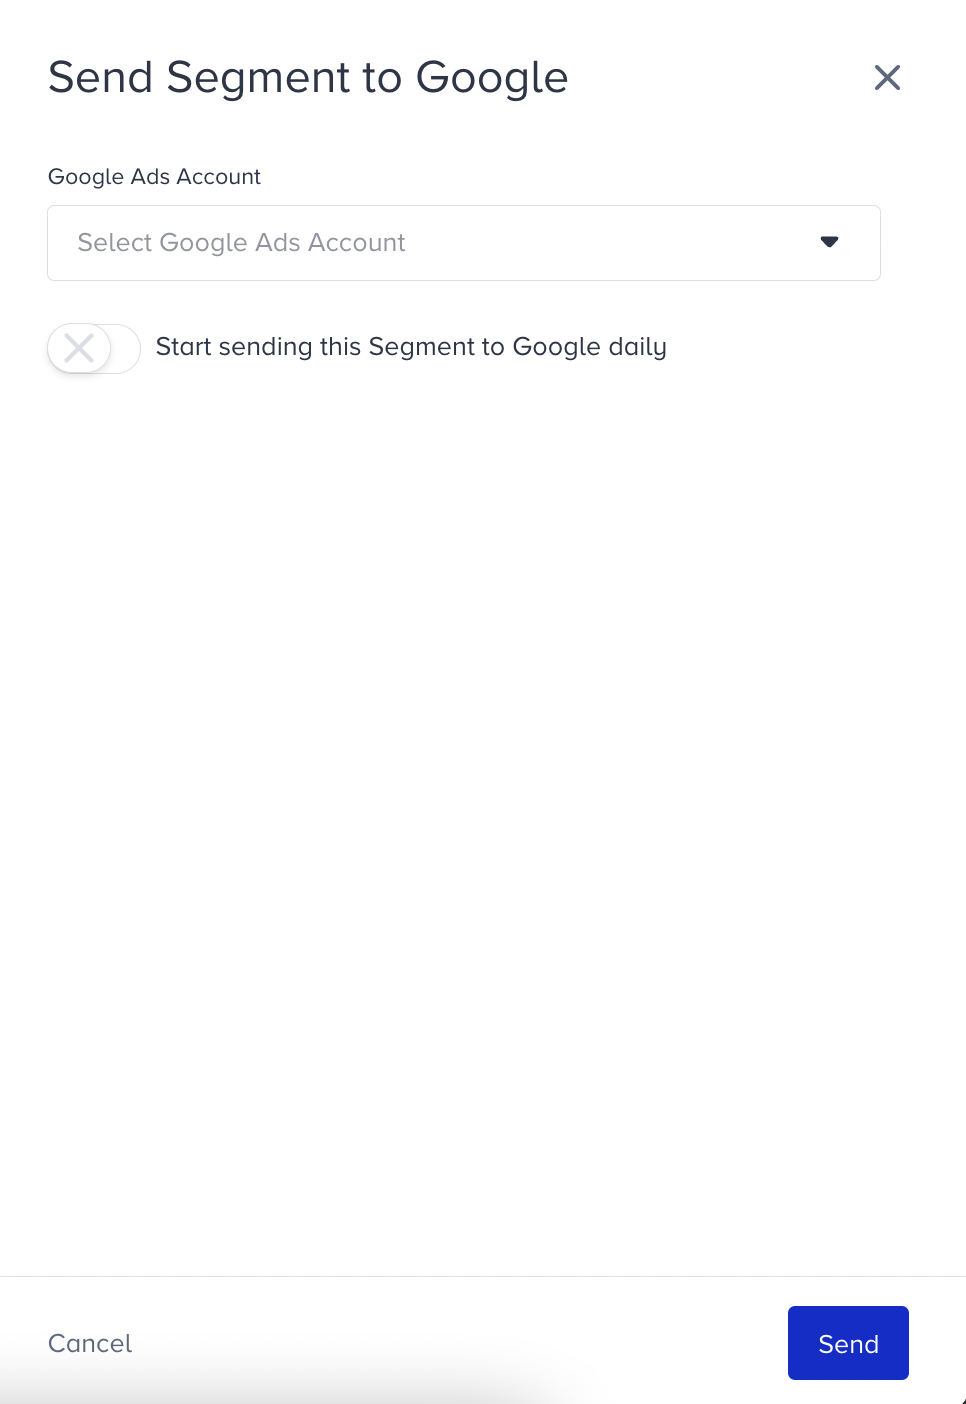
How to send a segment from Insider to Google Ads
To begin the sending process of your segment,
- Click on the Start button under Google remarketing icon on the listing page of your dynamic segments.
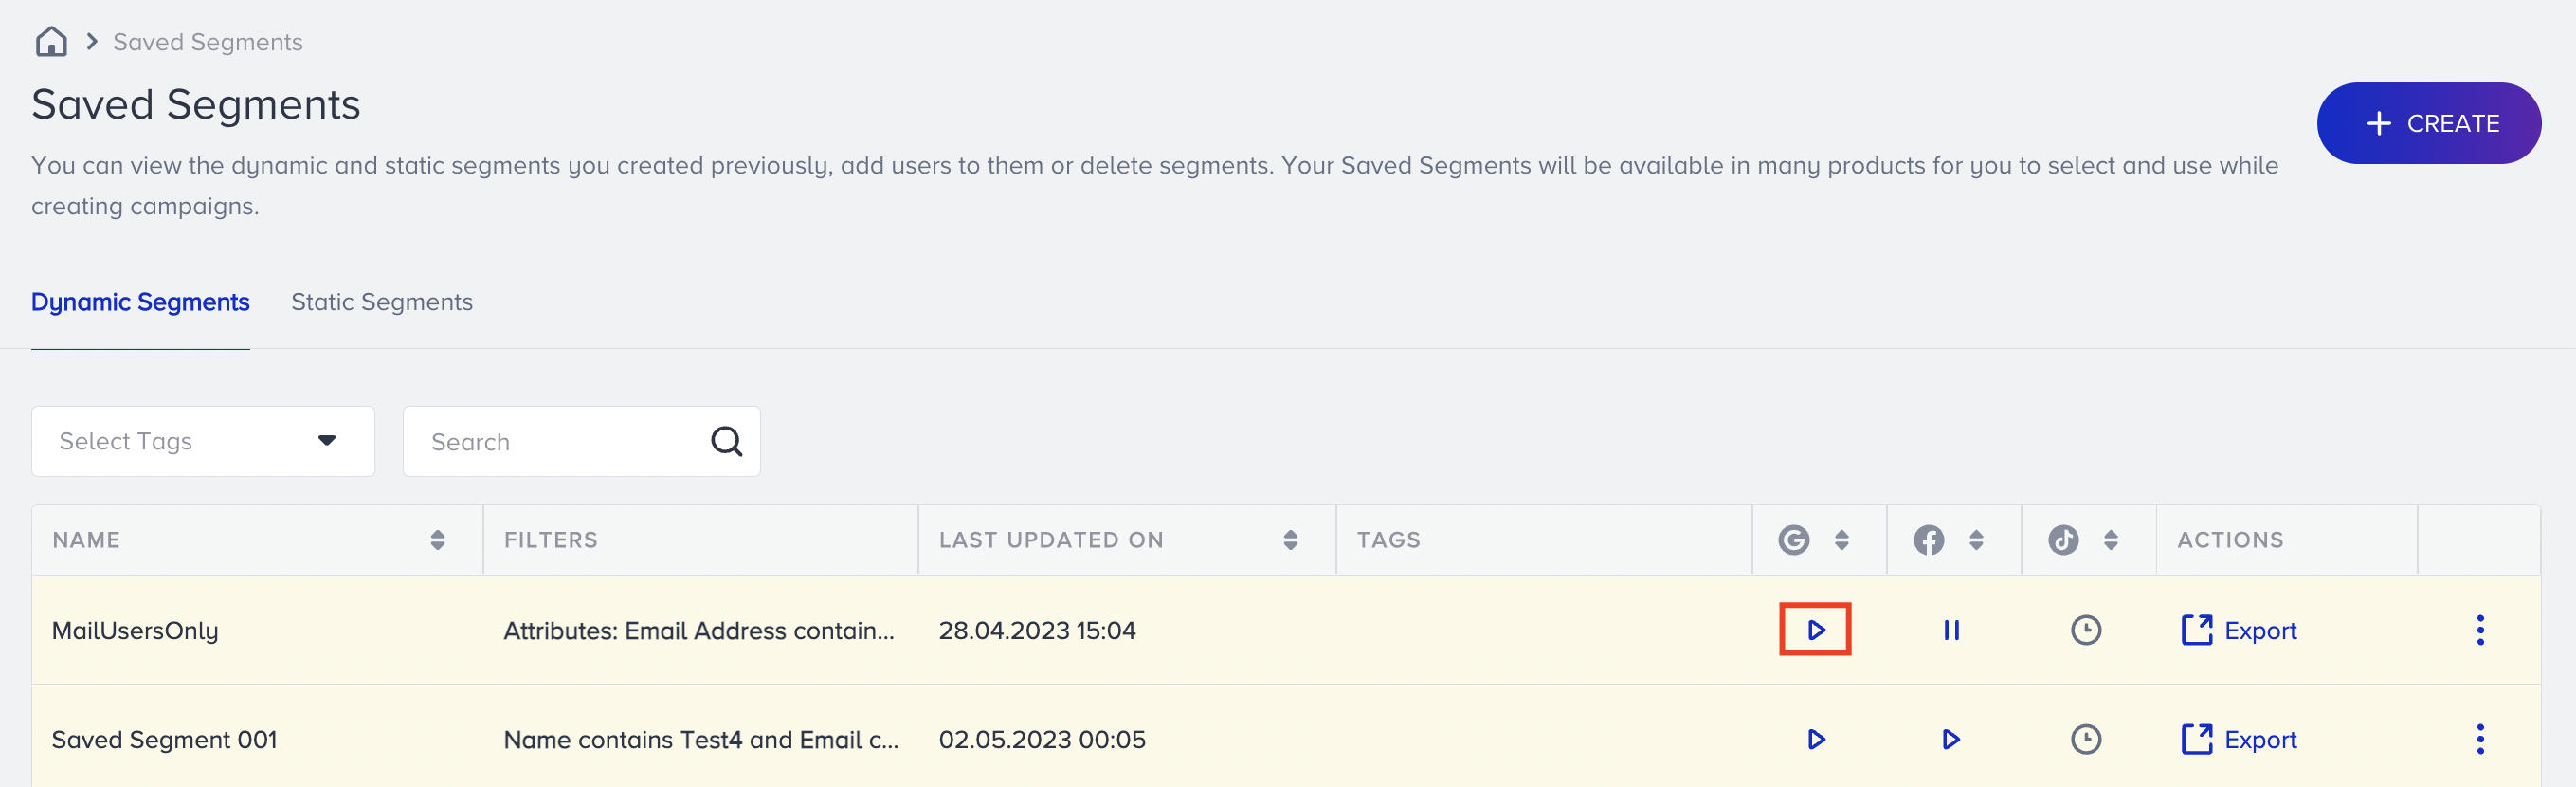
- Select your Google Ads account from the dropdown.
- Turn on the toggle to validate sending.
- Click Send to save your changes and set the segment up and running daily.
- The segments that have been sent from Insider will be displayed under the Audience Manager named with the prefix "Insider-", platform name, and segment name in your Google Ads account. The description of the audience will include the Insider ID of the campaign, platform, and server timestamp.
(1).webp)


(1).webp)
Your title goes here
You can also follow the same steps to send your audience based on Uninstall Analytics to Google Ads. To do this, create your segment and select Standard > Attributes > Mobile App Uninstall Date segment.
How to send a segment from Insider to Facebook Ads
To use Facebook remarketing, you should:
- Enable remarketing permission enabled for your account.
- Enable Facebook's custom audience terms.
- Log into your Facebook page account on InOne. You should have the privilege to create audiences and campaigns on Facebook Ads.
1. Go to Insider's InOne panel and click on your user name to navigate to InOne Settings > Integration Settings > Facebook Ads Integration. 
2. Click the Continue with Facebook button and enter your credentials on the pop-up screen.
3. You will see that your connected account resides under the table below.
4. Now, you can start sending the segments you want to Facebook Ads through the corresponding icons on the Saved Segments listing page.

Your title goes here
You can also follow the same steps to send your audience based on Uninstall Analytics to Facebook Ads. To do this, create your segment and select Standard > Attributes > Mobile App Uninstall Date segment.
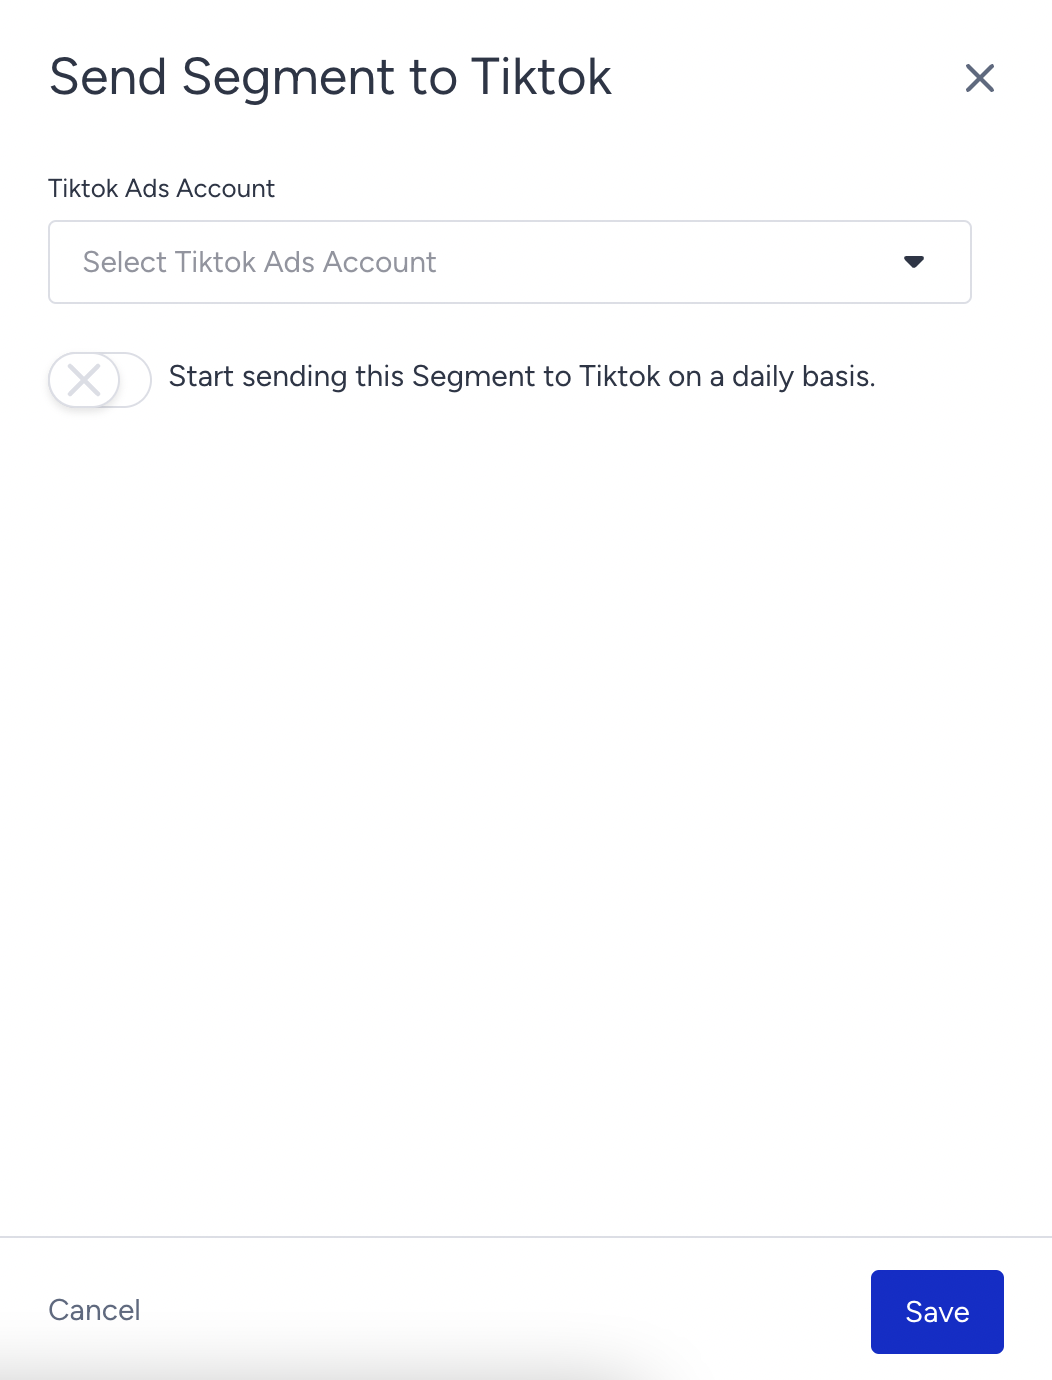
How to send a segment from Insider to TikTok Ads
Before you send your segment, you need to finalize the integration. This integration grants you the following advantages:
- Re-engage users based on their web interactions.
- Use the capabilities of AI-driven predictions to create smart audience clusters for retargeting.
- Engage with your audience on their preferred platform, enhancing retention rates and increasing conversions.
- Enhance your targeting of potential users and make more informed decisions regarding ad expenditure through the use of AI.
To begin the sending process of your segment,
- Click on the Start button under TikTok remarketing icon on the listing page of your dynamic segments.
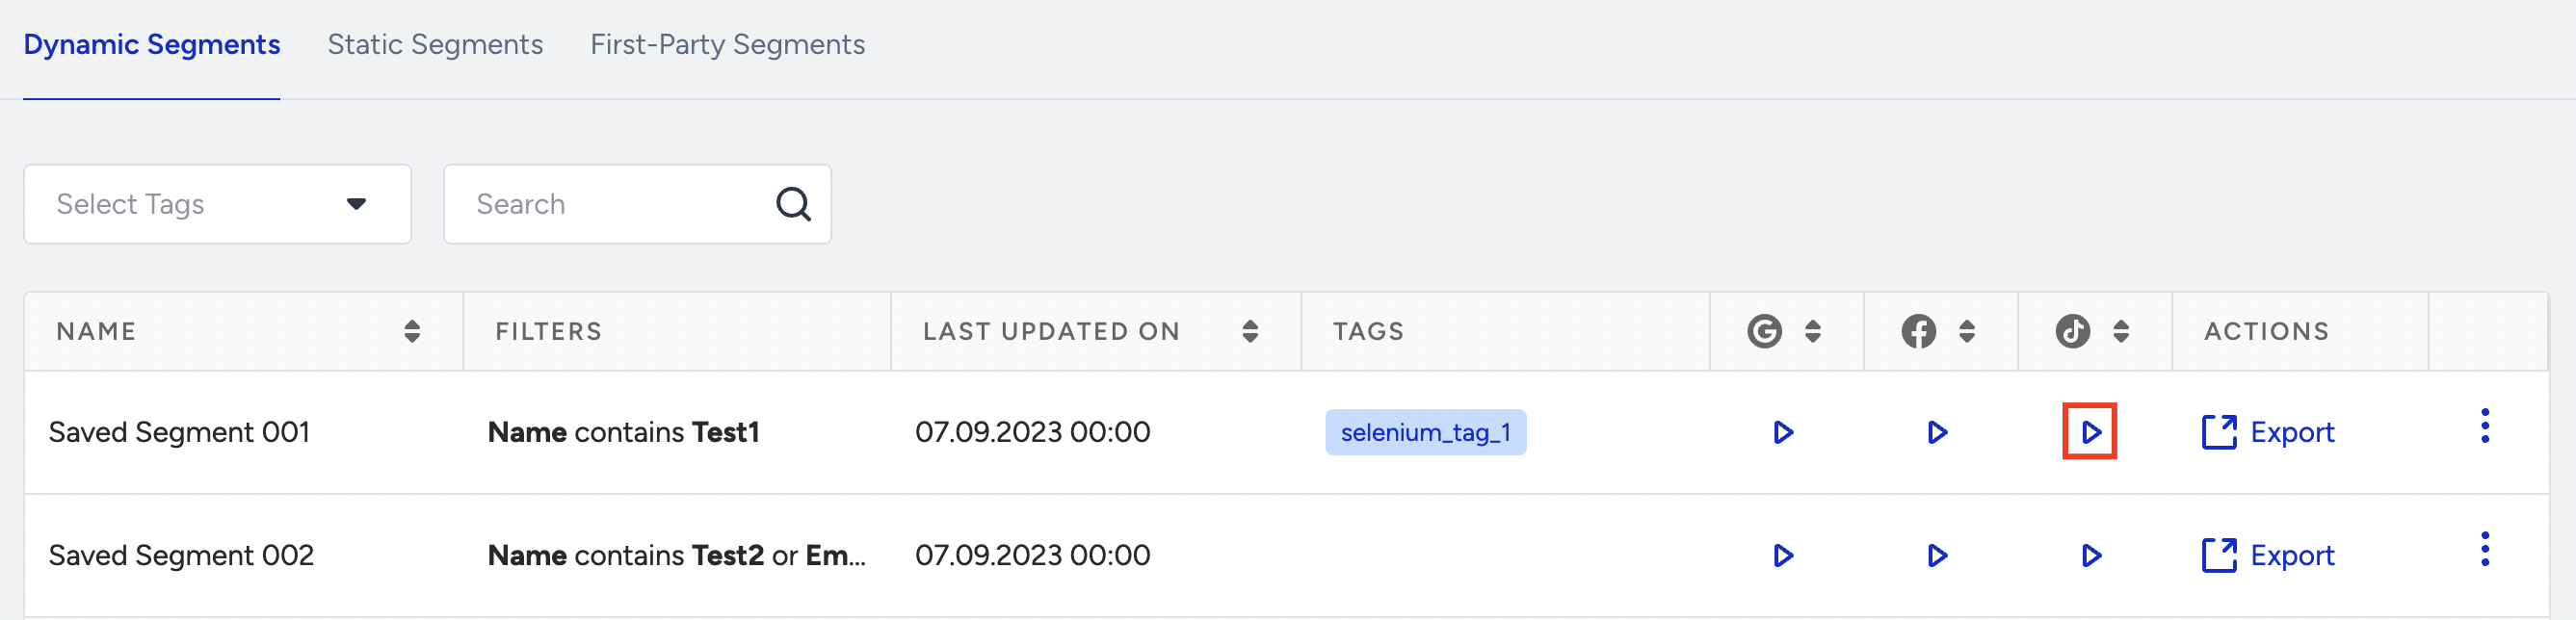
- Select the TikTok account to send your segments. Enable the toggle if you want to send the selected segment to TikTok on a daily basis. Click the Save button.


How to export a dynamic segment
You can export your saved dynamic segments in .csv format.
1. Click the Export button on the Dynamic Segments listing page. 
You can directly get the export of your dynamic segment without including the attributes of your users if you like. If you prefer to do so, you receive your CSV export with identifiers(Email, phone number, profile id) respectively.

You can also get exports by selecting different user attributes. You can select up to 20 different user attributes. Once you choose your user attributes from the dropdown list and click on the Export button, you see your selected user attributes appended to your CSV file.
Your title goes here
You cannot combine Dynamic Segment with any other saved segment or segment filter. It works independently.
Use cases
Dynamic segments are automatically updateable segments that can grow and shrink based on customer behavior. You can typically use them in three different ways:
- To send targeted campaigns: Instead of sending a campaign to your entire newsletter list, you can use a segment to build meaningful cross-sections of your list to which you can send more relevant content; e.g., you could contact everyone on your newsletter list who also opened an email from you in the past 30 days.
- To trigger campaign flows: If you want to trigger an automated email/web push/WhatsApp/SMS flow, whenever a user meets a set of conditions (e.g., has made exactly one purchase) for the first time, you can use a segment as the flow trigger.
- For analysis: Since segments are automatically updated in real-time, they provide an easy way to see what's going on with your audience.
Was this article helpful?