Architect Journey: Wait for Event
- 10 May 2024
- 5 Minutes to read
Architect Journey: Wait for Event
- Updated on 10 May 2024
- 5 Minutes to read
Article Summary
Share feedback
Thanks for sharing your feedback!
Wait for Event element allows you to let the users in the journey with an on-time option that works whenever a user performs the specified event(s).
How does it work?
The Wait for Event element functions based on real-time actions. When a user arrives at the element, they will be on hold until they perform the specified event(s) with the specified event parameters.

Once users perform the respective event, they will proceed from the wait element to the next element.
Your title goes here
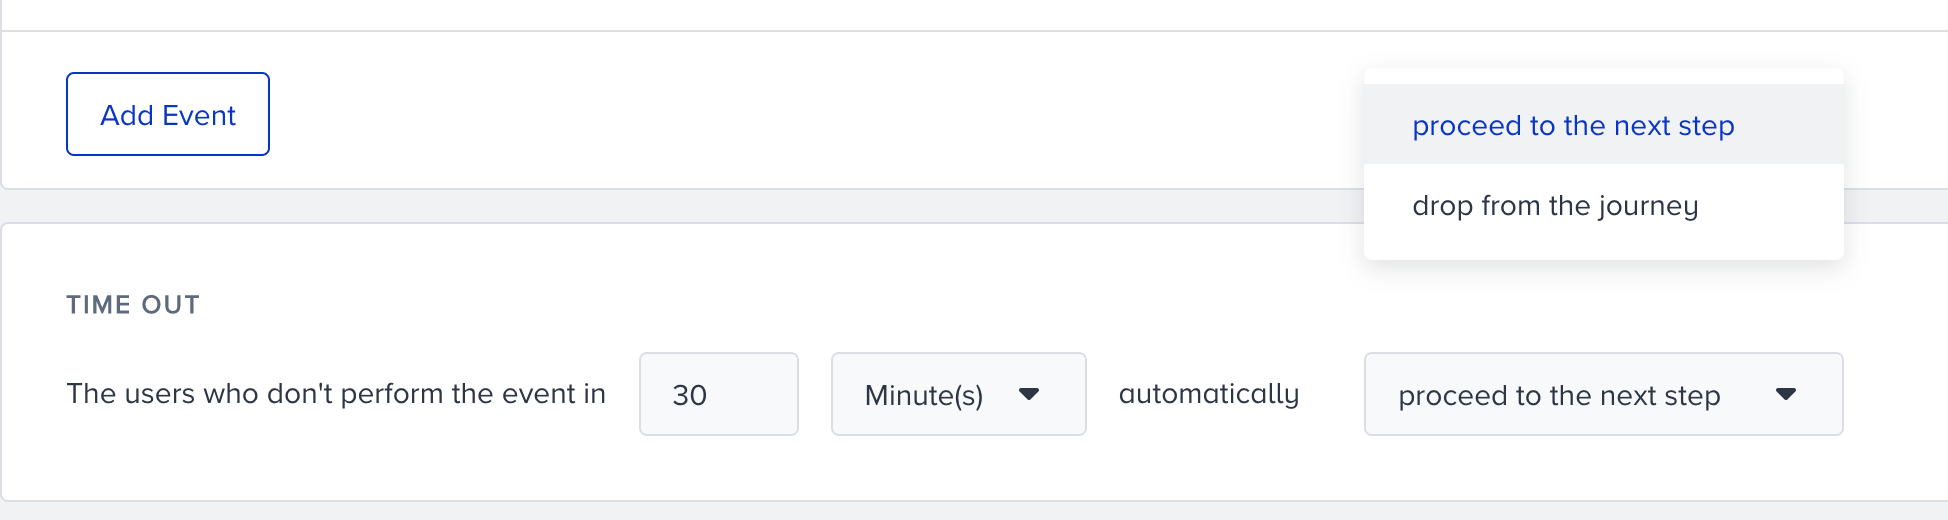
You can set up a maximum of 3 events with the or operator in this element.
You can specify the maximum duration to keep users on this element and select one of the following actions that you want to take for these users in any case they do not perform the specified event(s).
- Proceed to the next step: In case a user does not perform the specified event(s) in the specified duration, they will proceed to the next element.
- Drop from the journey: In case a user does not perform the specified event(s) in the specified duration, they will drop from the journey and be counted as dropped.
Your title goes here
This duration can be a minimum of 30 minutes and a maximum of 4 weeks.
Your title goes here
It is not allowed to add the same type of wait elements consecutively, or add the Wait Until a Time Slot and Wait for Some Time elements consecutively.
Use Cases
You can use the Wait for Event element in many use cases. Some are as follows:
- Keep first-time buyers on the Wait for Event step until they make a second purchase. Then you can send a "thank you" message right after the purchase.
- Wait for the users until they make a purchase to send a survey to get their feedback timely.
- Keep the users on hold until they redeem the coupon you send out with a message. Then, add those users who redeem the coupon to the desired segment after the Wait for Event element.
Below you can see some detailed use case examples with the Wait for Event element.
Web push prompt upon website visit
Let's say you have an optics company that sells contact lenses and has a subscription service where you send a new set of lenses every month to the subscribed customers. You let users into the journey when they purchase contact lenses. Then you wait until the users visit the contact lenses product page again. As soon as they visit it, you show them a web push encouraging them to sign up for the subscription.
(1).webp)
Coupon gift for sign-up
For example, imagine you have a retail company and want to get your customers to sign up for your website. You send them an app push saying that you will give your customers a special discount if they sign up in 7 days. Then you wait for them to sign up. If they sign up within the next 7 days, you immediately send them an email with the coupon code. If they do not sign up, they lose the chance to get a coupon as the result of the time is set as dropped.
(1).webp)
Voucher expiration
Let's say you have an e-commerce company and use vouchers to encourage your customers to purchase items. You use attributes to manage this process. You create a custom attribute called “User Voucher Status” that can take ‘Active’ or ‘Inactive’ as a value.
You send the voucher to your customer in an email, use the “Wait for Event” element, and set your event as “purchase” and timeout to 30 days. After the wait element, you use the “Update User Attribute” element to update the voucher status to inactive.
With this setup, you give your voucher 30 days before expiration. For users who purchase anything after the message with the sent voucher, the voucher expires immediately and they cannot use it again. You can also give different expiration dates for users of different segments.
(2).webp)
Warning messages after ride cancellations
For example, you have a ride-hailing company that matches riders and drivers. You have a policy for drivers who cancel riders’ requests consecutively. If they cancel requests 5 times, they are given a warning. If they make one more cancellation within the next 7 days after the warning, their account is taken under review.
In the starter, you let drivers who have canceled a ride request 5 times within the last 10 days into the journey. You send them an app push that includes a warning.
You wait for 7 days and if within that period Rider Cancel event happens, you send another app push saying that their account is under review and can be suspended. If not, the user drops out of the journey, and no review process is started.
(1).webp)
App install
Imagine you have a retail company that sells cosmetics and health items. You have recently launched your app and want to encourage your customers to download it. To motivate your customers by creating an urgency feeling, you advertise to your customers who have signed up for your loyalty program to download your app in 15 days to get special prizes.
You create a custom event called “Loyalty Signup” and use it in your starter element. You send your users a couple of messages with app download links. After these messages, you put a “Wait for Event” element and set the event as “Mobile App Opened”. You also set the timeout period as 15 days and let users exit the journey if they haven’t performed that event within 15 days. After the wait element, you put another message element and send a message containing the prize the user won. It could be coupons, a free cinema ticket, or a free chocolate bar for the next time they come to the store.
.webp)
Encourage frequent applications
Imagine, you have a job search platform that has many job posts for candidates to apply to. You aim to capture job candidates' interest and the best way to get them hooked on your platform is to encourage job seekers to apply for as many jobs as possible as soon as they sign up.
You use the On Event starter and choose “sign up” as the event. You immediately send a welcome email. After that, you wait for the user to apply for a job by using the “Wait for Event” element. As soon as they apply, you send another email congratulating them. If they don’t apply, they exit the journey. You can also use this sequence multiple times to congratulate them for every application through different channels.
For users who have exited the journey, you can let them enter another journey where there are more generic messages sent to all users.
.webp)
Now that you have discovered more use cases for this wait element, you can start using it in your journeys.
Was this article helpful?