OnSite Message Templates
- 03 May 2024
- 6 Minutes to read
OnSite Message Templates
- Updated on 03 May 2024
- 6 Minutes to read
Article Summary
Share feedback
Thanks for sharing your feedback!
Important Update for New Customers:
Please note that customers who have joined our platform after February, 2024 will not have access to these OnSite Message templates.
OnSite Message encourages users to complete the purchase by taking their attention to popups or messages. With the help of ready-to-use templates, you can deliver your messages quickly to your users.
How to create it
To create an OnSite Message Campaign,
1. Navigate to Experience > Optimize > Web Templates.
2. Click the Create button. Name your campaign, and click the Next button.

3. You will land on the Template Library. You can search for the template or find it under Increase Engagement. The available templates are:
- OnSite Message With Full Image
- OnSite Message With Title & Text & Button
- OnSite Message With Title & Text
- OnSite Message With Title Text 2 Buttons
- OnSite Message With Text & Image
- OnSite Message With Text & Image & Title
- OnSite Message Without Image
- OnSite Message With One Button
- OnSite Message With Image
- OnSite Message With 2 Buttons
Choose the one that best fits your needs.
.gif)
4. When you click on the template, you will see the available platforms, its default preview, description, and its elements. Click Use For {The platform} to proceed.

5. If you prefer the on-page template, it will be placed over your website. However, if you prefer the inline one, you need to select an element on your website to append it in Preview mode in Action Builder.
6. Switch to Design mode to start designing your template. It will appear with its elements by default.
7. Under Settings, you can customize your template. You can change its fill color, or you can upload an image as background for your template. To boost your SEO, you can enter alt-text for your image. To change its visibility, you can add Overlay, and add Animations.
 8. You can customize the elements separately. For the Title and the Notification, you can create a content as you wish to appeal to your users and configure their texts.
9. With the Buttons, you can redirect your users to another page by adding URLs or you can receive accept/decline reaction from your users. You can customize their text and style. For further information, you can refer to Button Settings.
10. For the Image element, you can upload it, and put a link to redirect your users when clicked.
11. You can change settings of Close Button if you have enabled it under template settings..gif)
12. Once your design is ready, Save it to proceed. Allocate the traffic of your variant in the Design step. Click Save and Continue for further configurations.
How to create OnSite Message templates with Responsive templates
You can use Responsive Web Templates to easily create these Onsite Message templates and surpass them with their advanced feature set, flexibility, and user-friendly UI. Furthermore, Responsive Templates enable you to create a campaign for all platforms (desktop, mobile, tablet) in one go with ease.
In the table below, you can see the responsive template equivalents of these templates.
| Onsite Message Template | Corresponding Template | Template Placement |
|---|---|---|
| Onsite Message without Image | Countdown Bar | Inline |
| Onsite Message with one Button | Countdown Bar | Inline |
| Onsite Message With 2 Buttons | Countdown Bar | Inline |
| Onsite Message with Image | Countdown Bar | Inline |
| Onsite Message with Title&Text | Responsive Layout Banner | On Page |
| Onsite Message with Text&Image&Title | Responsive Layout Banner | On Page |
| Onsite Message with Title&Text&Button | Responsive Layout Banner | On Page |
| Onsite Message with Title&Text&2 Buttons | Responsive Layout Banner | On Page |
| Onsite Message with Text&Image | Responsive Layout Banner | On Page |
| Onsite Message with Full Image | Responsive Layout Banner | On Page |
You can refer to the examples below to create an Onsite Message template campaign, thanks to the use of Countdown Bar and Responsive Layout Banner templates.
Onsite Message without Image
 Since this inline template has only one title and a text, you can add one more text element to your Responsive Countdown Bar Template and delete the other default ones.
.gif)
Then, you can change the text in terms of its style and alignment as well as add a background image if you like to complete your design.
Onsite Message with one Button
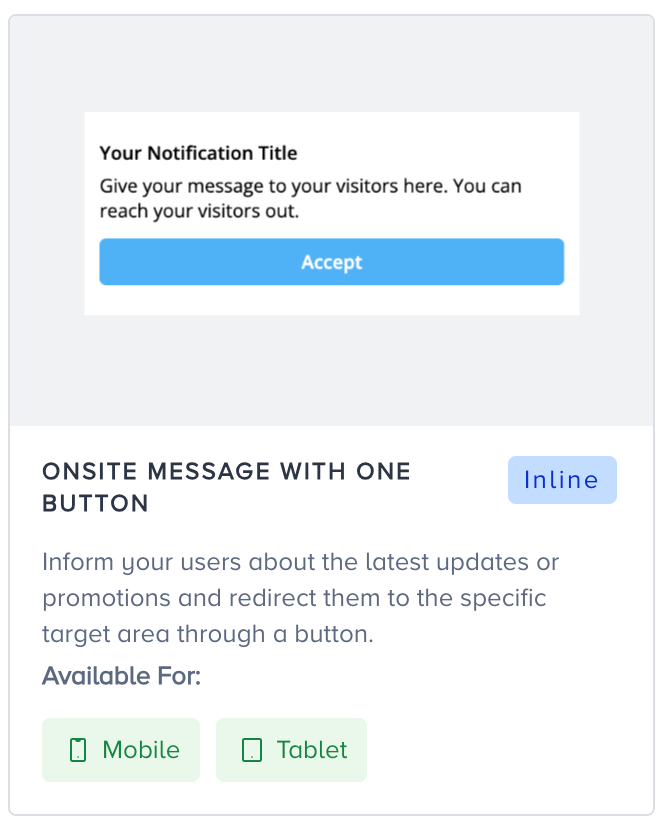
This inline template has one title, one text and a button. You can add one more text element to your Responsive Countdown Bar Template and keep the button while deleting the countdown element.
You can also use the “Size” menu for the button element to change its size with 3 options. To make it similar, you can select “Full” in the dropdown menu and change the text inside..gif)
To give spacing to any element to have margins on any side of its container, use the Spacing menu on the right and you can use the editing options which are All Sides, In Pairs, and Individually. 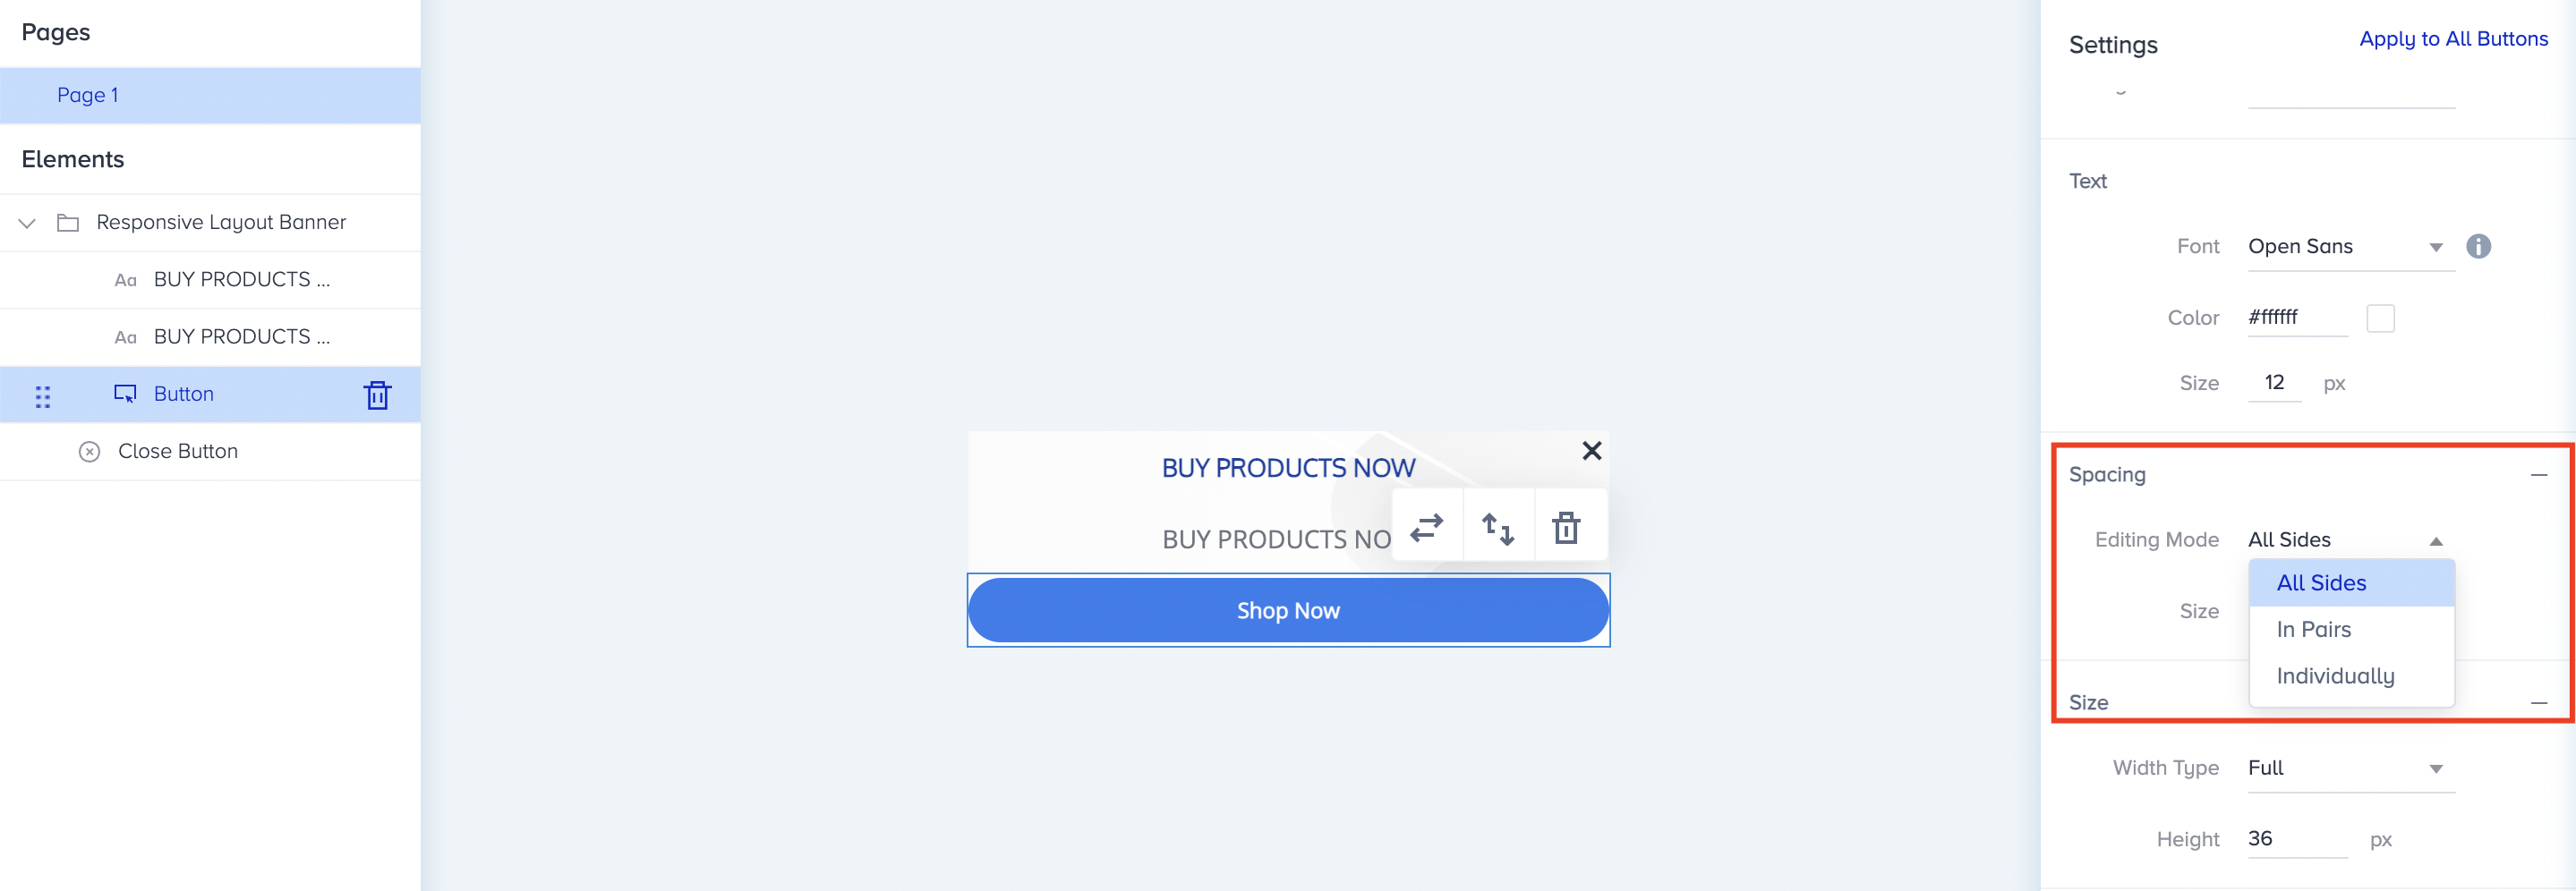
Additionally, the Border menu allows you to give different borders for each side of the button element. The default radius is 64 px and you can change it as you want. You can apply the borders and sides individually too.

Onsite Message With 2 Buttons

This inline template has one title, one text, and 2 buttons. You can add one more text element and button element to your Responsive Countdown Bar Template inside the layout while deleting the countdown element. Then, you can select any element layout that fits your use case..gif)
Then, you can change the texts and button elements in terms of their styles (use Spacing, Size, Border, Element Alignment, and Text Style on the right menu) and create the design as you want.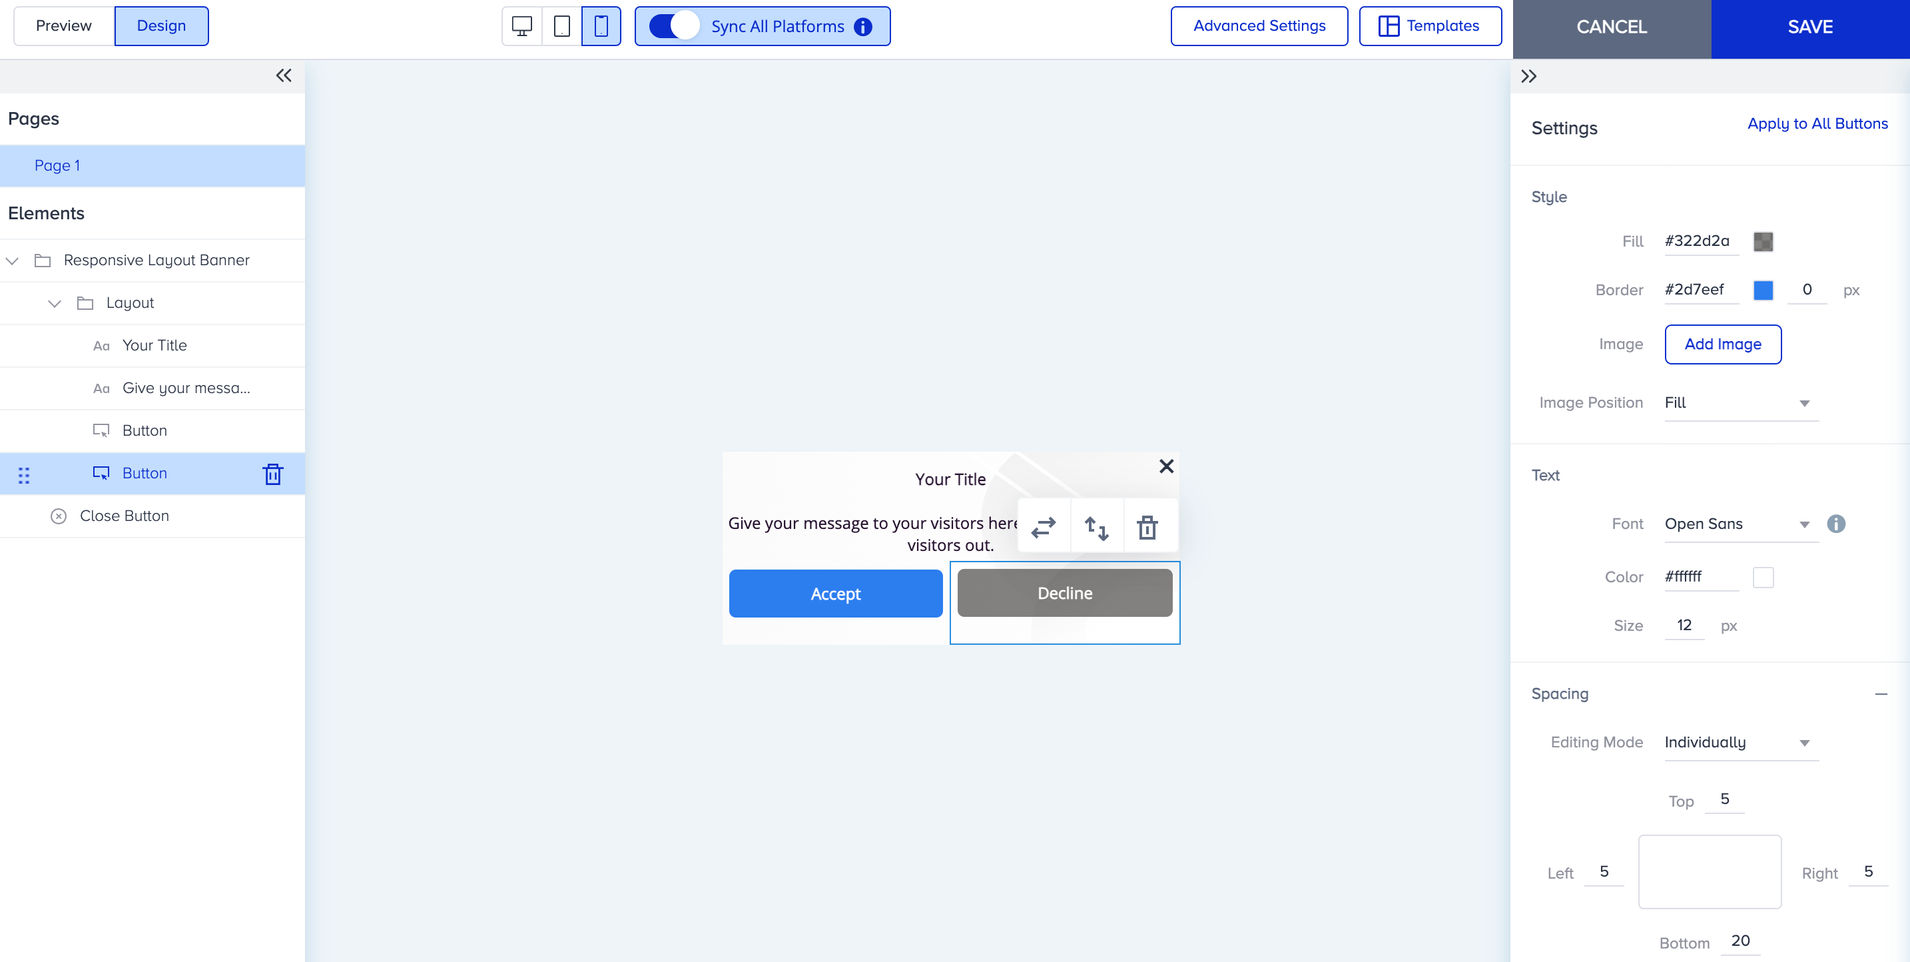
Onsite Message with Image
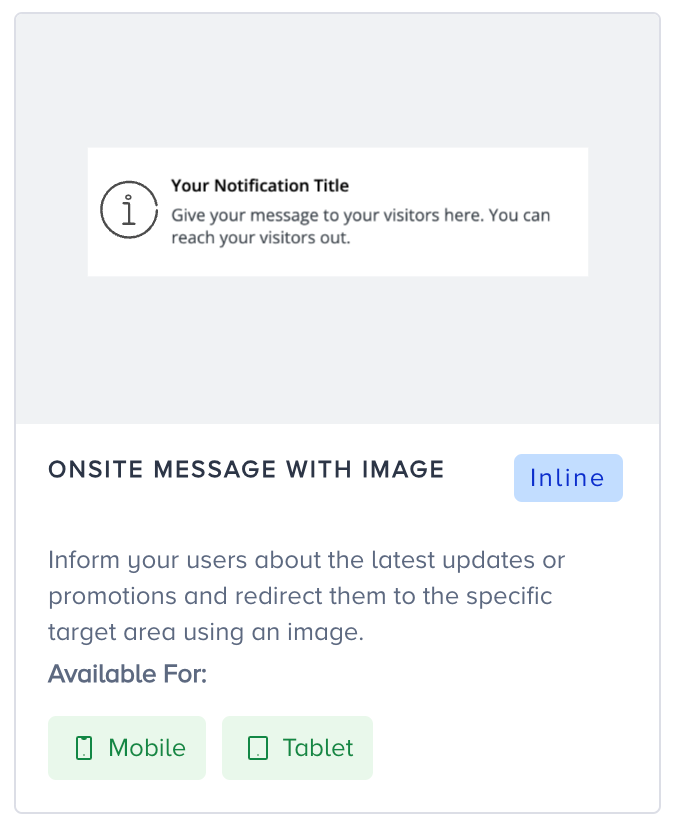
This inline template has one title, one text, and one image element. You should have 2 text elements and one image element in your Responsive Countdown Bar Template inside the layout. Then, you can select any element layout which meets your needs. .gif)
Then, to add an image to your campaign, click the Add Image button in the right menu or directly double click on the image area on your canvas.  You can also change the image position and image placement as well as its background color from the right menu.
Onsite Message with Title & Text
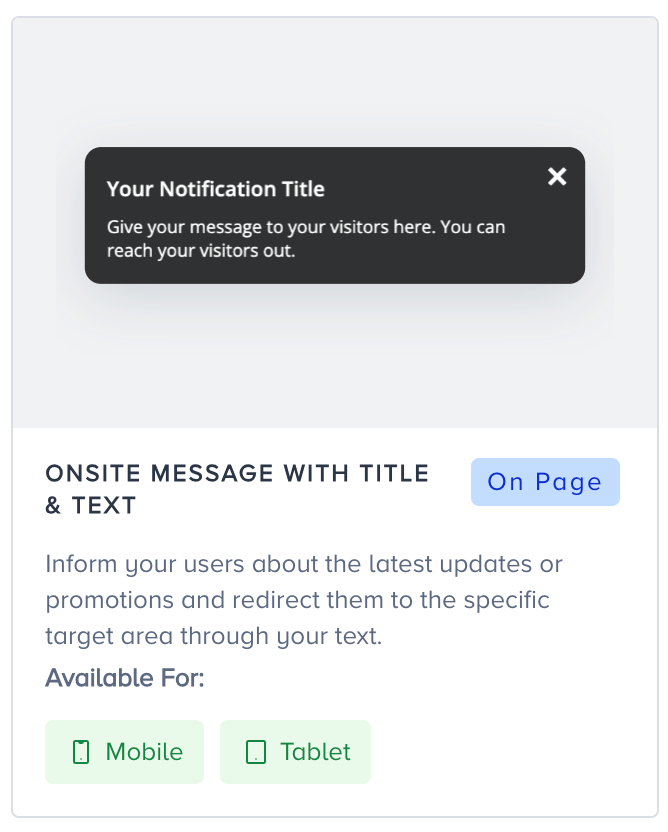
This On Page template is the same as Onsite Message without Image (Inline) template in terms of design. Using Responsive Layout Banner while creating this template is the only difference from the previous one since it is on page. Other than that, you apply the same actions while customizing it.
Onsite Message with Text & Image & Title
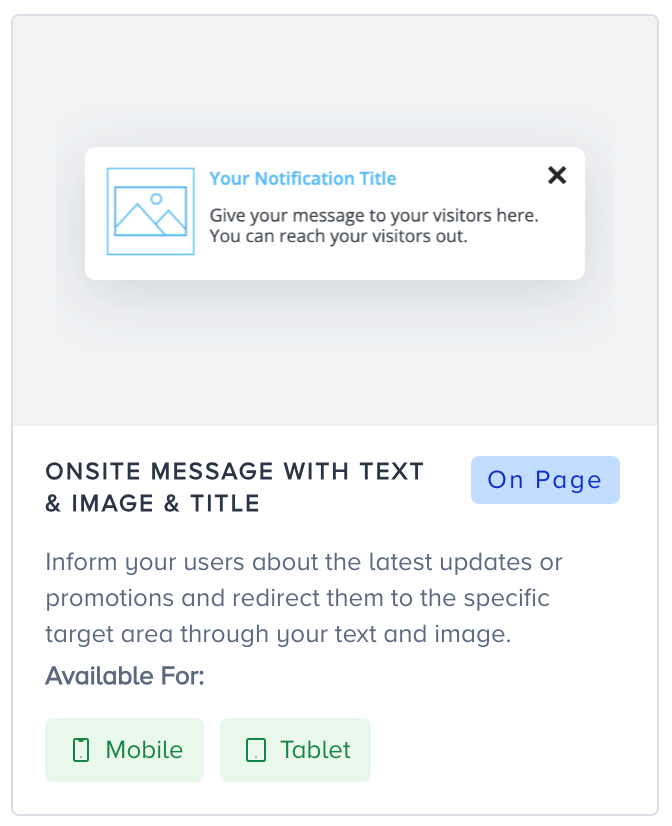
This On Page template is the same as Onsite Message with Image (Inline) template in terms of design. Using the Responsive Layout Banner while creating this template is the only difference from the previous one since it is on page. Other than that, you apply the same actions while customizing it.
Onsite Message with Title & Text & Button

This On Page template is the same as Onsite Message with one Button (Inline) template in terms of design. Using Responsive Layout Banner while creating this template is the only difference from the previous one since it is on page. Other than that, you apply the same actions while customizing it.
Onsite Message with Title & Text & 2 Buttons
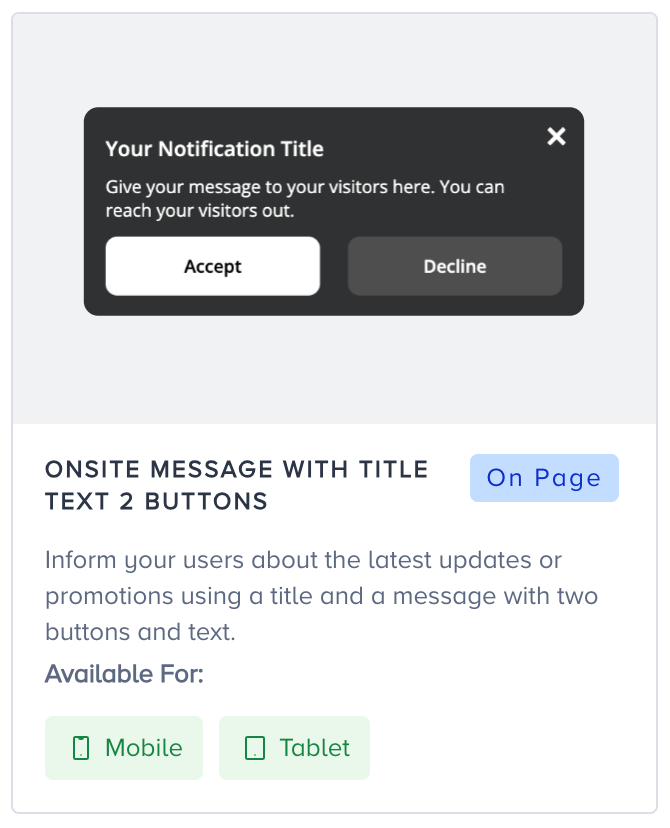
This on-page template is the same as the Onsite Message With 2 Buttons (Inline) template in terms of design. Using the Responsive Layout Banner while creating this template is the only difference from the previous one since it is on-page. Other than that, you apply the same actions while customizing it.
Onsite Message with Text & Image
 This on-page template has one text and an image element. You should have only these 2 elements in your Responsive Layout Banner Template. Then, you can select any element layout that fits your use case.
To change the text and image elements in terms of their styles, use Spacing, Size, Border, and Element Alignment in the right menu, and create the design you want.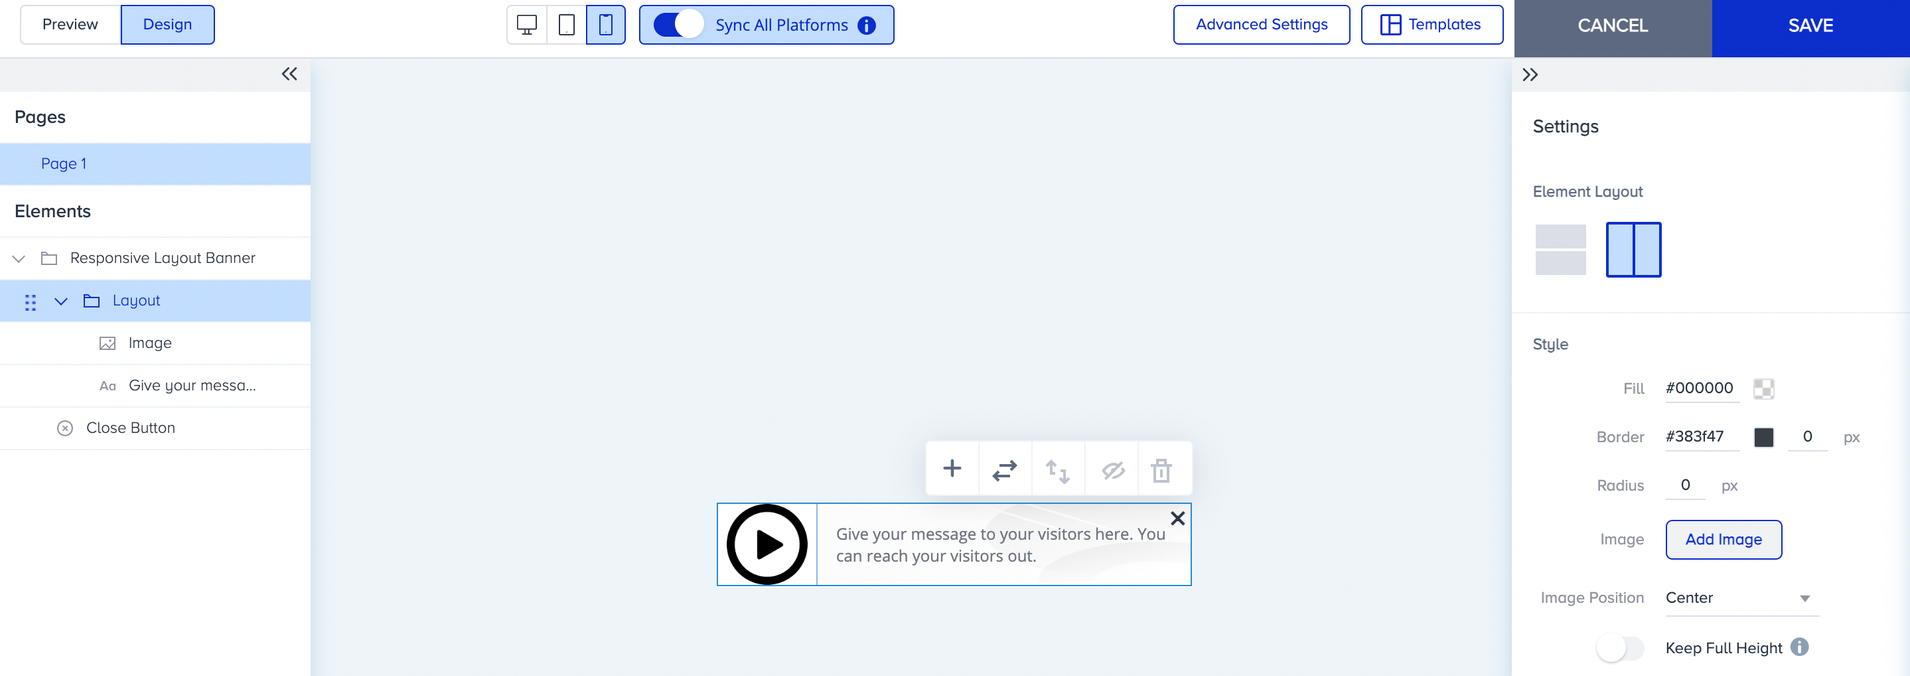
Onsite Message with Full Image
 In order to create a pop-up with a full image, you can use the Remove All Elements flow inside the Responsive Layout Banner Template.
When you click the Remove All Elements option on the right menu, it will trigger the removal of all elements on your canvas.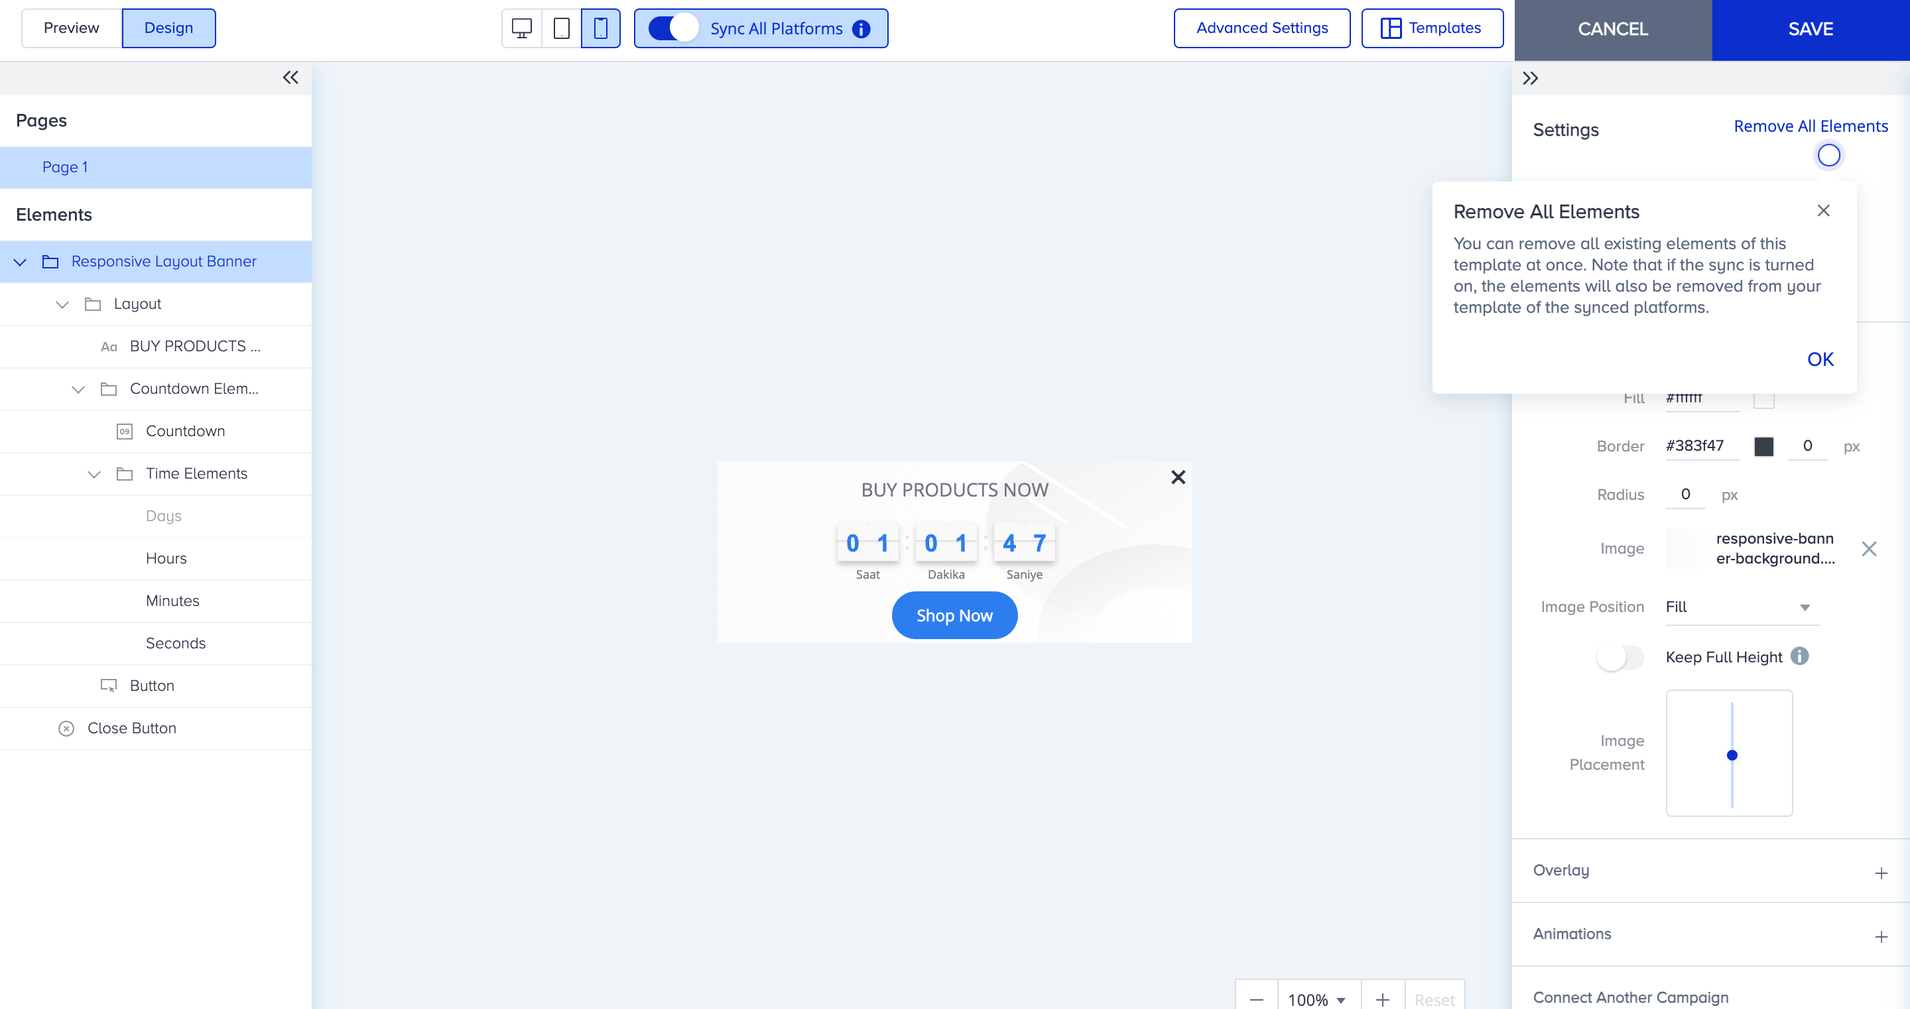
Then, you can double-click on your template to upload an image in addition to clicking the Add Image button on the right menu to trigger the template size being automatically adjusted to the uploaded image in each platform. The image you choose can be something bigger, smaller or the height is bigger than the width, etc. depending on your need.
Here is the magic! When you click the OK and upload the image, you will see that your template will be auto resized for each platform dynamically. You will see your pop-up exactly as it should be..gif)
Was this article helpful?