Architect Use Case: New User Registration
- 15 May 2024
- 8 Minutes to read
Architect Use Case: New User Registration
- Updated on 15 May 2024
- 8 Minutes to read
Article Summary
Share feedback
Thanks for sharing your feedback!
Converting new visitors into leads has always been a challenge for many marketers. You can nurture these leads and eventually convert them into paying customers. But this is easier said than done as not every user who lands on your website is looking to register or give out information.
Most of these users are in the consideration stage of the funnel and are in the process of doing their research. As a marketer, the added value you provide to users at this stage is to identify with their intent and offer relevant and personalized engagement. Also, one of the most effective ways to collect visitor data is to ask them directly for their basic information. To do this, you can build a New User Registration journey and drive them to register on your platform.
This article provides details about:
- Strategies to Tackle Registration Drop-Offs
- Goals
- Requirements
- Creating a New User Registration Journey
Strategies to Tackle Registration Drop-Offs
You can get new visitors to finalize their registration through constant communication along with the following strategies:
- Provide personalized assistance for acquiring power users,
- Recover users from registration abandonment with a web push journey,
- Use web templates to drive users to register on the website,
- Apply lead collection on other pages of the website as an alternative,
- Overcome account activation abandonment with a cross-channel journey,
- Run continuous A/B tests on the registration page to understand which one performs better.
Goals
Converting your users with a New User Registration journey helps you increase the registration rate. You can also improve your customer acquisition and retention.
Each targeted and converted user will help you:
- Increase registration rate,
- Grow the known user base,
- Activate users,
- Increase retention,
- Increase website page visits,
- Increase the life cycle value of users.
Requirements
- You should have Insider Tag integration completed.
- Before starting to use any channel in your journeys, integrations for the respective channels should be completed. Depending on the channels you want to use in your journeys, additional integrations might be required.
- In case you need to have some custom events, you need to create them and pass them to Insider.
- If you have a mobile app, you must have the SDK Integration implemented.
your title goes here
For further information, refer to Advanced Architect Integration Guide.
Creating a New User Registration Journey
You can create a New User Registration journey to nudge users to register on your website or app.
For example, once a new user lands on your website, you can engage them to register with personalized lead generation templates. For those users who do not register on the first visit, you can follow up with personalized offers in a web push notification. You can provide a loyalty card to further engage users who still do not sign up.
You can convert registration abandoners with a mobile app push journey. For example, if a user leaves the app without finalizing registration, send them a mobile app push after one day, and follow up on the third day.
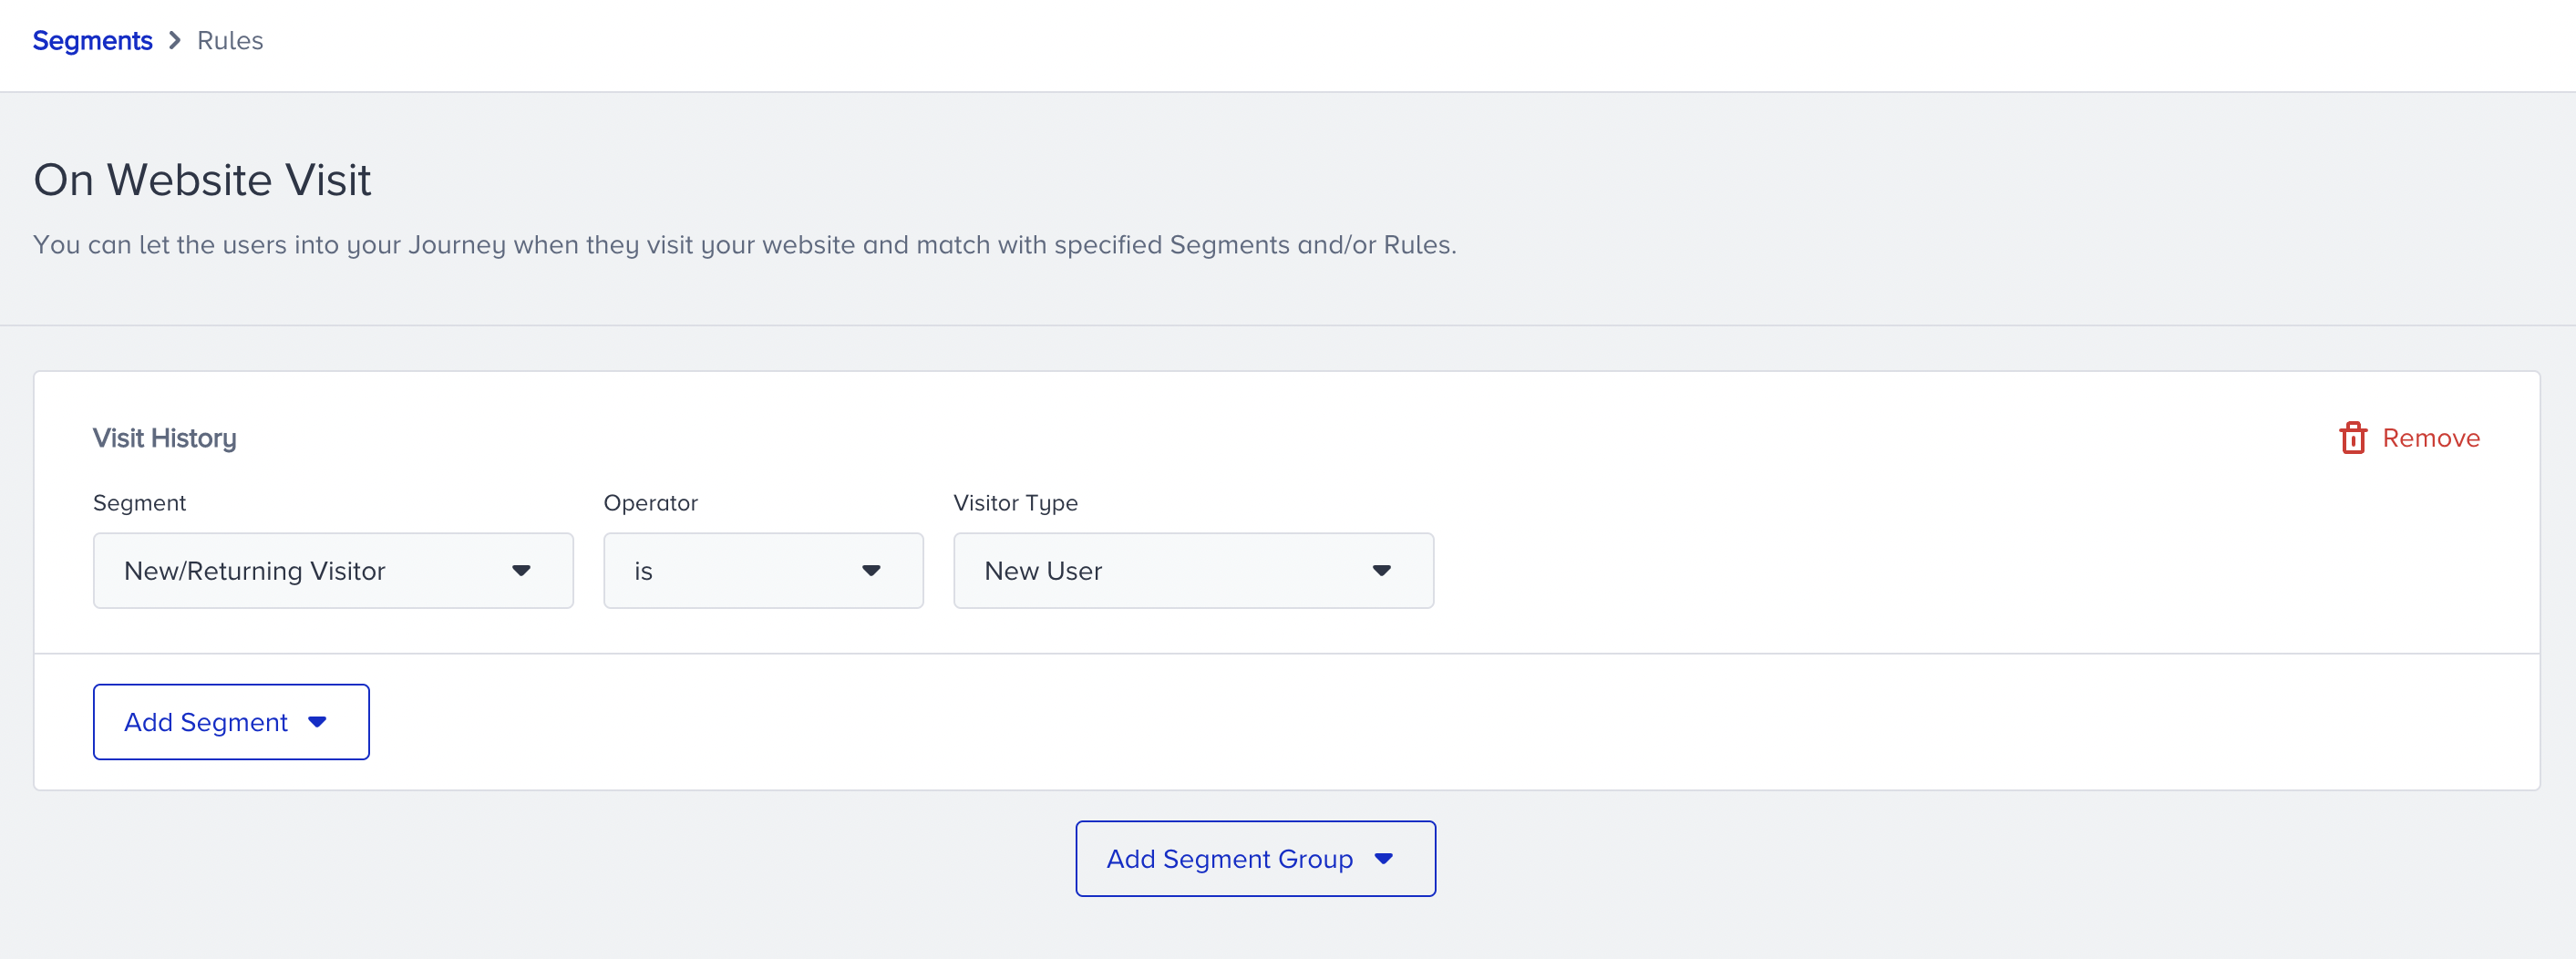
1. Select a starter
User Website Action starter tracks the segments and rules on the website. To target only website users, you can use this starter.
- Select Visit History > New/Returning Visitor and New User for visitor type.
- Or select User Rules > Loggedin User and the is not operator.

- If you want to consider your mobile app users, use the First/Last Time Open segment to take your mobile app users into the journey.


Your title goes here
If you have or plan to have app download journeys, you may exclude mobile app users from the New User Registration journey.

Your title goes here
Read more on On Past Behavior.
2. Build your journey
To build your new user registration journey, follow the steps below:
1. Filter your users
Before nudging users to register, you can wait for a while and then, check if the users sign up to your website or not. Based on the action, you can continue with the message step.
You can use Check Conditions > Predefined Segments > User Sign-Up. 
your title goes here
Read more about the Wait elements and Check Conditions.
2. Check Reachability
Before sending the initial message, you can also check if the users are reachable on that channel. If not, you can try another channel on another path. With Check Reachability, you can:
- Assess users' reachability on selected channels,
- Prevent users from dropping out of the journey and ensure that they are directed to the appropriate path based on their reachability,
- Optimize your budget and resources to the correct channels.


3. Select your channels
Channel selection is a crucial step in your Browse Abandonment journey to reach your targets. When selecting your channel, you should consider the following factors.
- User preferences: Users have diverse channel preferences; some prefer email for promotions, while others prefer push notifications or texts. This is where Architect steps in to help with the Next Best Channel element.
- Channel effectiveness: Each communication channel has its strengths and limitations in terms of reach, engagement, and conversion rates. For example, email may be effective for delivering detailed and personalized messages, while push notifications may be more suitable for time-sensitive reminders.
- Audience segmentation: Different segments of users may respond differently to messages delivered via various channels.
- Reachability: You can review your User Reachability data on the Overall Analytics Page to assess the number of reachable users across individual channels or channel combinations. You can design journeys that capitalize on the best-performing channels and leverage insights on user reachability, ensuring optimal engagement and outcomes.


4. Creating content
Web push, app push, on-site, and in-app channels are recommended for new user registration journeys. Define which channel you want to use and prepare the content for the channel accordingly. You can see some tips below for your message:
- Give special offers or discounts with coupon codes to new users to register them.
- Drive your users with a Conversion Trigger to register with the on-site channel in the journey.
- Make sure the content design is consistent with the design on your website and mobile app.
- Make sure images and GIFs have high resolution.
Web Push
Below is a sample web push that you can create for your journey.

On-Site
You can see an on-site campaign example below.

Follow-up Messages and Best Practices
After sending the initial message, you can control if the users complete your desired goal such as purchasing the item, adding the item to the cart, etc. after a while.
You can add a Wait element to give time to users, then you can add the Check Conditions element to check if the users perform the specified action.
Your title goes here
Wait elements allow you to avoid overwhelming users with excessive messages, since this may lead to disengagement or unsubscribes. Check the user behavior and interactions deeply to move your journey to an advanced level.
Below you can see some common practices for messaging frequency for new user registration use cases:
- You can send an initial registration prompt when a new user first lands on your website or app. This prompt should be timely and informative, encouraging users to create an account without overwhelming them with too much information.
- If a user visits your platform but does not register, you can consider sending a follow-up reminder after a certain period, such as 24 hours. This reminder should gently encourage users to complete the registration process and highlight the benefits of creating an account.
- Depending on user behavior and response to previous messages, you may send additional reminders at strategic intervals. You should space out these subsequent reminders appropriately to avoid appearing spammy or intrusive and should provide additional incentives or reasons to register.
- You can offer users the option to opt out of receiving registration-related messages if they choose. Respect user preferences and avoid bombarding them with excessive reminders if they are not interested in registering.
- Personalize messaging based on user behavior, preferences, and demographics to make the registration process more relevant and engaging for each user. You can use dynamic content and segmentation to tailor messages to specific user segments and increase the likelihood of registration.
You can create your new user registration use cases following these best practices:
- Make the registration process as simple and streamlined as possible to minimize friction for users. Avoid asking for unnecessary information and use clear, intuitive form fields to collect essential details.
- Provide incentives or rewards to encourage users to register, such as discounts, exclusive offers, or access to premium content. Highlight the benefits of registration to motivate users to complete the process.
- Use clear and compelling calls-to-action (CTAs) to prompt users to register. Place registration buttons prominently on your website or app, and use persuasive language to encourage action.
- Showcase testimonials, reviews, or user success stories to build trust and credibility with new users. Highlight the positive experiences of existing users to reassure new users about the value of registration.
- Ensure that the registration process is mobile-friendly and optimized for users accessing your platform from smartphones and tablets.
- Offer personalized assistance to users who may encounter difficulties during the registration process. Use live chat support, chatbots, or FAQ sections to address common questions and concerns in real time.
- Use progress indicators or step-by-step guides to visually communicate the registration process and reassure users about their progress.
- Implement follow-up campaigns to re-engage users who start but do not complete the registration process. Send reminders or incentives to encourage users to return and finish registering.
- Continuously test different registration strategies, messaging approaches, and incentives to identify what resonates best with your target audience. Use A/B testing to experiment with variations and optimize your registration process over time.
- Track key performance metrics such as registration rates, conversion rates, and user engagement to evaluate the effectiveness of your registration efforts. Use data-driven insights to refine your strategies and improve results over time.
3. Launch your journey
Before launching your journey, complete your launch settings:
- You can set journey entry capping so as not to send too many messages to the same users. In this way, you can optimize your messaging frequency.
- You can also use the User Eligibility setting to prevent users from entering the Wishlist journey too frequently and receiving the same type of messages.
- You can set Sign Up event as a goal for your journey.


Example Flow
Here you can take a look at one of the new user registration journey flow examples.

Was this article helpful?