Journey Listing Page
- 21 Mar 2024
- 5 Minutes to read
Journey Listing Page
- Updated on 21 Mar 2024
- 5 Minutes to read
Article Summary
Share feedback
Thanks for sharing your feedback!
Journey Listing page lists all your previously created journeys.
Using this page, you can also perform the following operations:
- Create journeys
- Filter & list journeys
- See Analytics Dashboard
- Discover journey elements
- Configure journey settings
- Search journeys
- Sort journeys
- See Optimization Points
- Track users
- Test journeys
- See analytics of each journey
- Duplicate journeys
- Duplicate journeys to another domain
- Pin/unpin journeys
- Edit tags
- Change activation statuses
- Delete journeys
Create journeys
Click the Create button to start creating a journey.

Filter & list journeys
You can filter and list your journeys based on their statuses, channels, starters, creators, journey name and tags.
You can reach Status and Tags filter from the top of the listing page. You can also search through journey names using the search bar. To reach more advanced filters, you can use Filters button next to the search bar.

From the modal that opens, you can filter the journeys according to:
- Channels: Include journeys with all of the chosen channels. For example, if you choose WhatsApp and SMS, it will bring you journeys that contain both of them.
- Starter Type: Includes journeys with any of the chosen starter type.
- Created By: Includes journeys with any of the chosen creators. All of the Insider staff is gathered under the “Insider Staff” option.
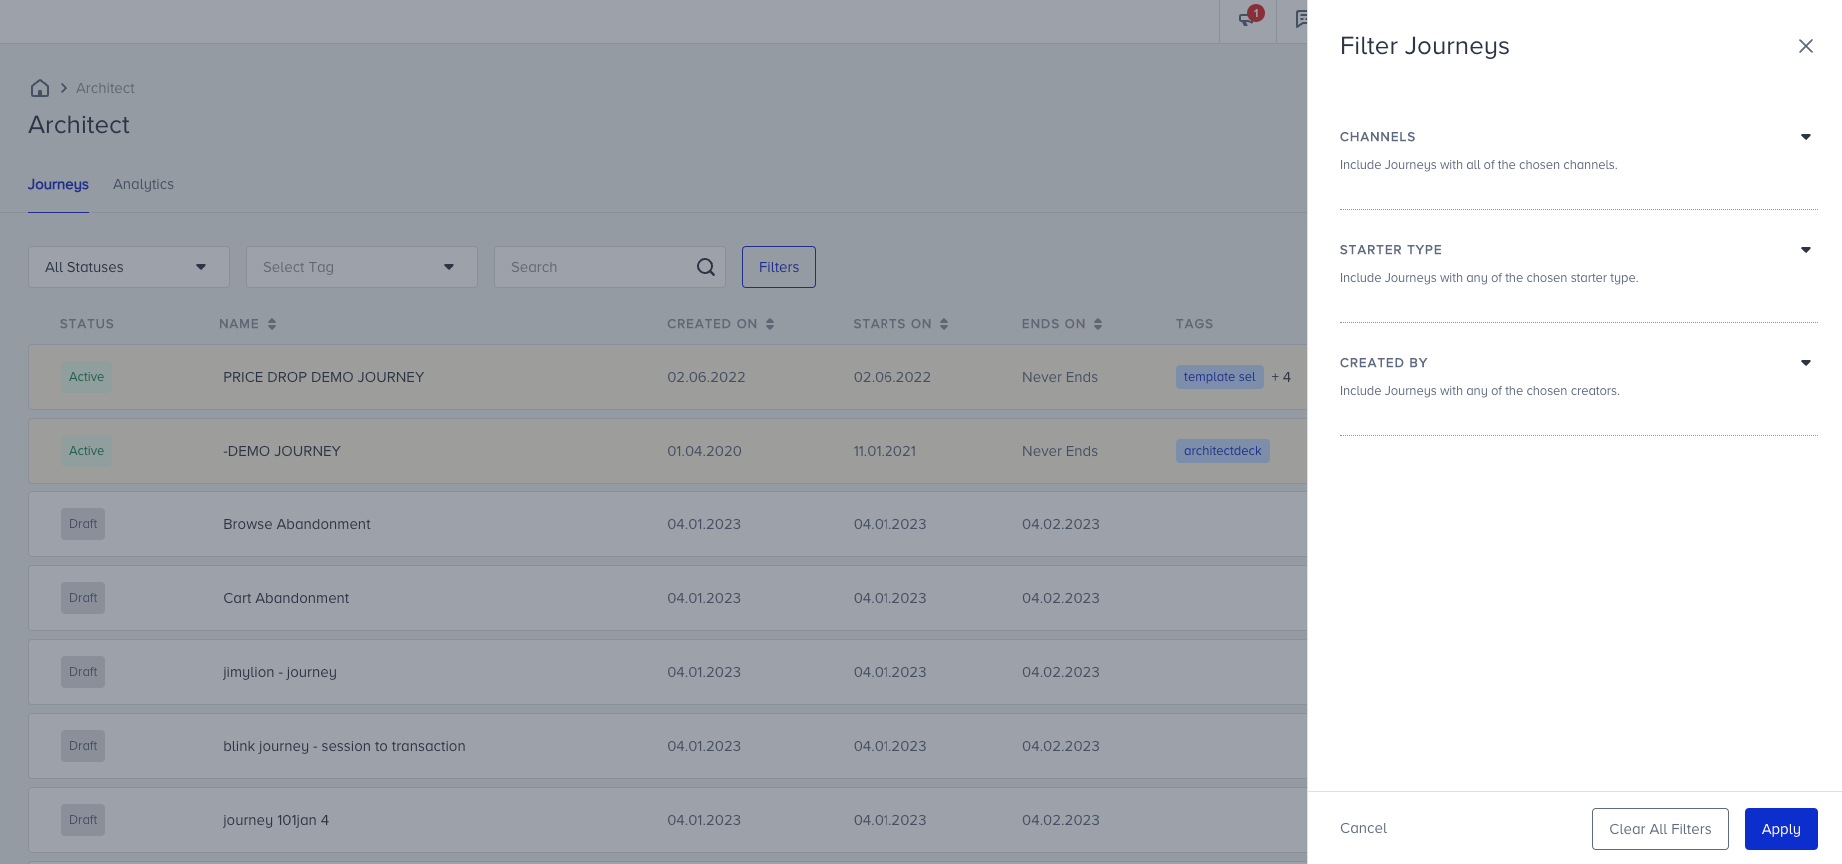

All the filters you choose are also shown at the top of the modal. When you click the Apply button, the modal will close and all filters will be applied. To clear out all the filters you have selected from the modal, click the Clear All Filters button.
You can see the number of filters you have selected including the on page filters (Status, Tags and Search) on the Filter button. If you want to see all journeys without any filters, make sure that you clear all filters and there is no number on the Filters button.
See Analytics Dashboard
You can reach the analytics page through the Analytics tab next to the Journeys tab.

Discover journey elements
Discover takes you on an interactive tour to see how journeys work. You can follow it to learn how to complete a journey.
Configure journey settings
Settings option enables you to configure Facebook integration and journey entry capping.

You can switch between tabs to complete the configuration.
Search journeys
You can search your journeys by their names or their journey IDs. You can see your journey IDs in the bottom left corner when you hover on the journey name on this page, or in the URL of your journey once you click it.
Sort journeys
You can sort your journeys based on their Starts On and Ends On dates. Note that pinned journeys are always listed at the top.
See Optimization Points
Journey Optimizer offers recommended practices to optimize your journeys before launching them. So, your journey will be more efficient and your journeys result better accordingly.
You can also see the important alerts about your journey. For example, if no one entered your journey in the last 2 days, it will create an alert.
Based on the number of optimization or alert points and their importance, you will see different numbers and colors on your listing page.

Track users
You can see how a user is proceeding on the journey flow. Read here for further information.
Test journeys
You can test your journeys to make sure they function as you build them.
See analytics of each journey
You can click the See Analytics button against each journey to see the Single Journey Analytics.

Duplicate journeys
You can duplicate your journeys and make a copy of them to edit them to create a similar journey.
Duplicate Journey to Other Accounts
You can duplicate your journeys and make a copy of them to edit them to create a similar journey in another domain under the same account. You might have multiple business units in different countries and these accounts can be DemoEN, DemoTR, or DemoDE. Basically, you can duplicate journeys between these domains..png)
Step 1:
When you click “Duplicate to Other Accounts” you will see a modal opened. You can select multiple or a single account to duplicate your journey. Also, you can edit tags and the journey name in this modal before duplicating. Under duplication information, you can see what elements will be duplicated and what will be excluded:
- InApp and WhatsApp Channel content won't be duplicated.
- Email content will be duplicated.
- Facebook Channel settings won't be duplicated.
- Coupons won't be duplicated.
- If product packages are incompatible, some content will not be duplicated when duplicating OnSite.
- If Dynamic Content used in Channels is missing in the target domain, your content will not work properly.
- Channels (Email, OnSite, Web Push, App Push, SMS and Call an API) will be duplicated.
- The journey flow will be duplicated.
- Exit Criteria and Journey Goals will be duplicated.
- Journey Tags will be duplicated.
- Goals and exit criteria will be duplicated if the target account has the respective events or attributes.

Your title goes here
When duplicating a journey from Account A to Account B, the segments (Starter, Check Conditions, Wait for Event and Wait for Attribute elements) will be duplicated. If you used any events or custom attributes in Account A that do not exist in Account B, you will be prompted with a validation message. To be able to launch the journey on Account B, you should create the same events and custom attributes.
Step 2:
When you clicked on the Duplicate button, the process will start. This might take some time, after the process ends, you can check the other domain. 
After duplication is completed, Insider will send you an email about the duplication process and give information if there are any problems while duplicating or process succeeded.
When you open the duplicated journey, you will see the Duplication Report to remind you of what settings are not duplicated. So, you can complete all settings before launching the journey.
You can close this report, but if you need to check this report again while editing your journey, you can reach it for 30 days through Version History. Click on Show Duplication Report to open the report modal again and see what should be edited in this journey.
Your title goes here
If you cannot see all of the domains in the domains list while duplicating journeys, contact Insider team.
Pin/unpin journeys
You can pin your journeys that you want to reach easily to the top of the journey list. You can pin up to 6 journeys.
The pinned journeys will be highlighted in yellow color.
Edit tags
You can click the Edit Tags button against each journey and add tags on your journeys to categorize them.
Change activation statuses
You can change the activation status of the journeys.
Delete journeys
You can delete your journeys with the Delete button against each journey.
Was this article helpful?