Import Contacts
- 21 Mar 2024
- 5 Minutes to read
Import Contacts
- Updated on 21 Mar 2024
- 5 Minutes to read
Article Summary
Share feedback
Thanks for sharing your feedback!
While Insider Platform provides products to capture leads from your website or CRM, you can also import your contacts by uploading your CSV or Excel files to contact lists.
This can be useful in the following cases:
- You have some data collected from offline mechanisms and you want to send them email campaigns.
- You want to make a one-time mass update to a certain attribute of a group of users.
- You want to assign coupon codes to your users.
- You want to define a new attribute or update any attribute value for all or specific users.
By default, the following attributes are created for you to accelerate your import flow:
- First Name
- Last Name
- Gender
- Birthday
- Age
- Language
- City
- Country
You can also create custom fields depending on your needs.
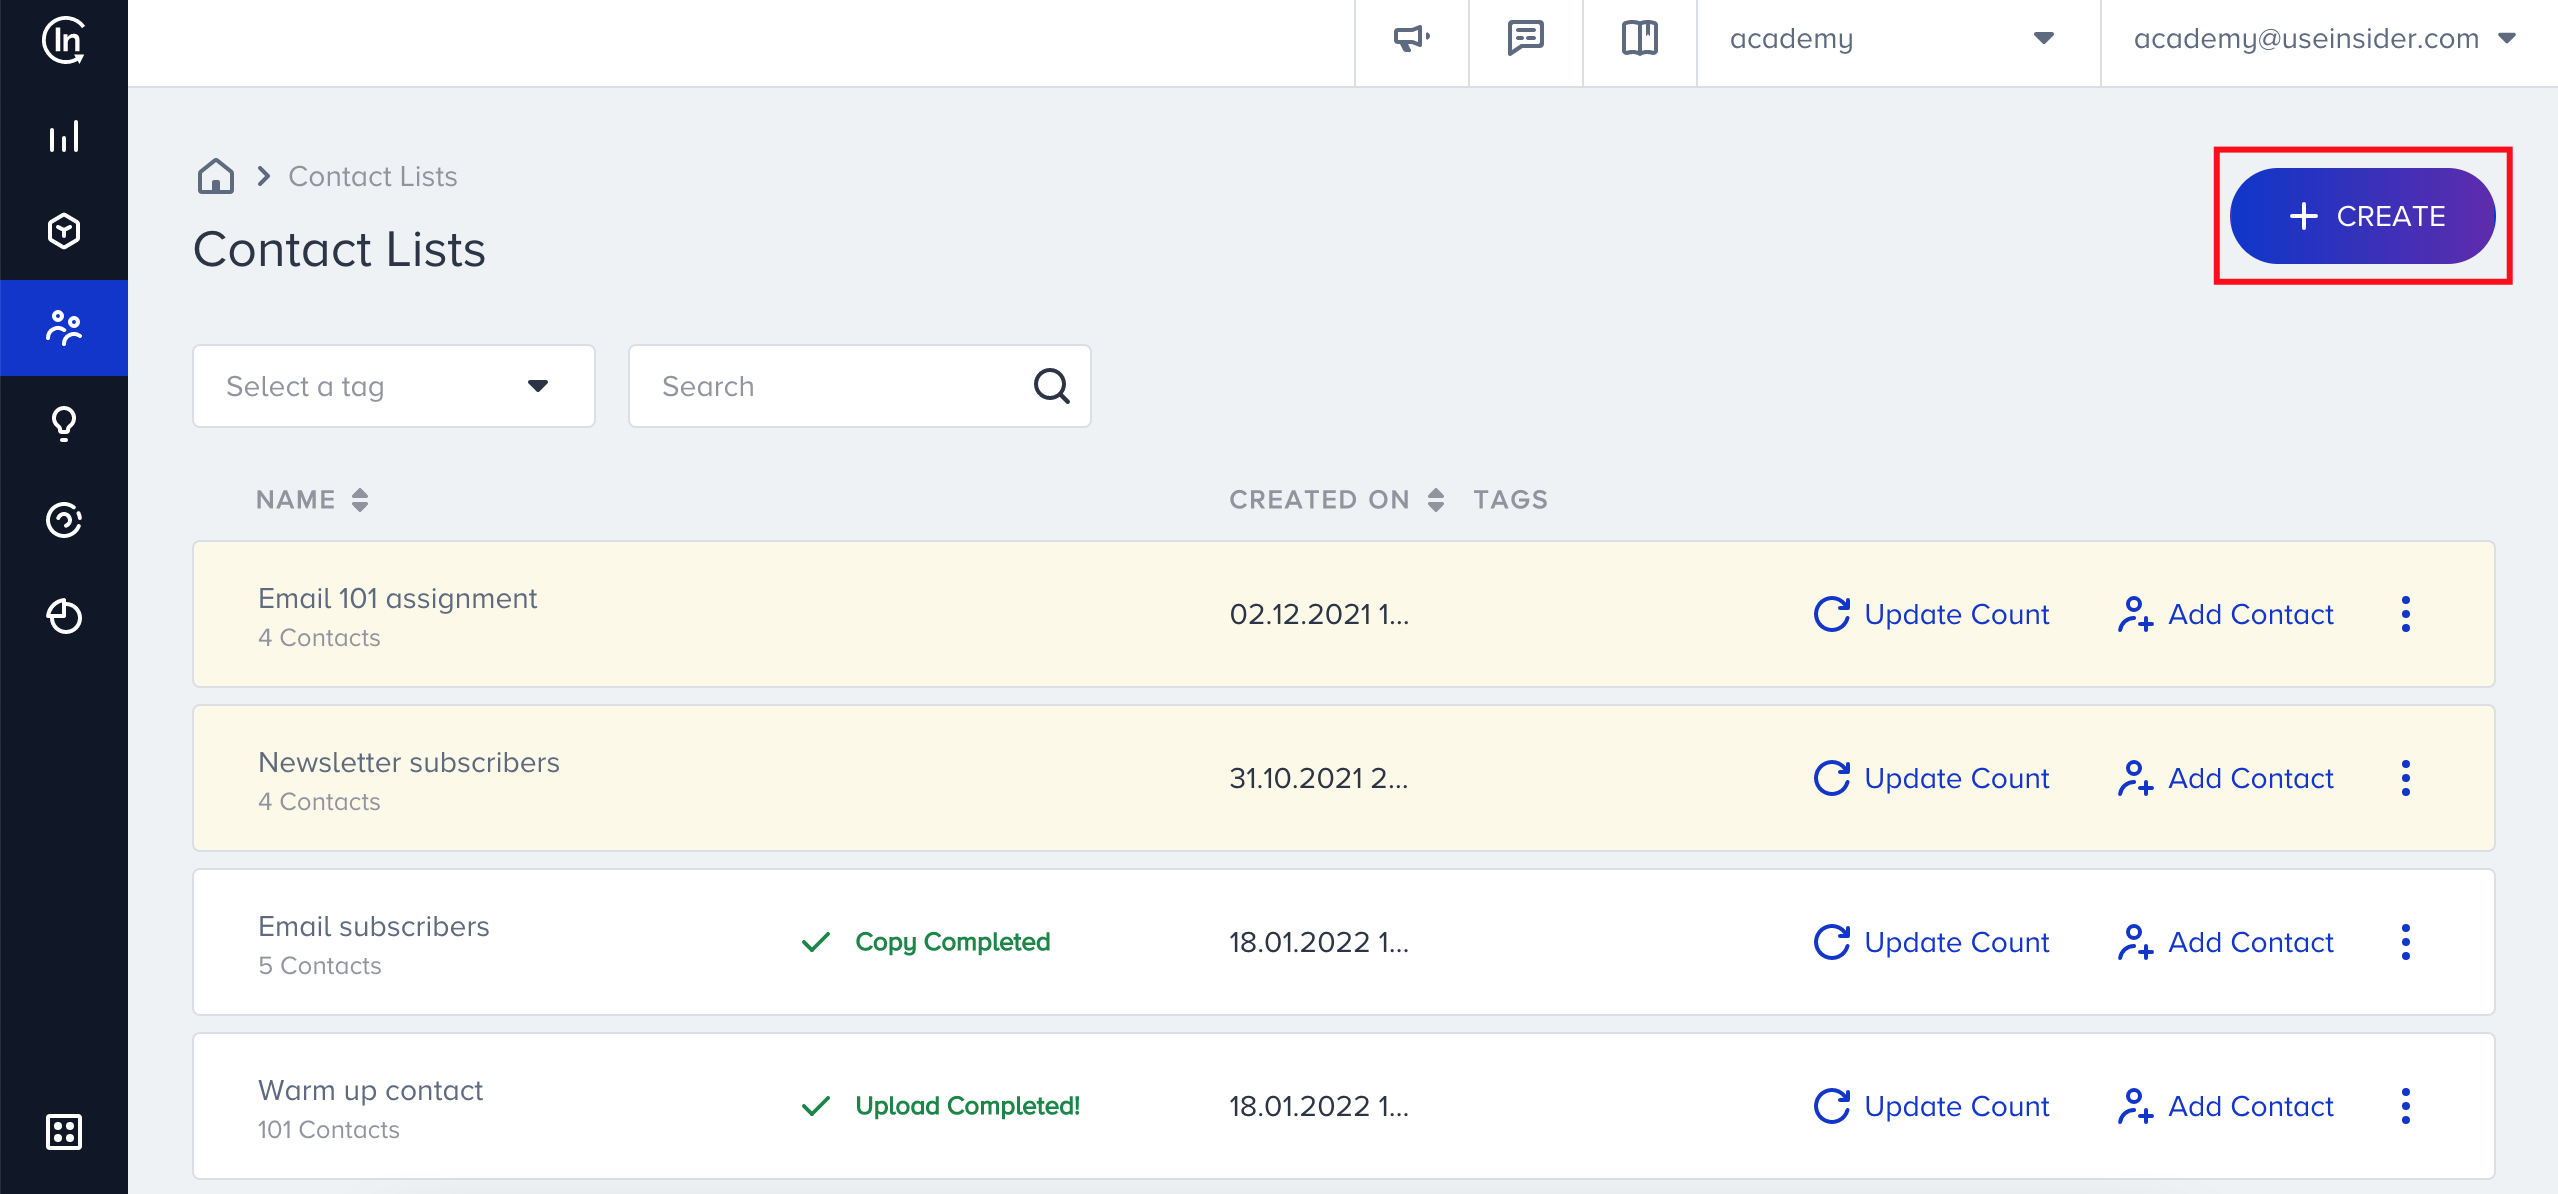
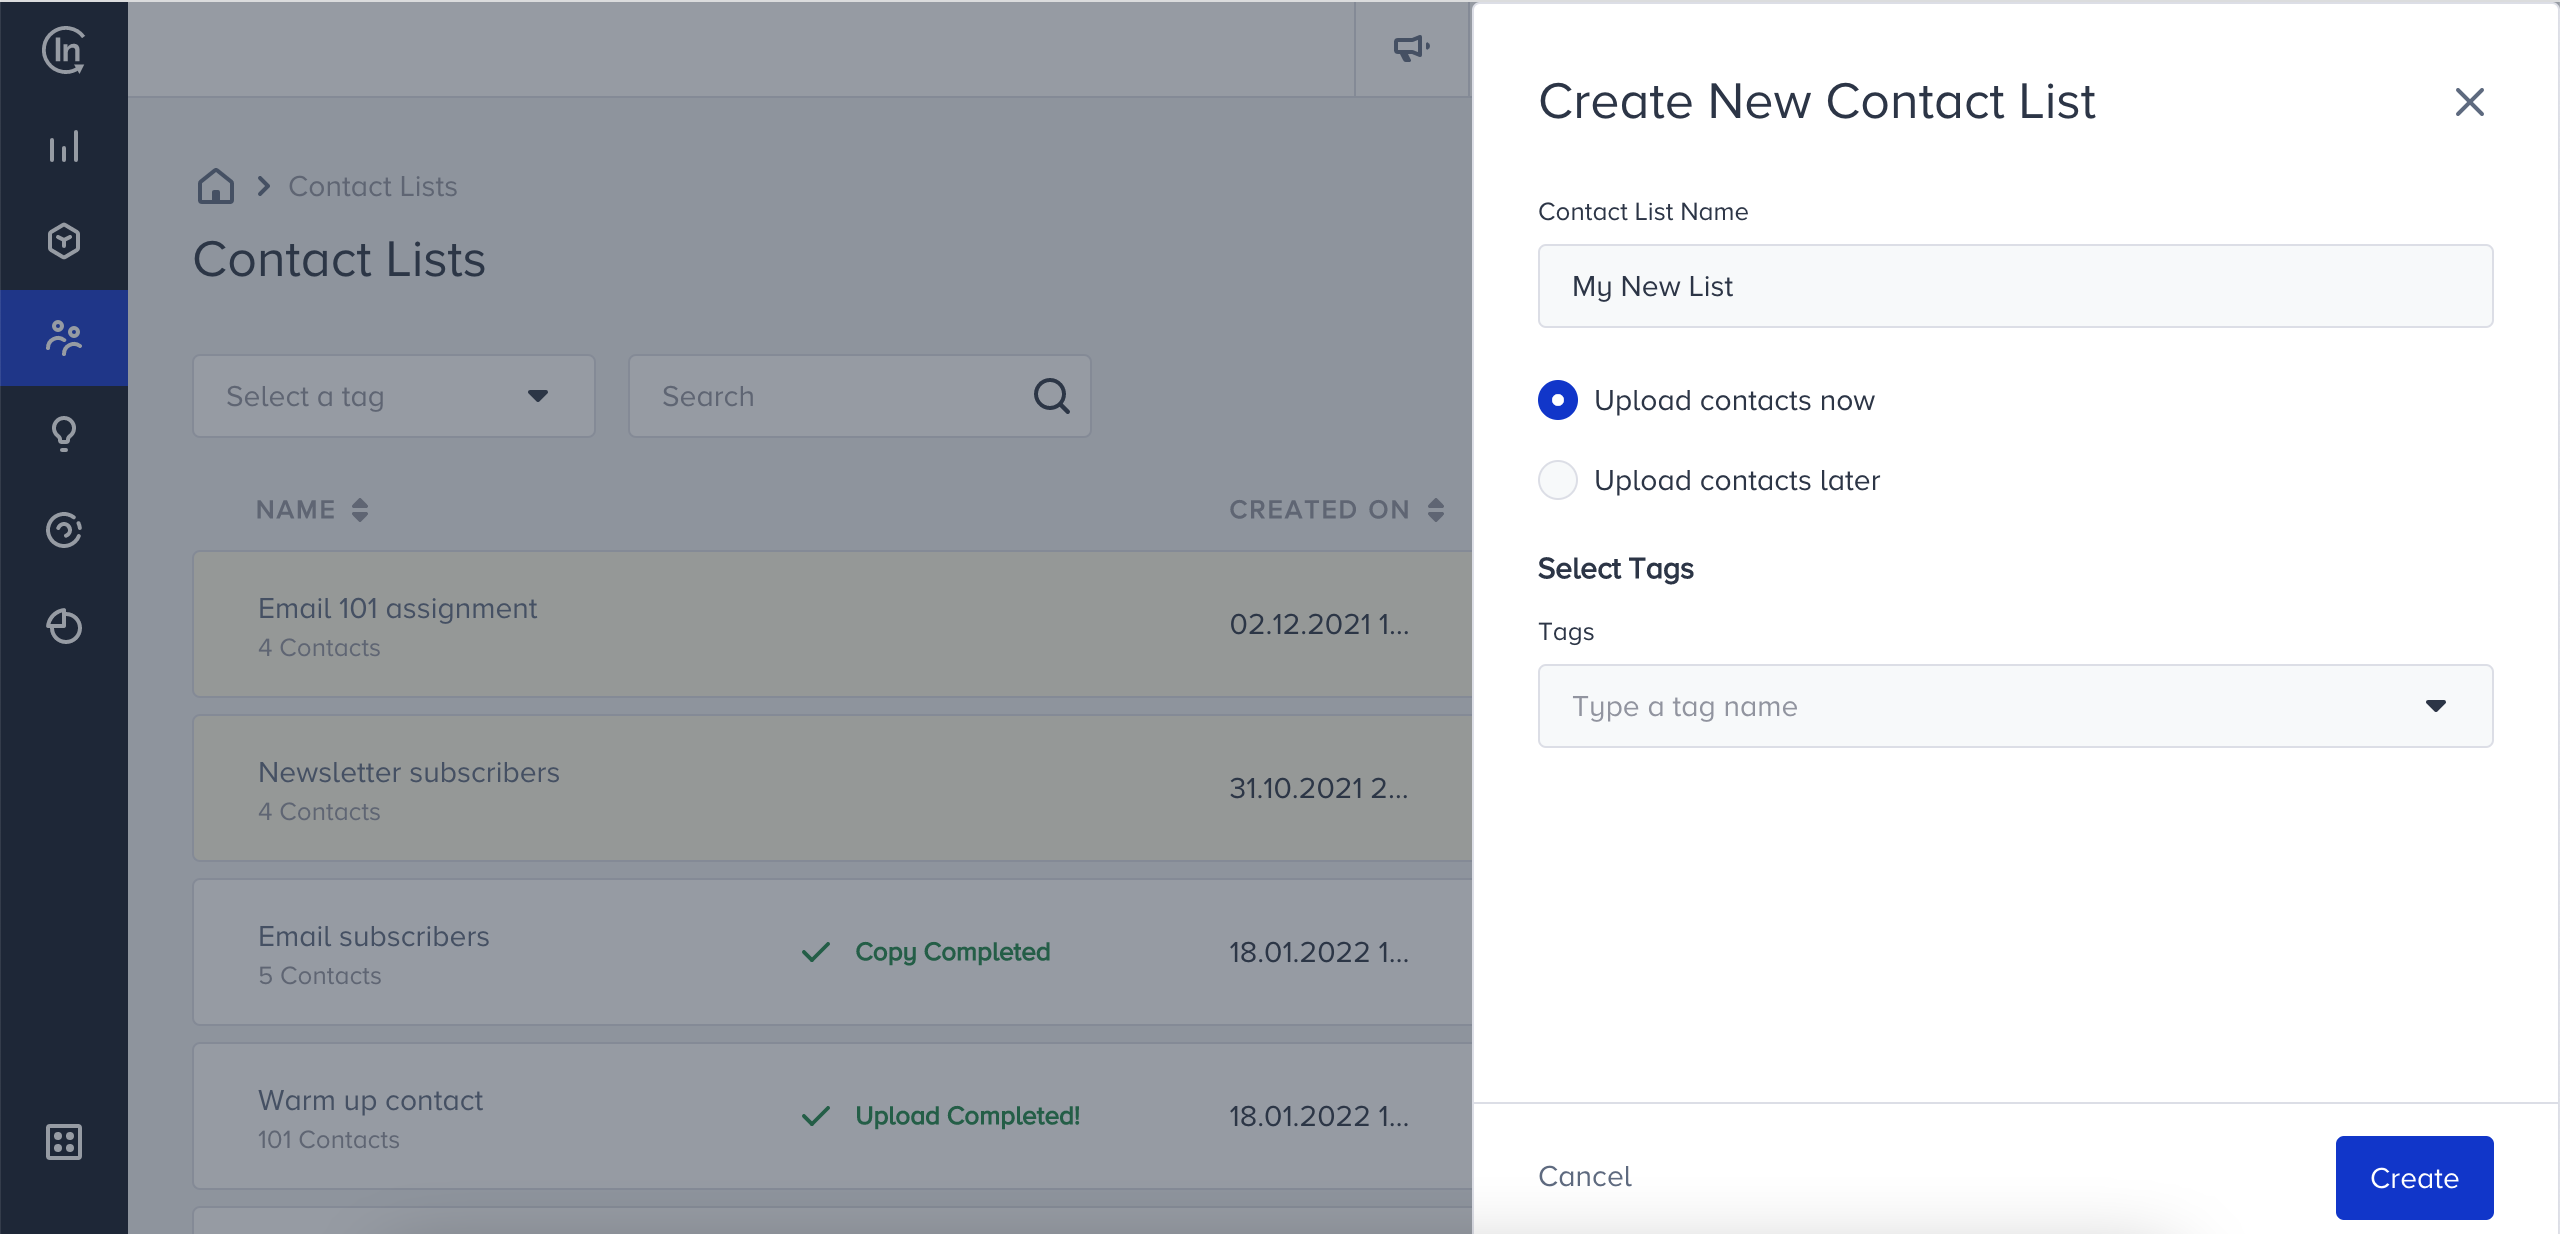
To get started with the upload process, you will need to create a Contact List. You can reach Contact Lists through Audience > Contacts Management > Contacts Lists and create a new list by clicking the Create button on the top right of your screen. To upload contacts immediately, you can select upload contacts now option, or to upload them later, you can select upload contacts later.
your title goes here
Only the team members who have access to add or edit customer PII (Personally Identifiable Information) or personal data can perform these actions. You can provide user access to your members to view the PII, personal data of the customers, or the User Profiles from the Settings tab.
What are the supported formats for contact file uploads?
Newsletter product supports the files in the following formats:
- XLSX, XLS and CSV files in UTF-8 Format is supported.
- For XLSX and XLS files, maximum size limit allowed is 5MB.
- For CSV files, maximum size limit allowed is 100MB.
- If you want to add a date in the document, the date format must be YYYY-MM-DD.
- The email field name must be filled.
- Headers are not mandatory, but if the file contains headers, note that different headers cannot be assigned to the same field.
- There is a validation for the first three contacts in your document. So If your file has another incorrect row, contact information will be wrong in the system. Please pay attention to preparing the document correctly to have a clean set of data.
You can also download this sample file from the file upload screen.
Uploading contacts from a file
You can upload contacts from a file on List Records page and Contact List listing page. You can do it through Add Contact > Upload Contacts on List Records or Manage Contacts > Upload Contacts on the list itself.
.png)

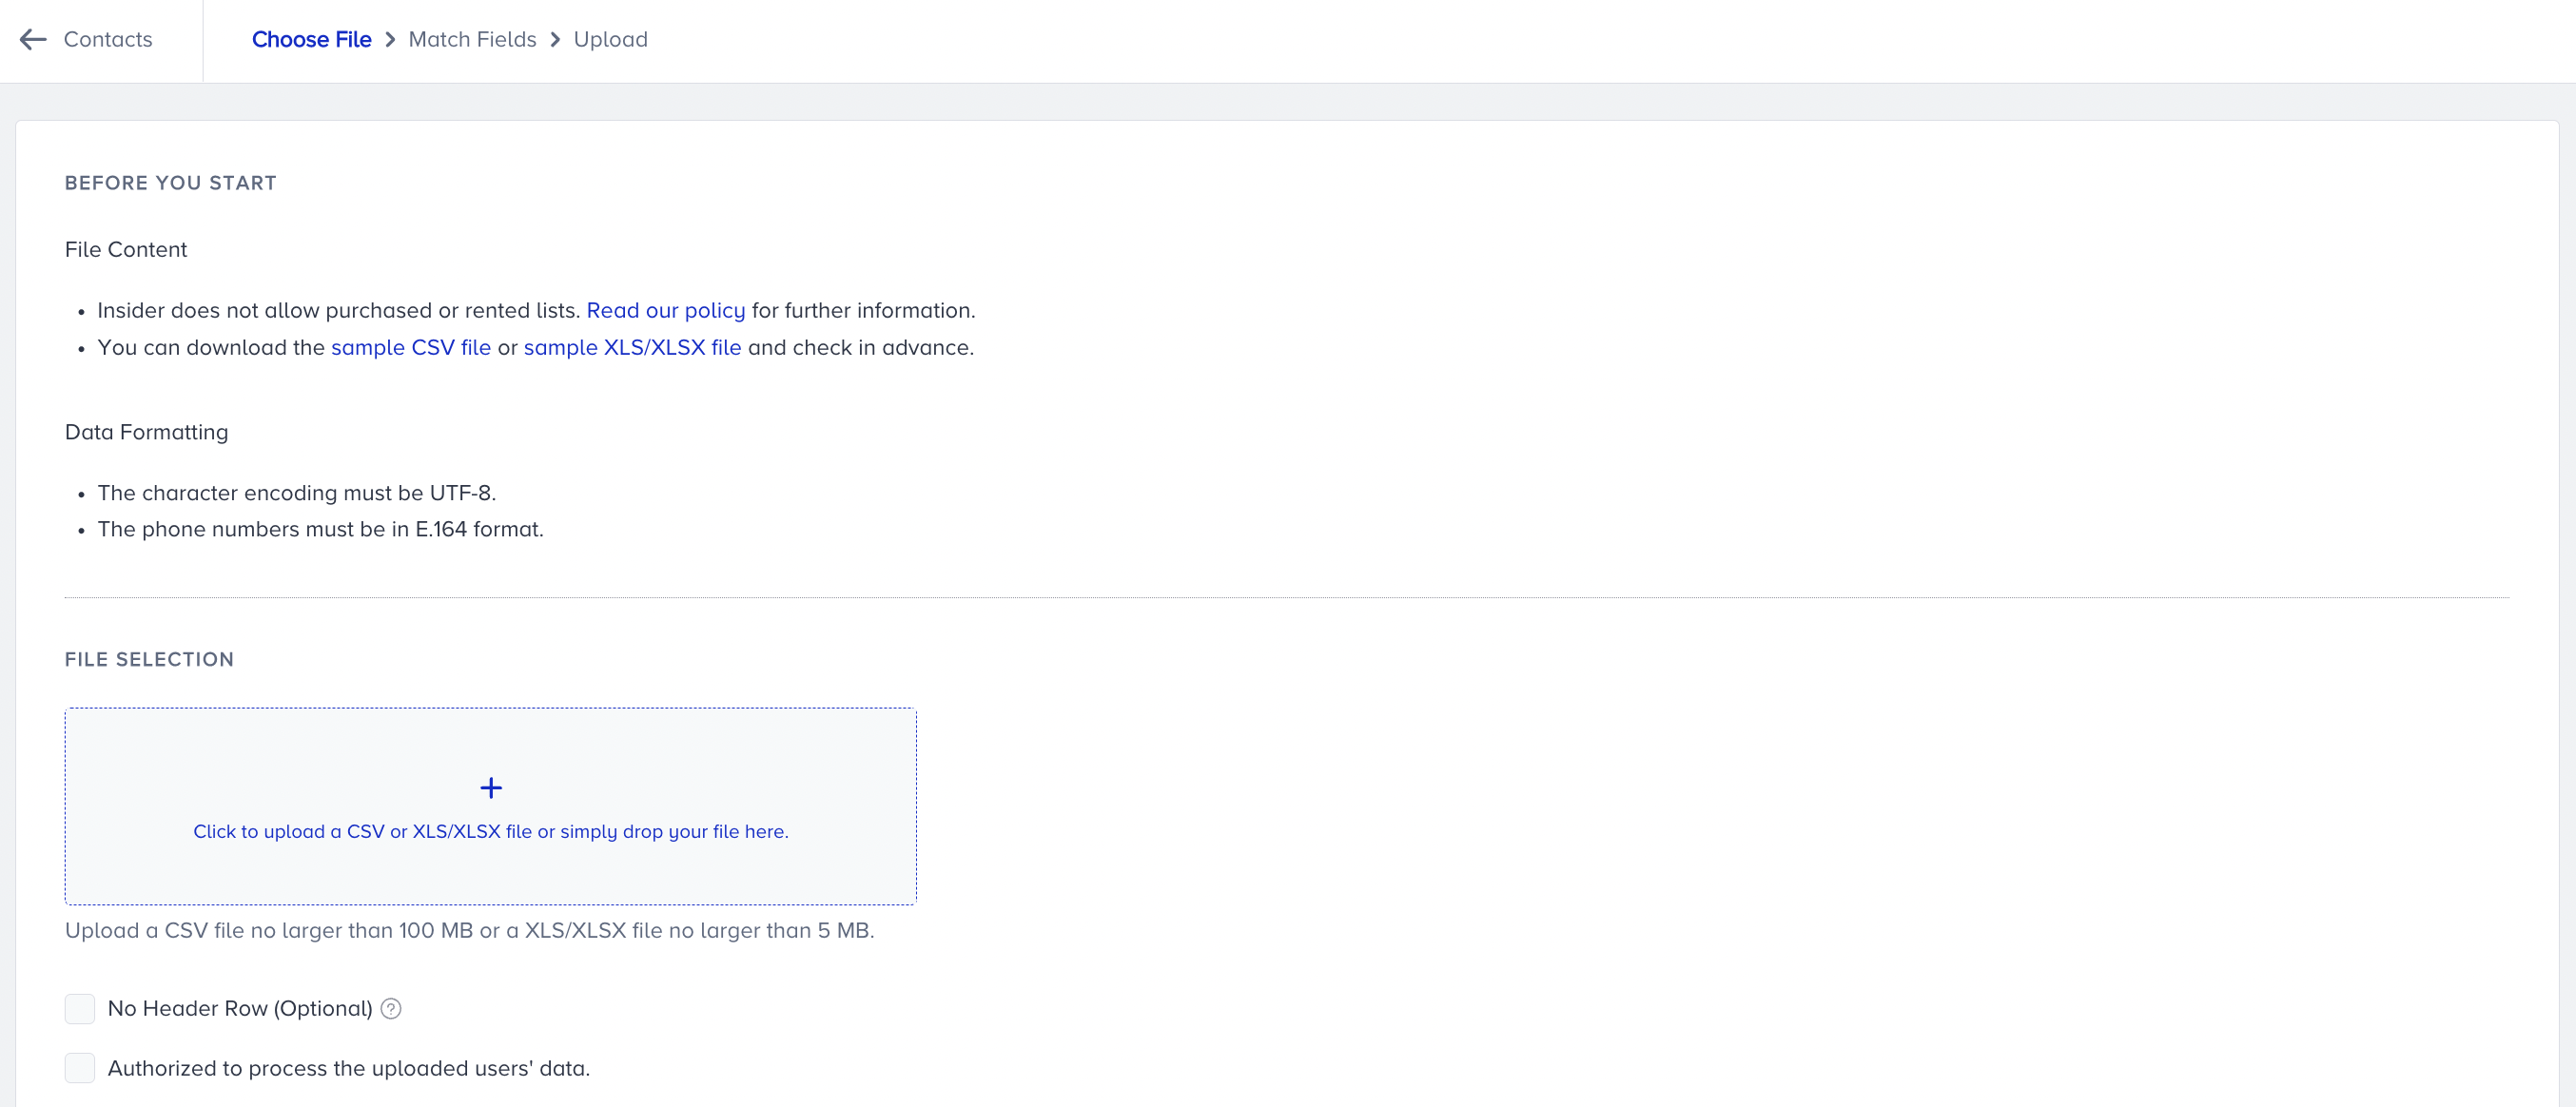
- After choosing your file type, drag or upload your file.
- Check the “Authorized to process the uploaded users' data.” checkbox.
- If your file does not contain any headers, check the “No Header Row.” checkbox.
- Click Save & Next to upload your file.

your title goes here
Check if each column is assigned the right field name and type. You can use “Clear” option not to use the columns if necessary.
You need to consider the following contact features while importing your contacts:
- The first three rows after the headers should be filled matching the headers that you want to import.
- If you want to add a date in the document, the date format must be YYYY-MM-DD.
- The email field name must be matched.
- Different columns cannot be assigned to the same field.
- There is a validation only for the first three contacts in your document. So If your file document has another incorrect row, contact information will be wrong in the system. Please pay attention on preparing the document correctly to have a clean set of data.
In the Match Fields step, you see if the fields in your CSV file matched correctly. Next to your fields, you see a Label. It means that your attribute will be inserted as identifier. Ensure that your identifier is unique.
Your title goes here
Custom identifiers are not supported, you can only insert email address, phone number and UUID as identifier on user list uploads. If you don’t want to insert any of them as identifiers, please contact Insider team.
Once you match all the data you want to upload, click Save and Continue to proceed.
.png)
You will see a summary screen after clicking Save and Continue. However, this email does not imply that processing of the contacts is done. You will receive an email after the file processing is done.

Click Finish to finalize your work.
your title goes here
When you upload a contact that is already in another contact list, contact will be added to the contact list and associated attributes will be updated. Contact will not be added as a duplicate.
Adding contacts manually
You can add your contacts manually on List Records page and Contact List listing page through Add Contact > Add Manually or Manage Contacts > Add Manually.
.png)
.png)
- Enter the email address.
- Check the box "This person gave me permission to email them." to add the contact to your current list manually.
your title goes here
When you add a contact that is already in another contact list, contact will be added to the contact list as the same contact. Contact will not be added as a duplicate.
.png)
How to interpret your upload summary email
After your file is uploaded and processed, you will receive an upload summary email with an attachment that contains details about your contacts or attributes that are not uploaded.
In this email, you can find the following information:
.png)
- Name of the file that is successfully uploaded
- Total number of email addresses uploaded as active
- Total bounced users (bounced from central bounce)
- The reasons for contacts or attributes that are not uploaded
a. Invalid - means the email address on email column is invalid
b. Wrong number of fields - means there is an extra column on the record
c. Birthday format should be YYYY-MM-DD - means the date format is not supported
d. Age should be number - means the age format is not supported
e. Duplicate - means the email address exists more than once in the file
your title goes here
If the records have different values of attributes, the contact will be uploaded with the last values.
your title goes here
The email addresses and non-erroneous attributes will be uploaded in any case except for a and e above. If you want these attributes to be uploaded as well, you can re-upload them to the same list after fixing the erroneous features. In this case, attributes will be updated without heaving a duplicate record.
FAQ
1. How does the user update, insert work on this page?
- If you upload a brand new user, the user will be created with the identifiers you selected.
- If you upload an existing user, the old user will get updated with the new attribute values.
- If you upload a user together with new the attributes that has not existed before, attributes will be created for the user, so their profile will be updated.
2. What's the difference between custom segment and saved segments?
You can use Custom segments only for on-site products while saved segments for messaging channels.
Was this article helpful?