Anatomy of a Web Campaign
- 09 Apr 2024
- 4 Minutes to read
Anatomy of a Web Campaign
- Updated on 09 Apr 2024
- 4 Minutes to read
Article Summary
Share feedback
Thanks for sharing your feedback!
Insider's Desktop, Mobile and Responsive Web Suites offer various templates that serve your brand's campaign needs. These web templates have similar structures in terms of navigation, template selection, segmentation, targeting, campaign creation, goals and launch configuration.
You need to apply five main configuration steps to each campaign, whether you’re working on desktop or mobile:
- Design to style your template.
- Segments to set your target audience.
- Rules to set your target pages.
- Goals to measure the performance of your campaign.
- Launch to configure language and start-end date of your campaign.
This guide will walk you through navigating the product, creating a campaign, and selecting a template and finally, launching your campaign.
Navigating to the product
After logging in to your Insider account, you will land on Executive Summary Dashboard. On the left sidebar, you can see the menu items: Favorites, Reports, Experience, Audience, Insights, Predict, Advanced App analytics and Components.
Navigate to Experience > Optimize > Web Templates.

Click on Web Templates to select a web template. You will be directed to a listing page where you can see the campaigns that you previously created. This is the page on which you will start personalizing your campaign.
Creating a campaign
1. Click the Create button on the right top corner.
.png)
2. Name your campaign using the field on the right side of your window and click the Create button to start configuring the steps of your personalization..png)
1. Design
You will be directed to the template library to start designing your campaign.

1. Choose a template to suit your campaign objectives.
2. Select the platform you wish to launch your campaign on and click the Use For {Device} button.

3. Determine a variant for one or more alternative version of your campaign to show. Click the Save and Continue button. .png)
2. Segments
Segmentation is the process of dividing a broad consumer group into sub-groups based on shared characteristics such as past purchases or visit frequency. .png)
You can select one or more user groups to show your campaign based on the following segment options:
- Predictive Segments
- Purchasing Behavior
- Visiting Behavior
- First Party Segments
- On-site Campaign History
- Custom Segment
- CRM Attributes
your title goes here
If you do not apply any segment, your campaign will be delivered to all available users.
When you select a segment, you will see the properties available to that segment (e.g. segment name, operators, value). You can create segment groups and condition them using on AND/OR logic.
Once you have selected your segments (or if you decide not to select any) you can click Save and Continue to proceed to the next step: Rules.
3. Rules
Rules enable you to trigger your campaign based on conditions such as page URL, traffic source and device type. 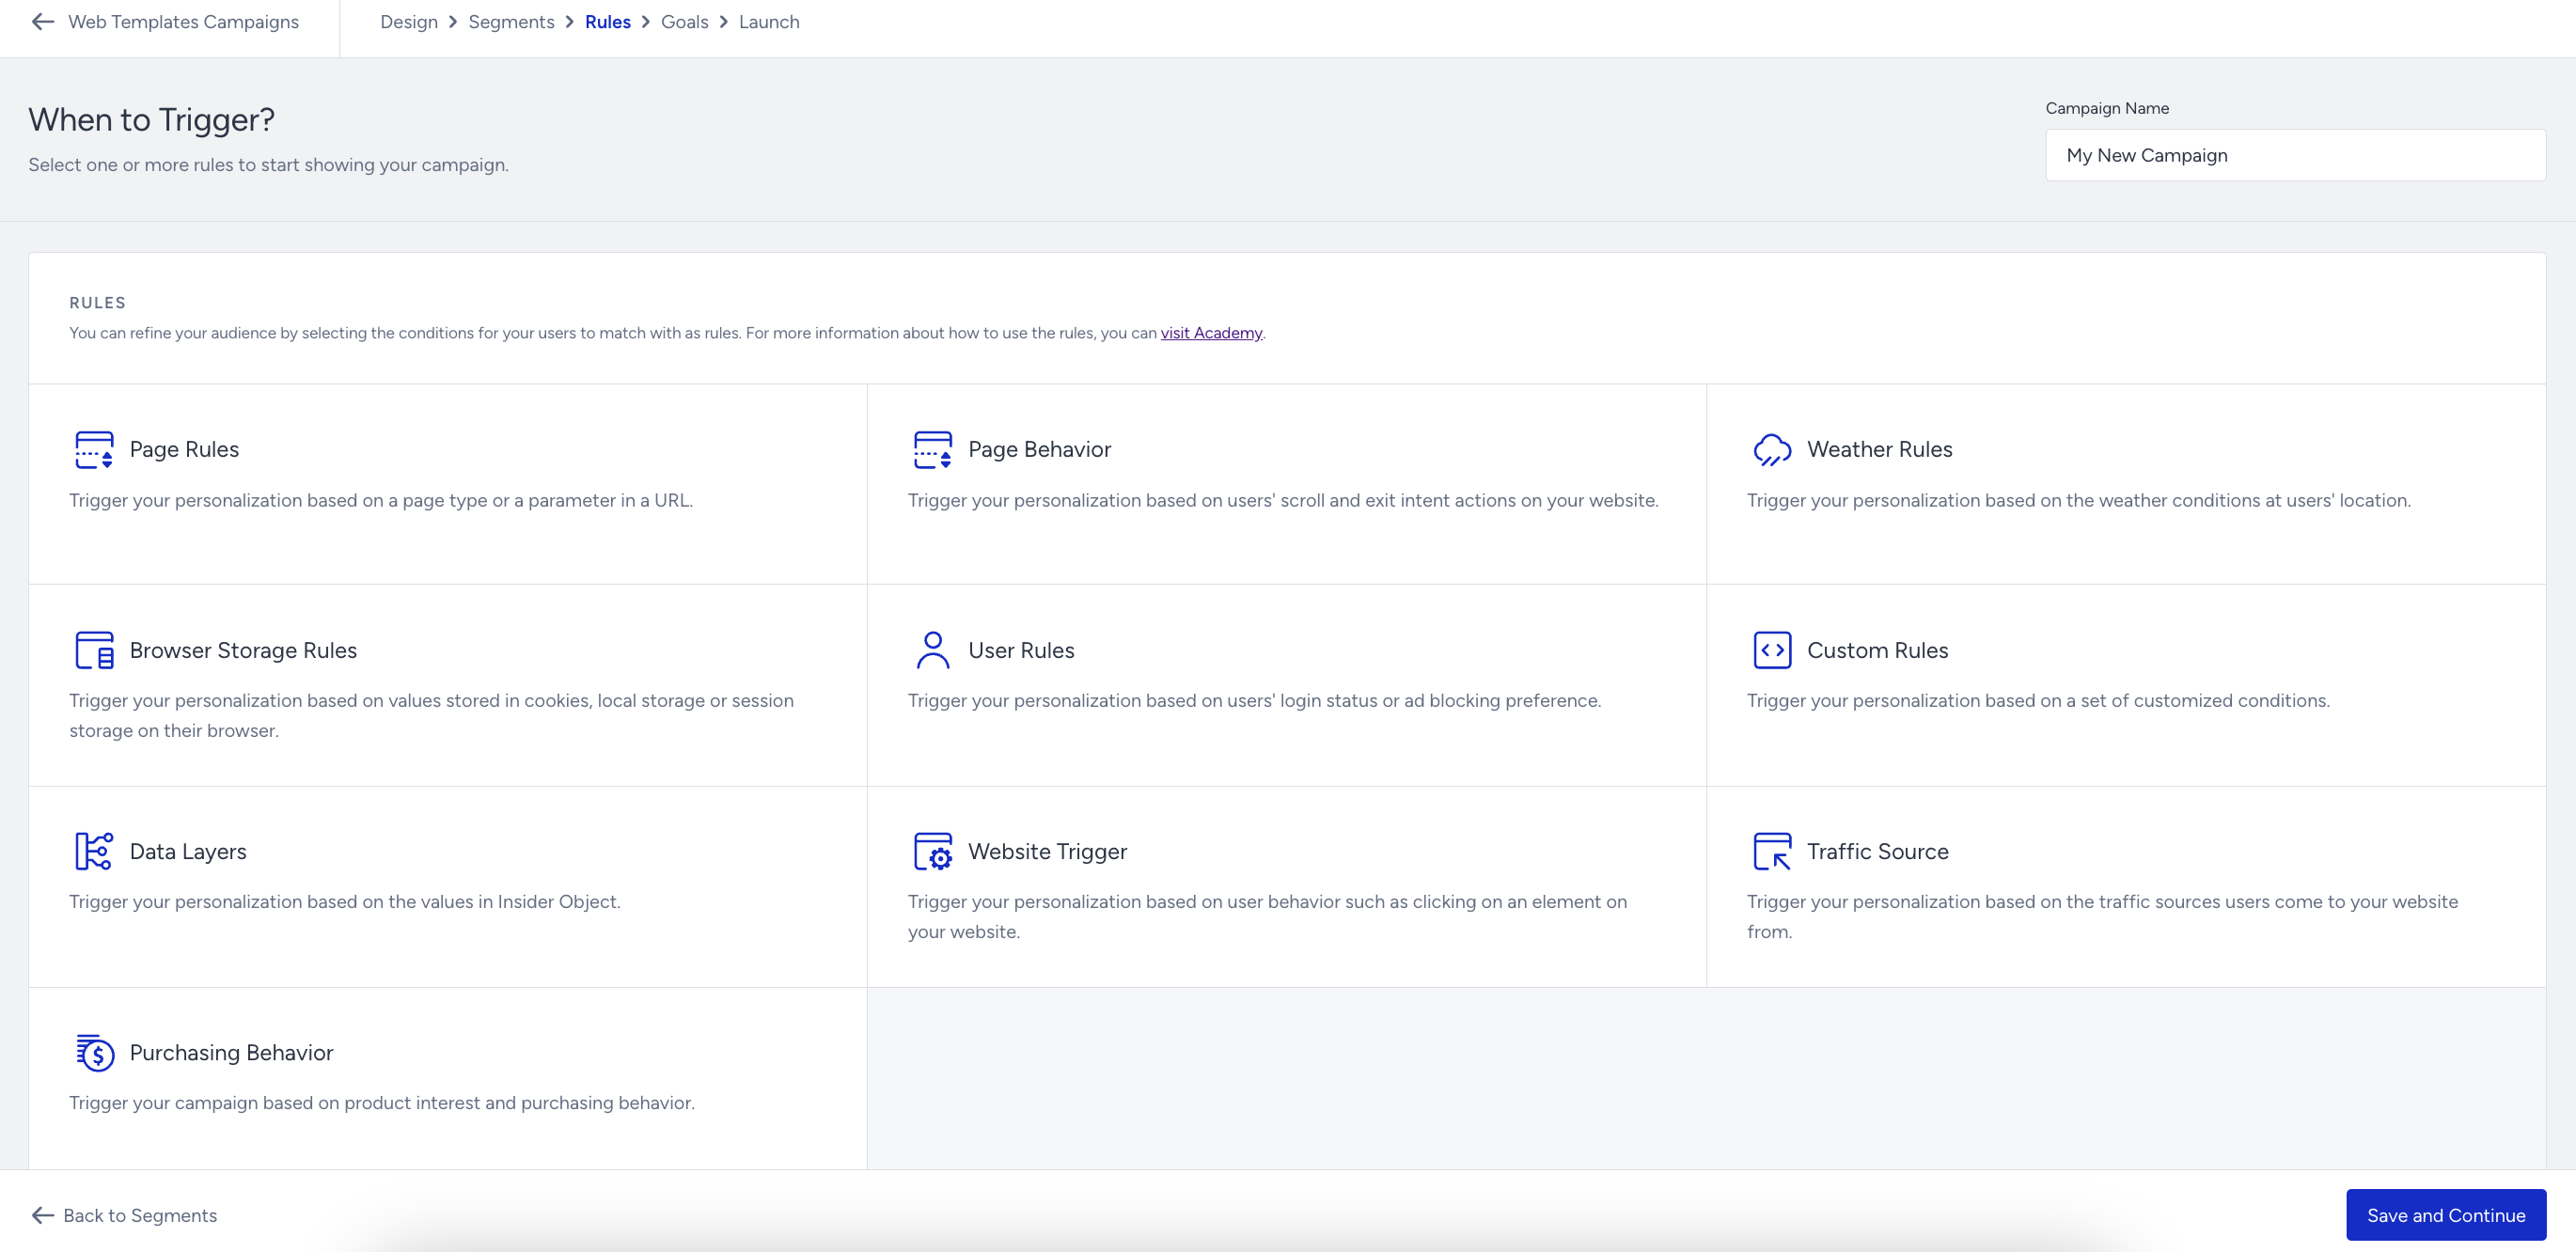
The list below shows all available rules. You can choose one or more to trigger your campaign.
- Page Rules
- Page Behavior Rules & Mobile Web Exit Intent
- Weather Rules
- Browser Storage Rules
- User Rules
- Custom Rules
- Data Layers
- Website Trigger
- Traffic Source
- Purchasing Behavior
your title goes here
Unlike Segments, you cannot personalize your campaign without selecting any rules. If you do now have any specifications on where to display the campaign, you can select Page Rules > Page Type > All Pages to trigger your campaign on all pages for eligible users.
You can also create your own triggers using Campaign Trigger Settings and Advanced Settings. With Campaign Trigger Settings, you can use one campaign to trigger another. With Advanced Settings, you can set when your campaign will broadcast to users: either immediately or after a delay.
4. Goals
Goals enable you to track the performance of your campaign. Keeping track of the respective metrics helps you strategize your campaign. 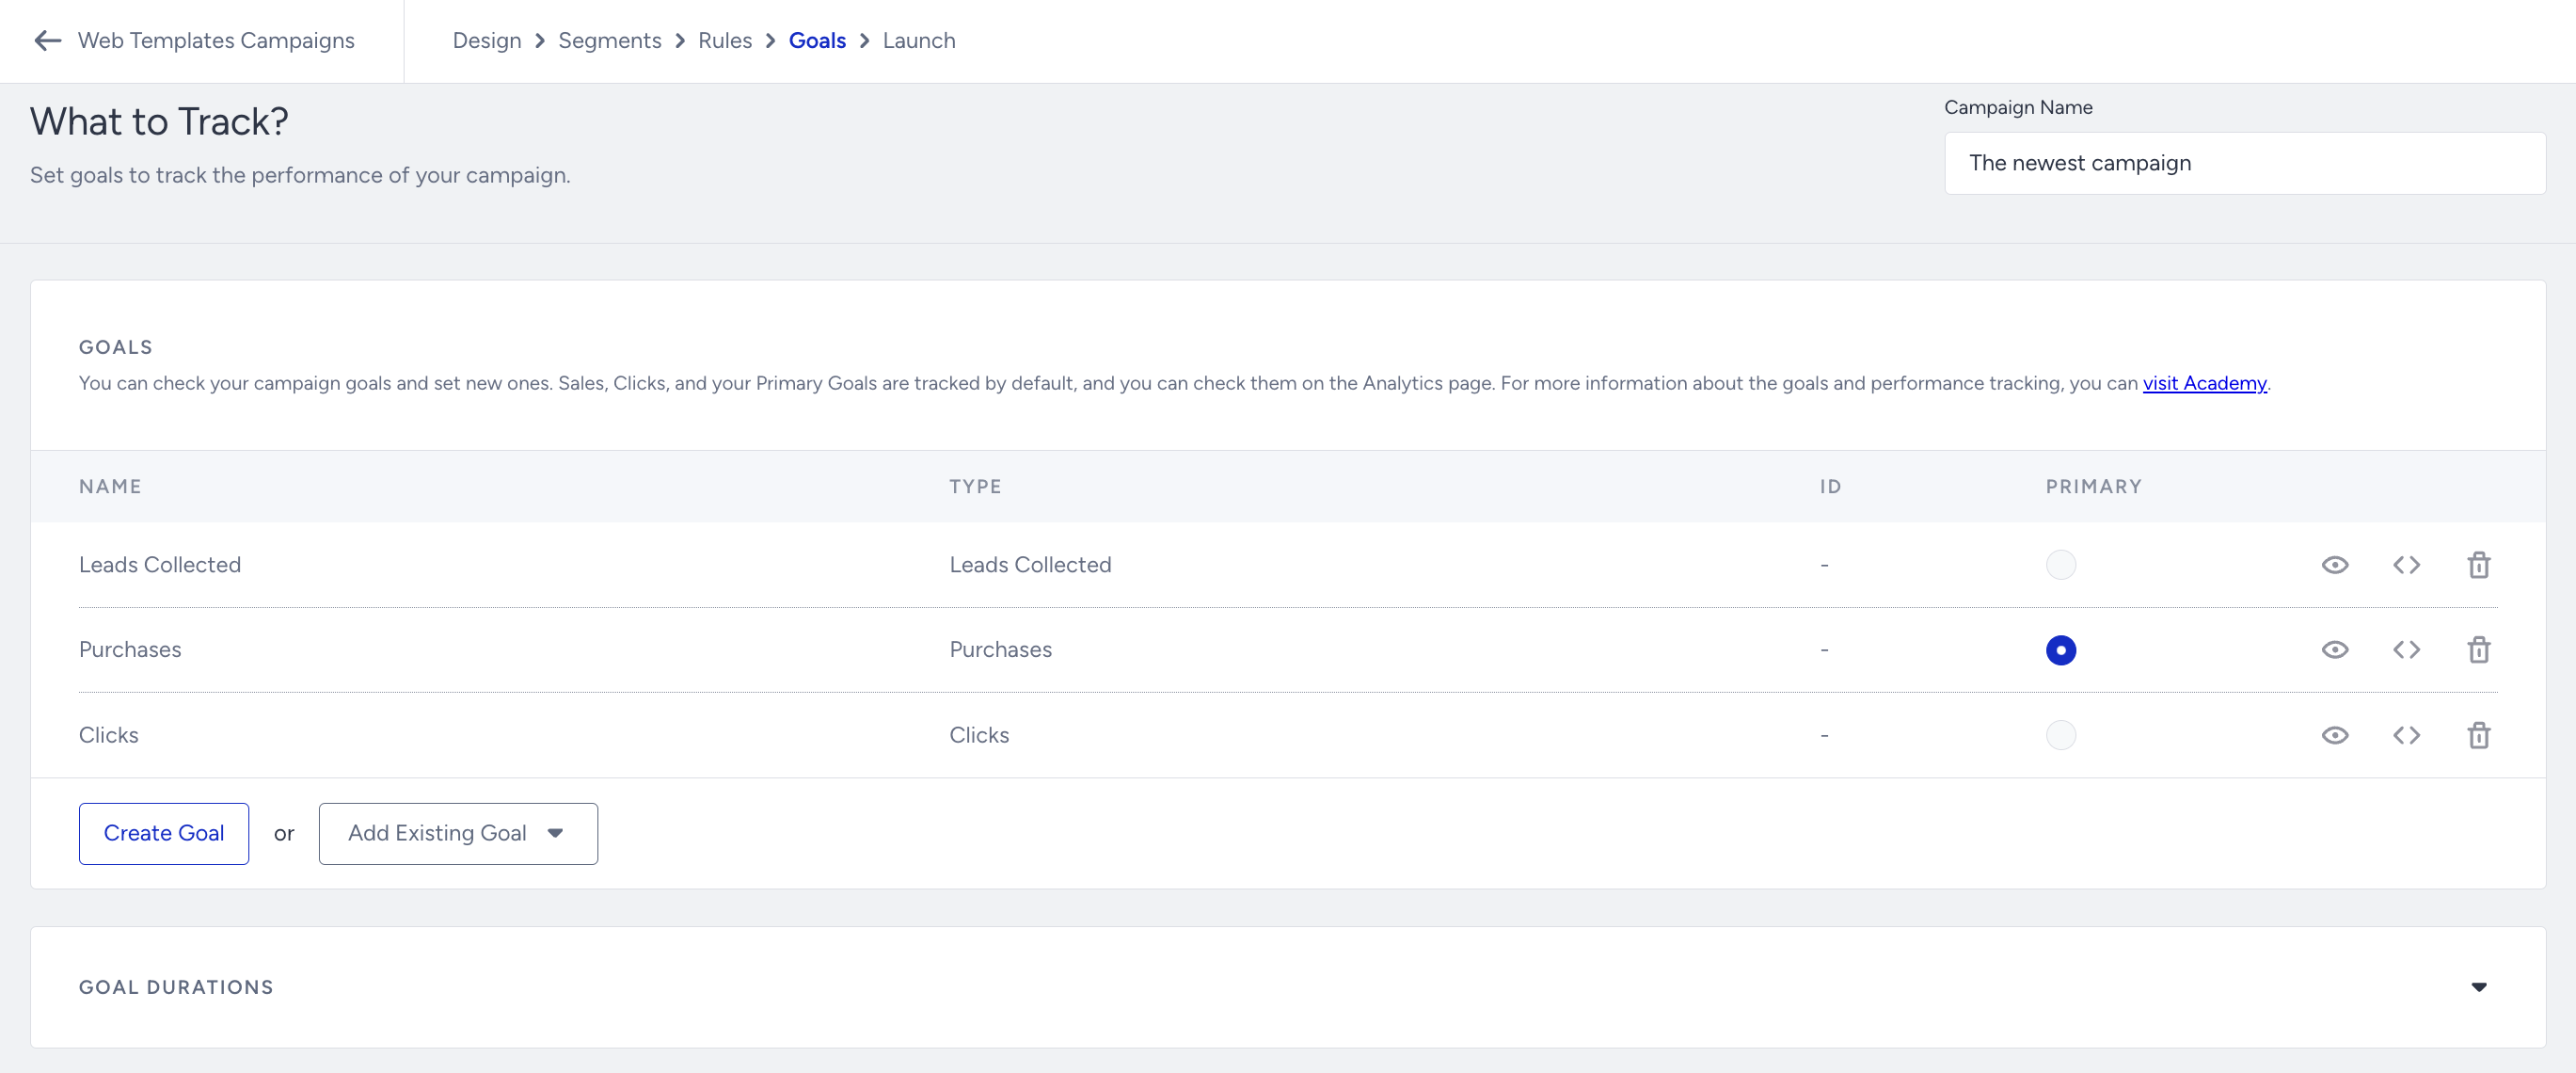
You can keep only the default goals or create a new goal using the available goal types following the guide for Adding a new goal.
You can also access Goal Durations from this pages to configure settings like when a user is assigned to a variant of a campaign, how long conversations are logged, and when a user will see a campaign after they trigger it.
5. Launch
Launch is the last step before your campaign goes live. However, before launching your campaign, you need to:
- Configure your campaign settings
- Generate your panel
- Test your campaign
your title goes here
We strongly suggest you keep your campaign status as Test while you configure and review it to make sure it's set correctly. Once you test your campaign and it is ready to go live, you can change the status to Active to launch it.

Configure your campaign settings
In the Launch step, you can configure the following settings for you campaign:
- Language Selection
- Activation Day & Time
- Display Settings
- Advanced Settings
- Activation Status
- Notes for your comments on your campaign
Generate your panel
Before testing or launching your campaign, you need to generate your panel. To do so, follow the instructions for Generating Inone.
your title goes here
If you do not generate your panel, no changes will be applied to your campaigns.
Test your campaign
Before launching your campaign, we suggest you to test your variant(s) using the Testing a Web Campaign as a guide.
Launch your campaign
Now that you understand the anatomy of a web campaign, you can start building and launching unique user experiences that boost engagement, drive conversions and increase brand loyalty.
Was this article helpful?