Recently Viewed Items Templates
- 19 Mar 2024
- 3 Minutes to read
Recently Viewed Items Templates
- Updated on 19 Mar 2024
- 3 Minutes to read
Article Summary
Share feedback
Thanks for sharing your feedback!
If your users cannot easily find an item they have recently viewed on your website, this can be quite upsetting for them. However, when you have a Recently Viewed Items template on your website, you can make the search experience easy for your users since they can simply go back to an earlier choice and finalize the purchase.
Insider's Recently Viewed Items is a tool providing users a chance to see through the previously browsed products. It helps you increase the engagement time of your users, therefore the conversion rate.
Together with its additional cool features such as mini view, add to cart button and discounted price for products, this template is product comparison tool as well. Thus, this is both a product comparison and recently viewed items widget. Your users can compare up to 12 products with respect to their product specifics.
How to create an on-page template
To create an on-page Recently Viewed Items Campaign,
1. Navigate to Experience > Optimize > Web Templates.
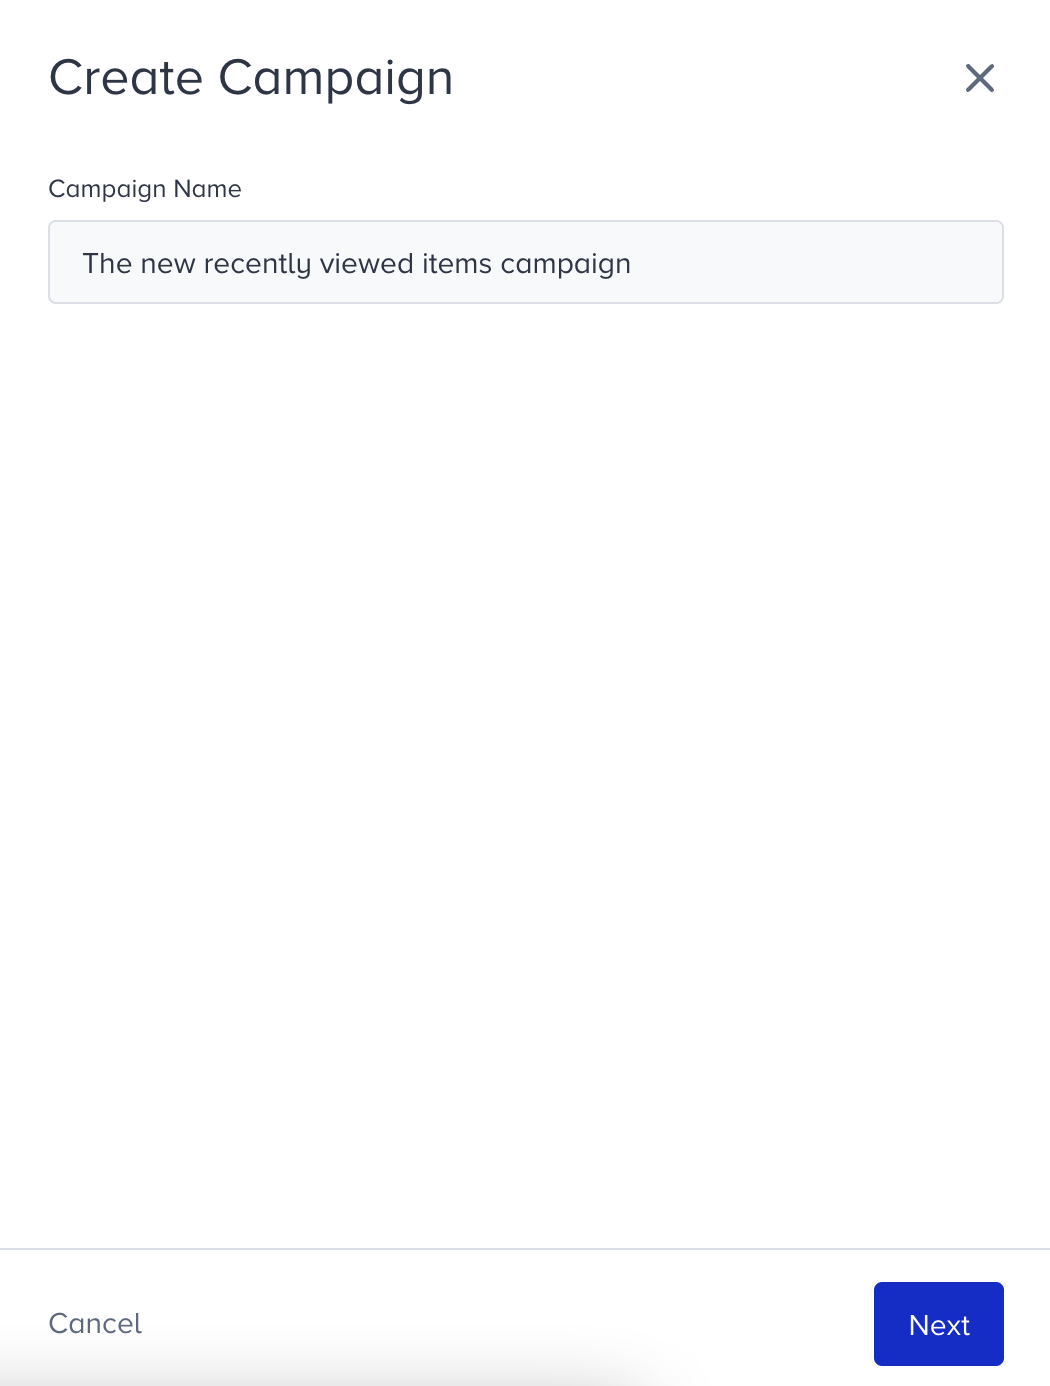
2. Click the Create button. Name your campaign, and click the Next button.
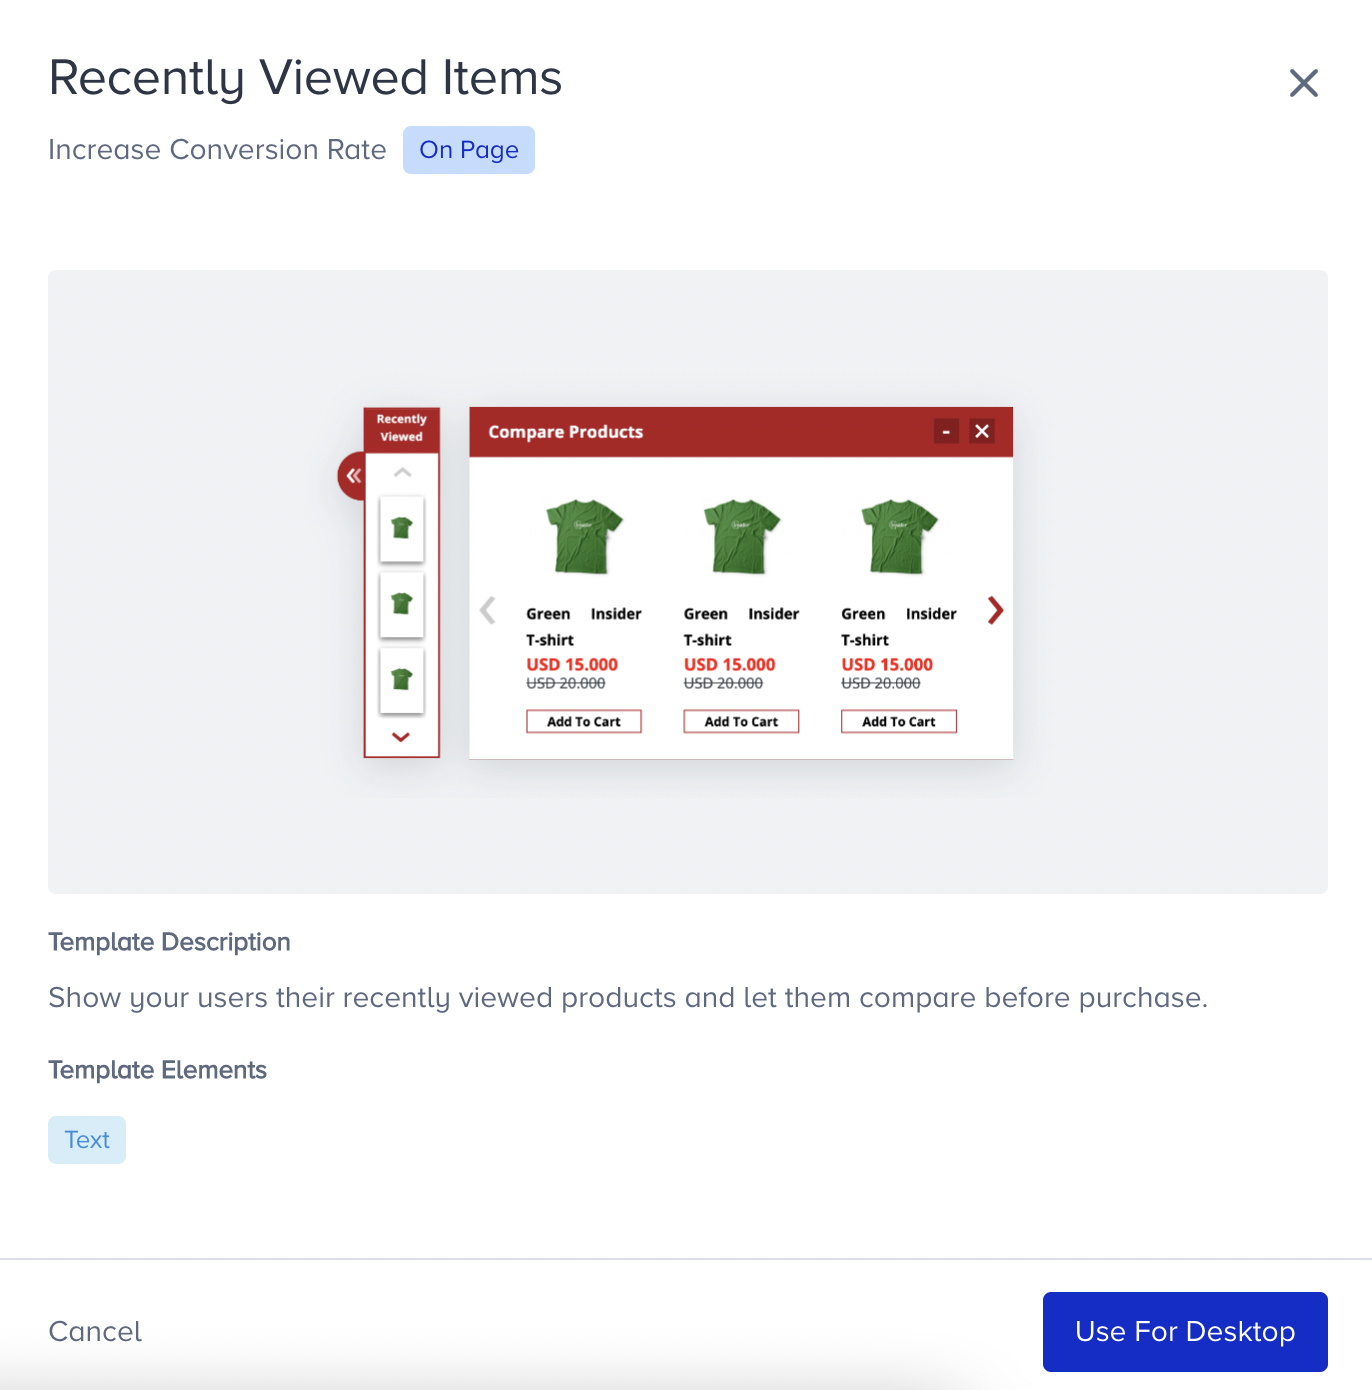
3. You will land on the Template Library. You can search for the template or find it under Increase Conversion Rate. 
4. When you click on the template, you will see its default preview, description, and its elements. Click Use For Desktop to proceed.
5. You will see the default version of the template in Preview mode in Action Builder.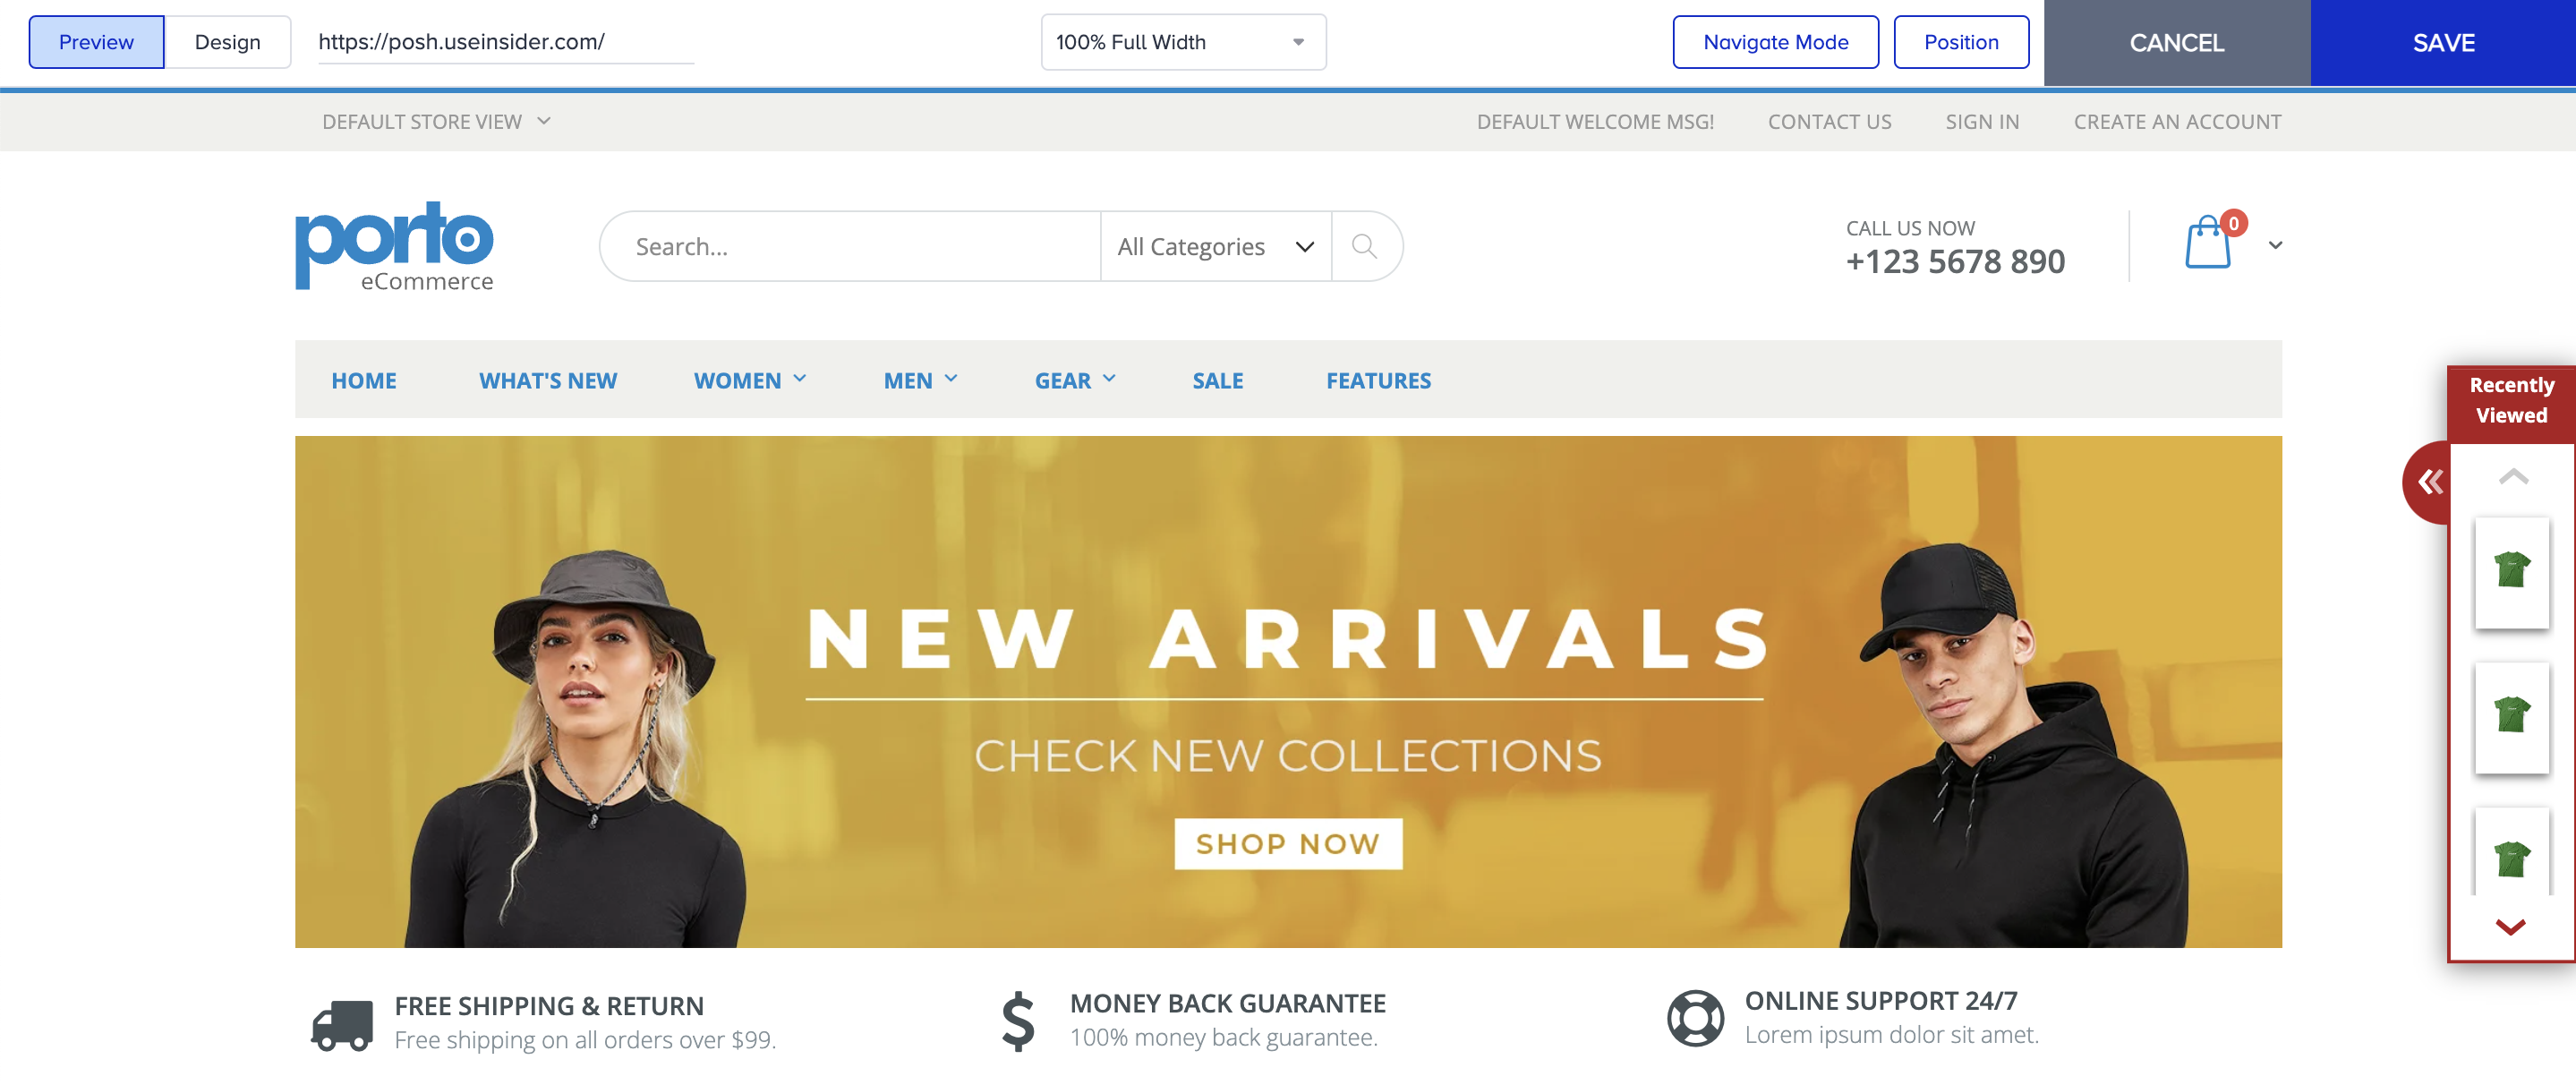
6. Switch to Design mode to start designing your template. It will appear with its elements by default.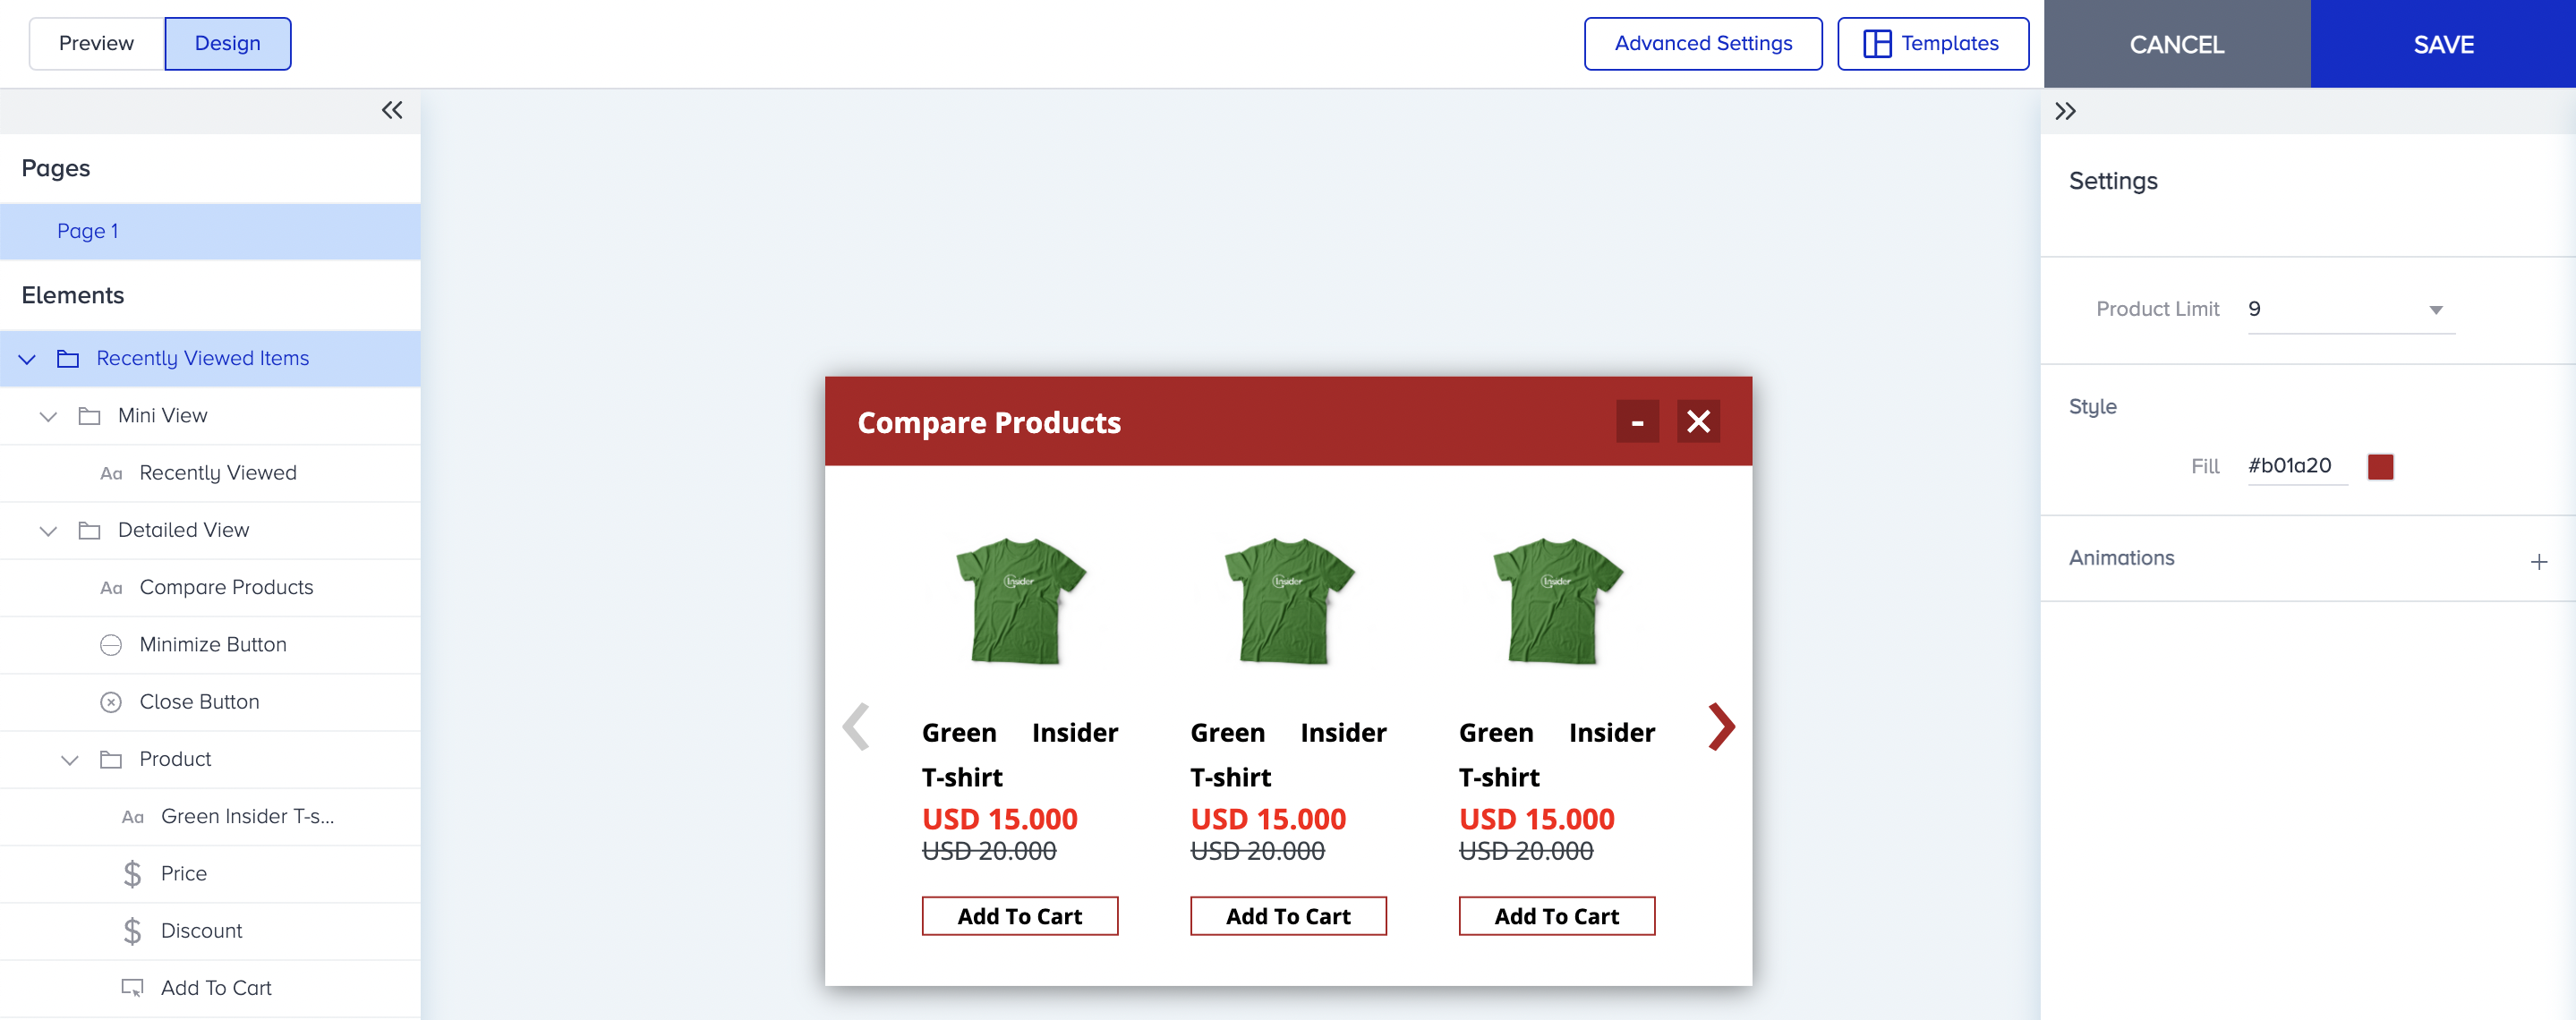
7. You can start customization with the number of the products to be displayed and the stye of the template. You can add Animations to make your template appear/disappear attractively.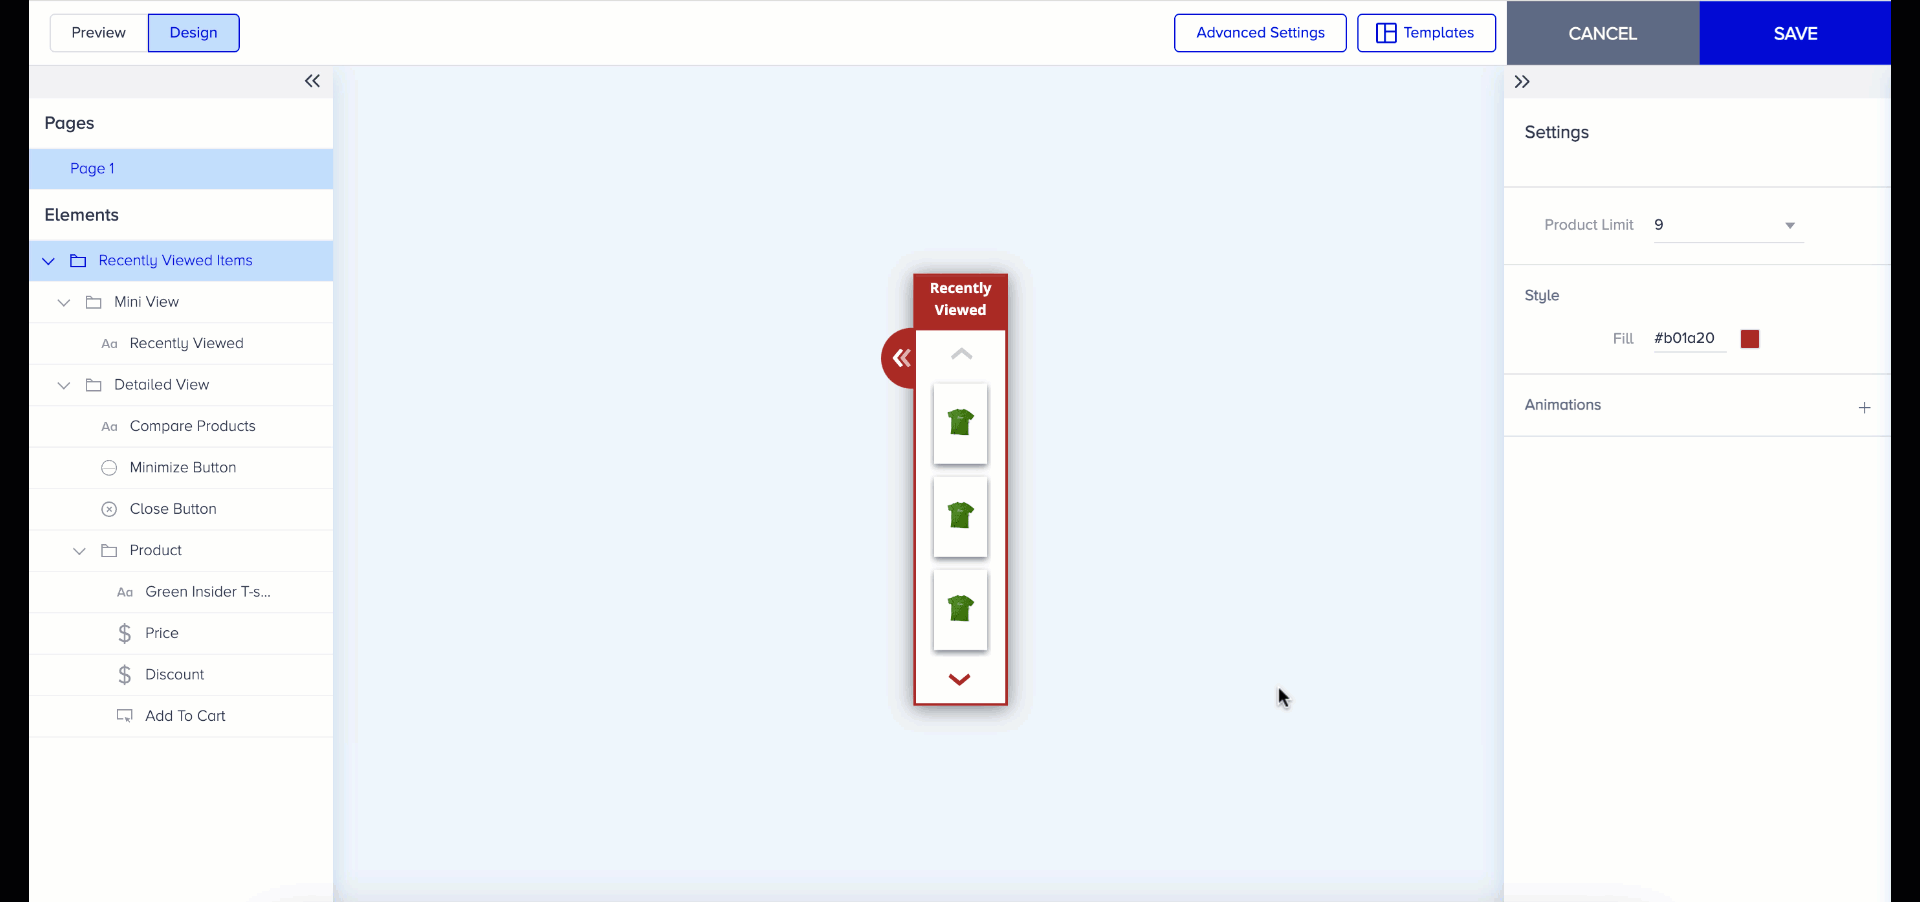
8. You can change the settings of the Mini View. You can enable/disable title, image, and close button toggles. When enabled, you can customize them separately. You can also change Style and Text settings.
9. You can customize the settings of the Detailed View. You can enable/disable product name, product price, discount price and add to cart attributes of the products. You can also change Style settings.

10. You can change the title and button elements of the Detailed View.
11. When you are done with your design configurations, click Save and proceed with the rest of your campaign.
How to create an inline template
To create an inline Recently Viewed Items Campaign,
1. Navigate to Experience > Optimize > Web Templates.
2. Click the Create button. Name your campaign, and click the Next button.
3. You will land on the Template Store. You can search for the template or find it under Increase Conversion Rate.
4. When you click on the template, you will see the available platforms, its default preview, description, and its elements. Click Use For {Platform} to proceed.

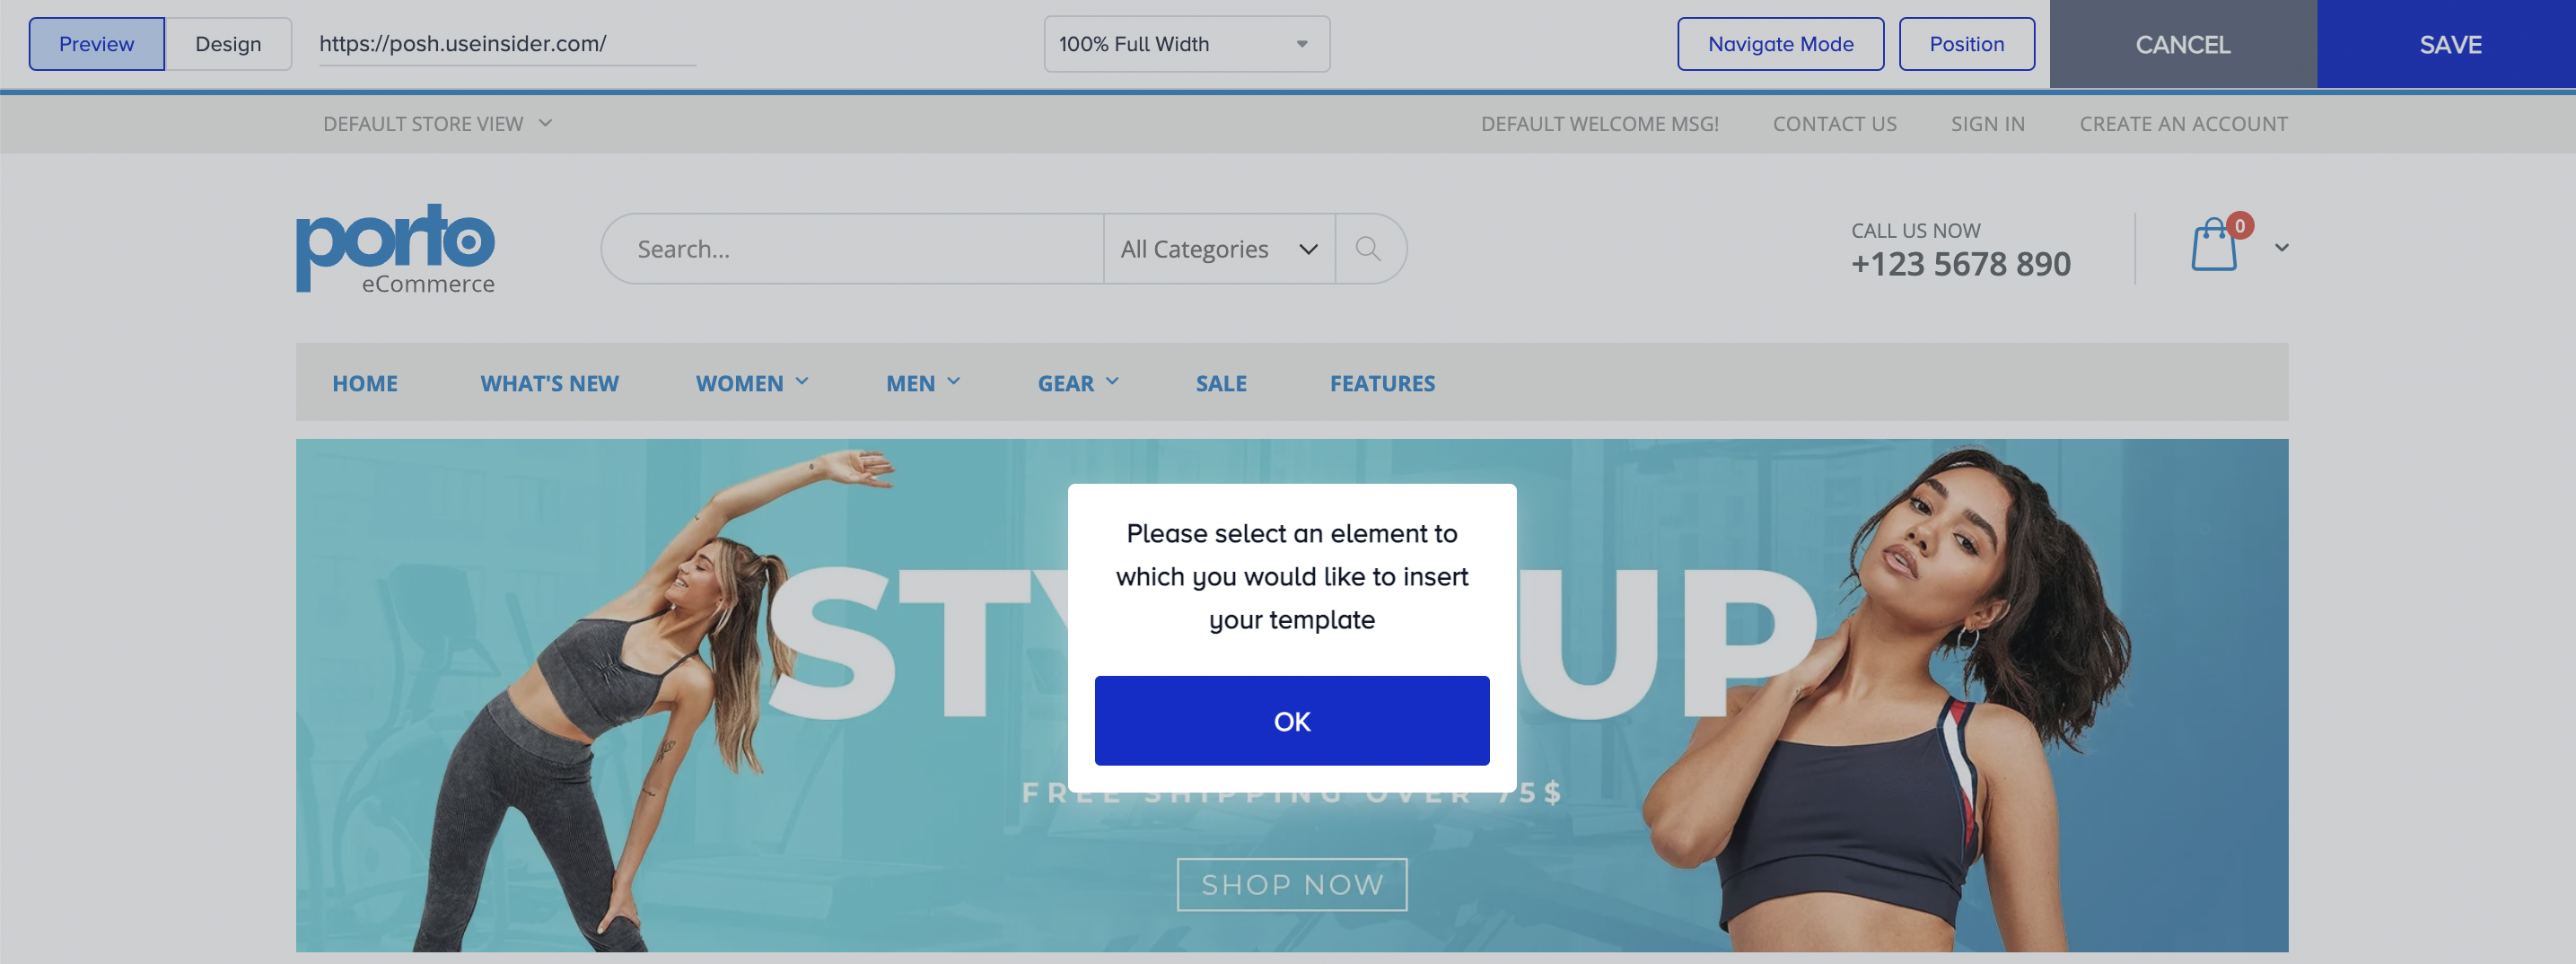
5. Since it is an inline template, you need to select an element on your website to append it in Preview mode of Action Builder.
6. When you append your template, under Settings, you can decide to keep Title and Product Attributes visible or not, and specify the product limit; you can put the limit up to 12. To encourage your users to purchase one of the suggested items, you can also add Add to Cart button element. You can change Sliding Settings too. You can add Animations to change how your template appears/disappears.
7. If you have enabled the Title toggle, you can customize its Text settings..gif)
8. If you want to stress the discounted prices, you can turn on the discount badge toggle and design it accordingly. You can enable Responsive Design or you can set the details yourself. You can change the Style of the product and Text settings.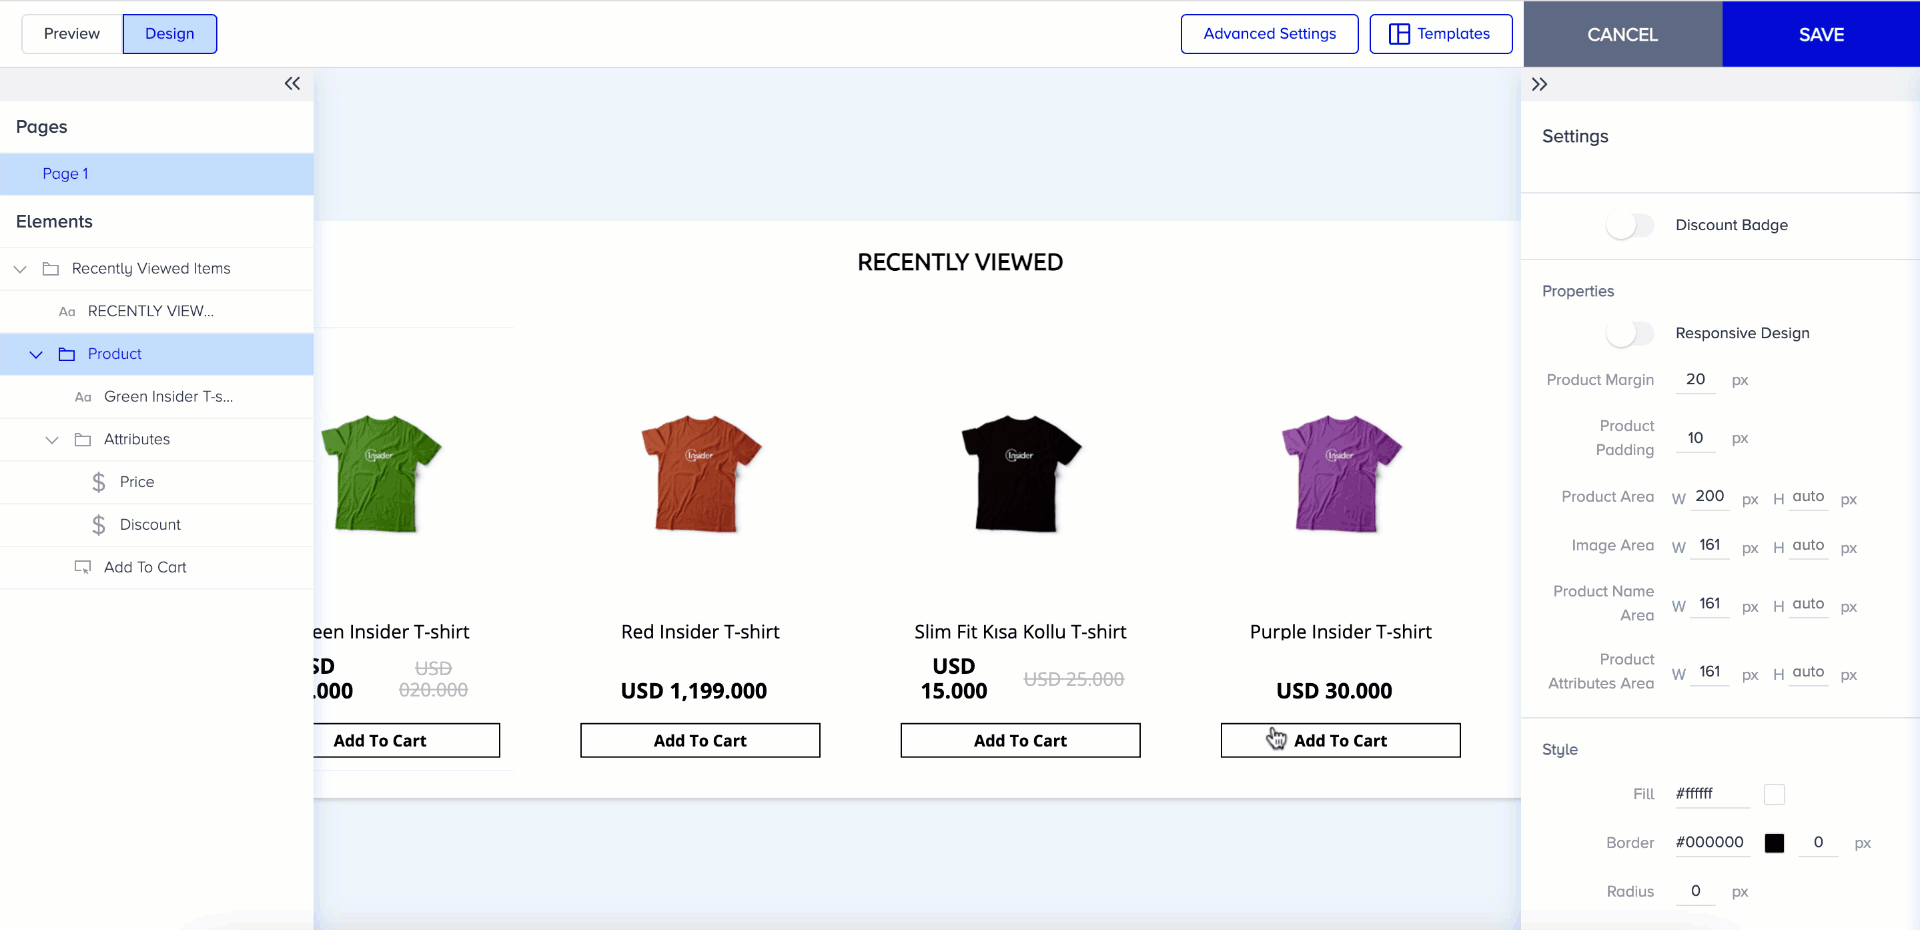
9. If you have enabled Product Attributes and Add to Cart button, you can customize them separately. 
10. Once your design is ready, Save it to proceed. Allocate the traffic of your variant in the Design step. Click Save and Continue to proceed with the rest of your campaign.
Was this article helpful?