Journey Canvas Tools
- 05 Apr 2024
- 11 Minutes to read
Journey Canvas Tools
- Updated on 05 Apr 2024
- 11 Minutes to read
Article Summary
Share feedback
Thanks for sharing your feedback!
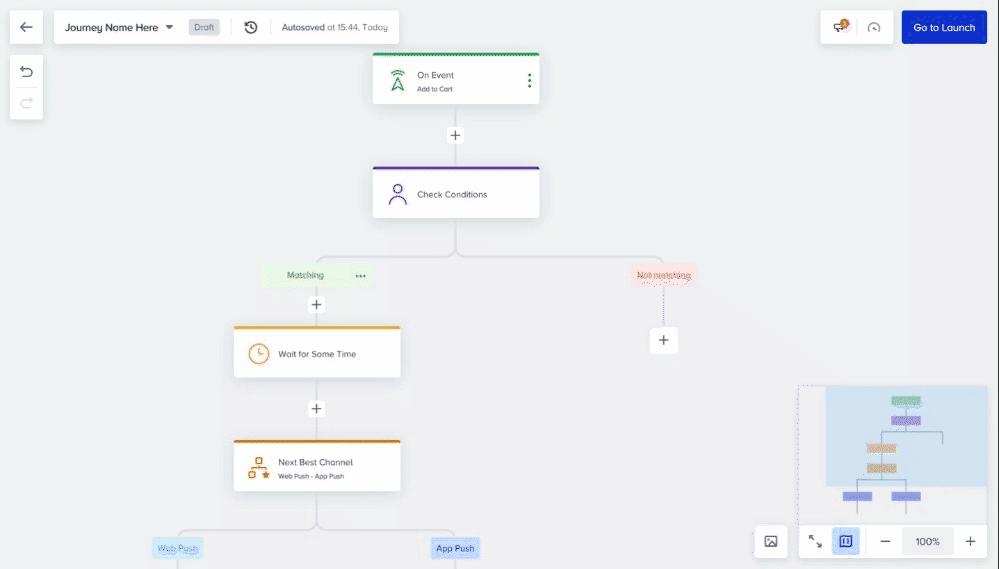
You can use various functions on the canvas while you are designing or editing your customer journey flow.
Autosaving
Autosaving helps you save all edits and changes automatically on your canvas. You can see the last date and time your journey was saved at the top bar. Thanks to autosaving, you do not need to launch your journey each time you make changes on your canvas. You can keep your journey on Draft status until you want to launch it.

Your title goes here
The content of the elements cannot be saved automatically unless you click the Save button inside the elements.
Your title goes here
If two different users are simultaneously working on the same canvas, a warning is triggered when either user edits the journey or saves elements. This functionality works both ways; if the first user makes changes, the second user receives a pop-up, and vice versa. Both users need to refresh the page to view the other's modifications, as indicated in the pop-up.
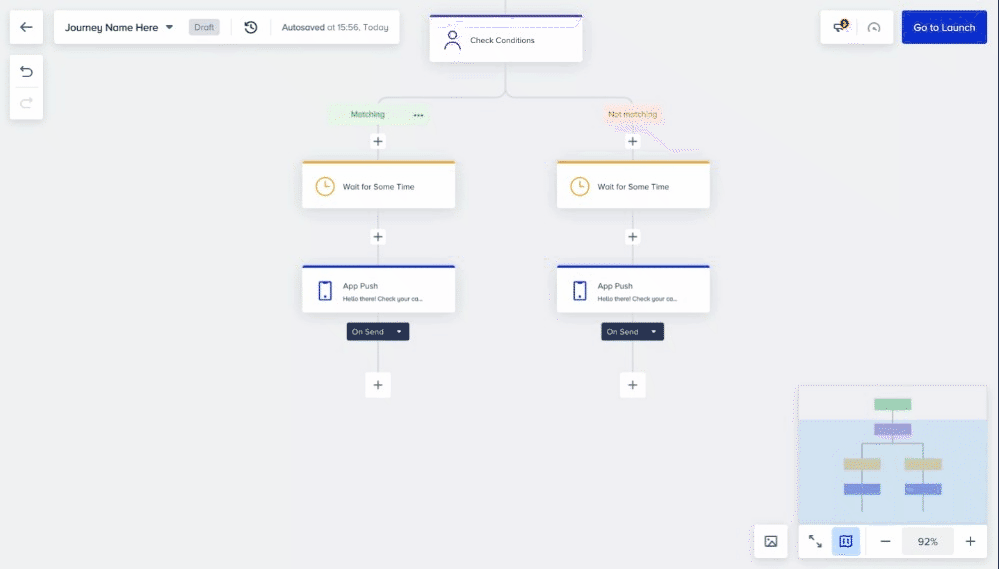
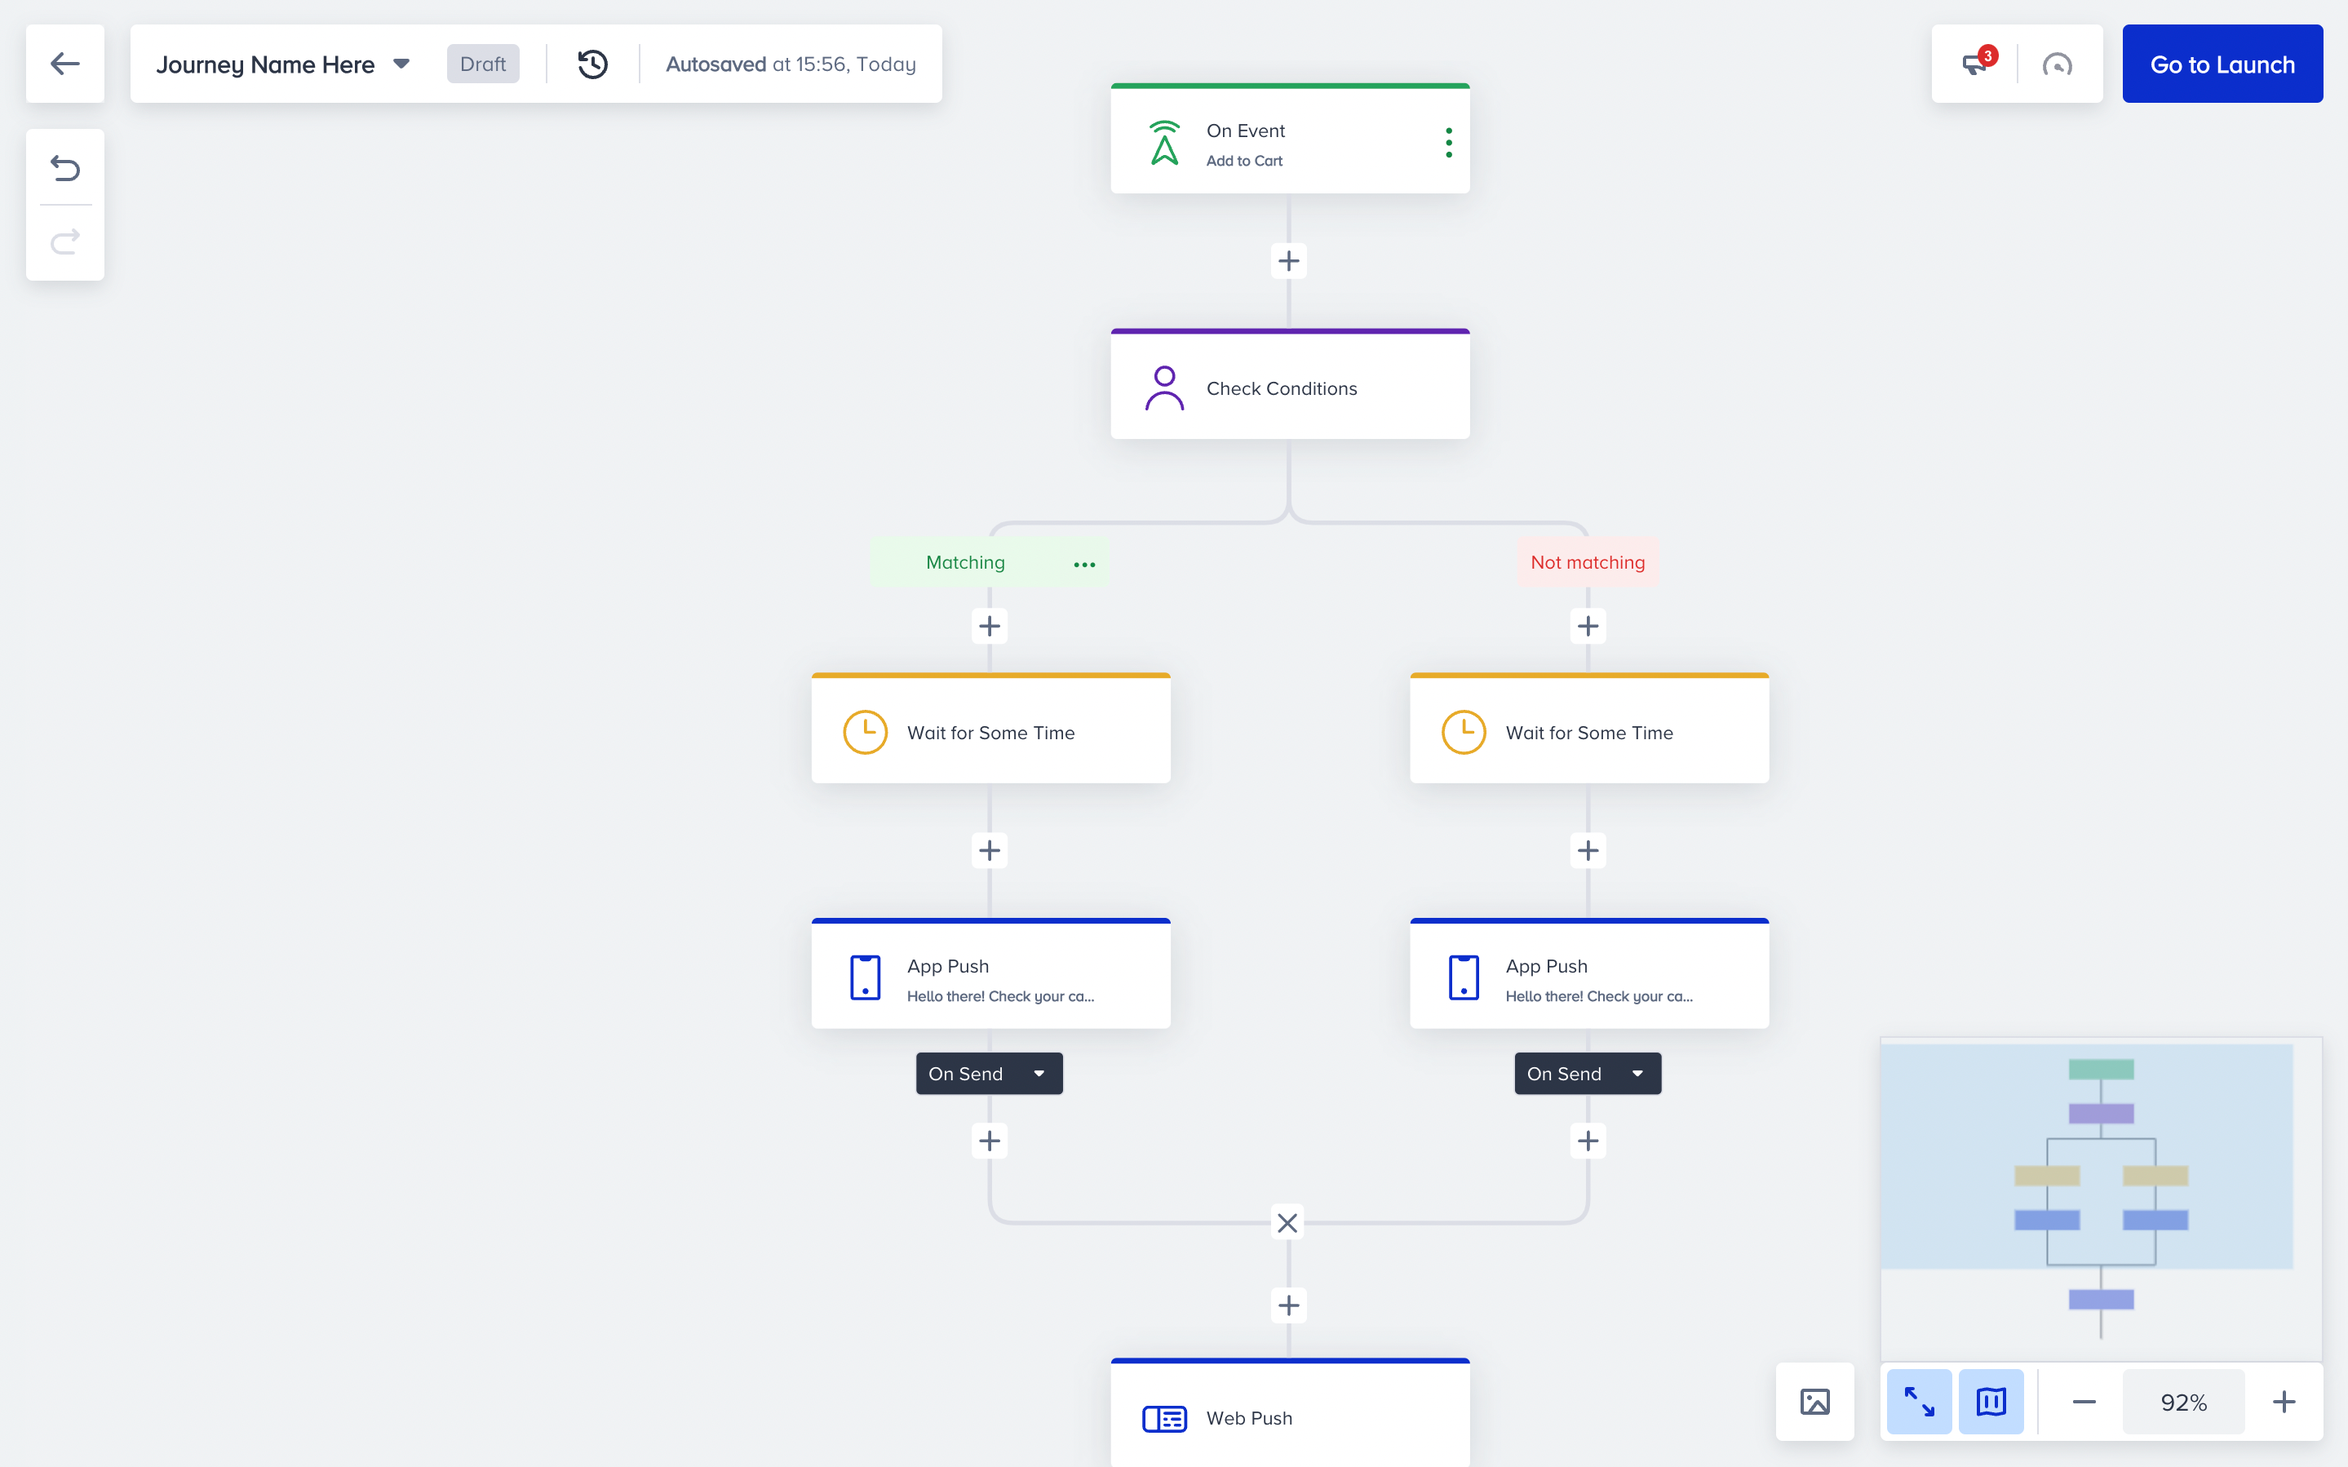
Add element between elements
Add button is placed between any two elements. When you hover on the flow connectors (rod), you will see Add button.
Your title goes here
You cannot add the same type of wait elements consecutively. You cannot add the Next Best Channel between two elements afterward.

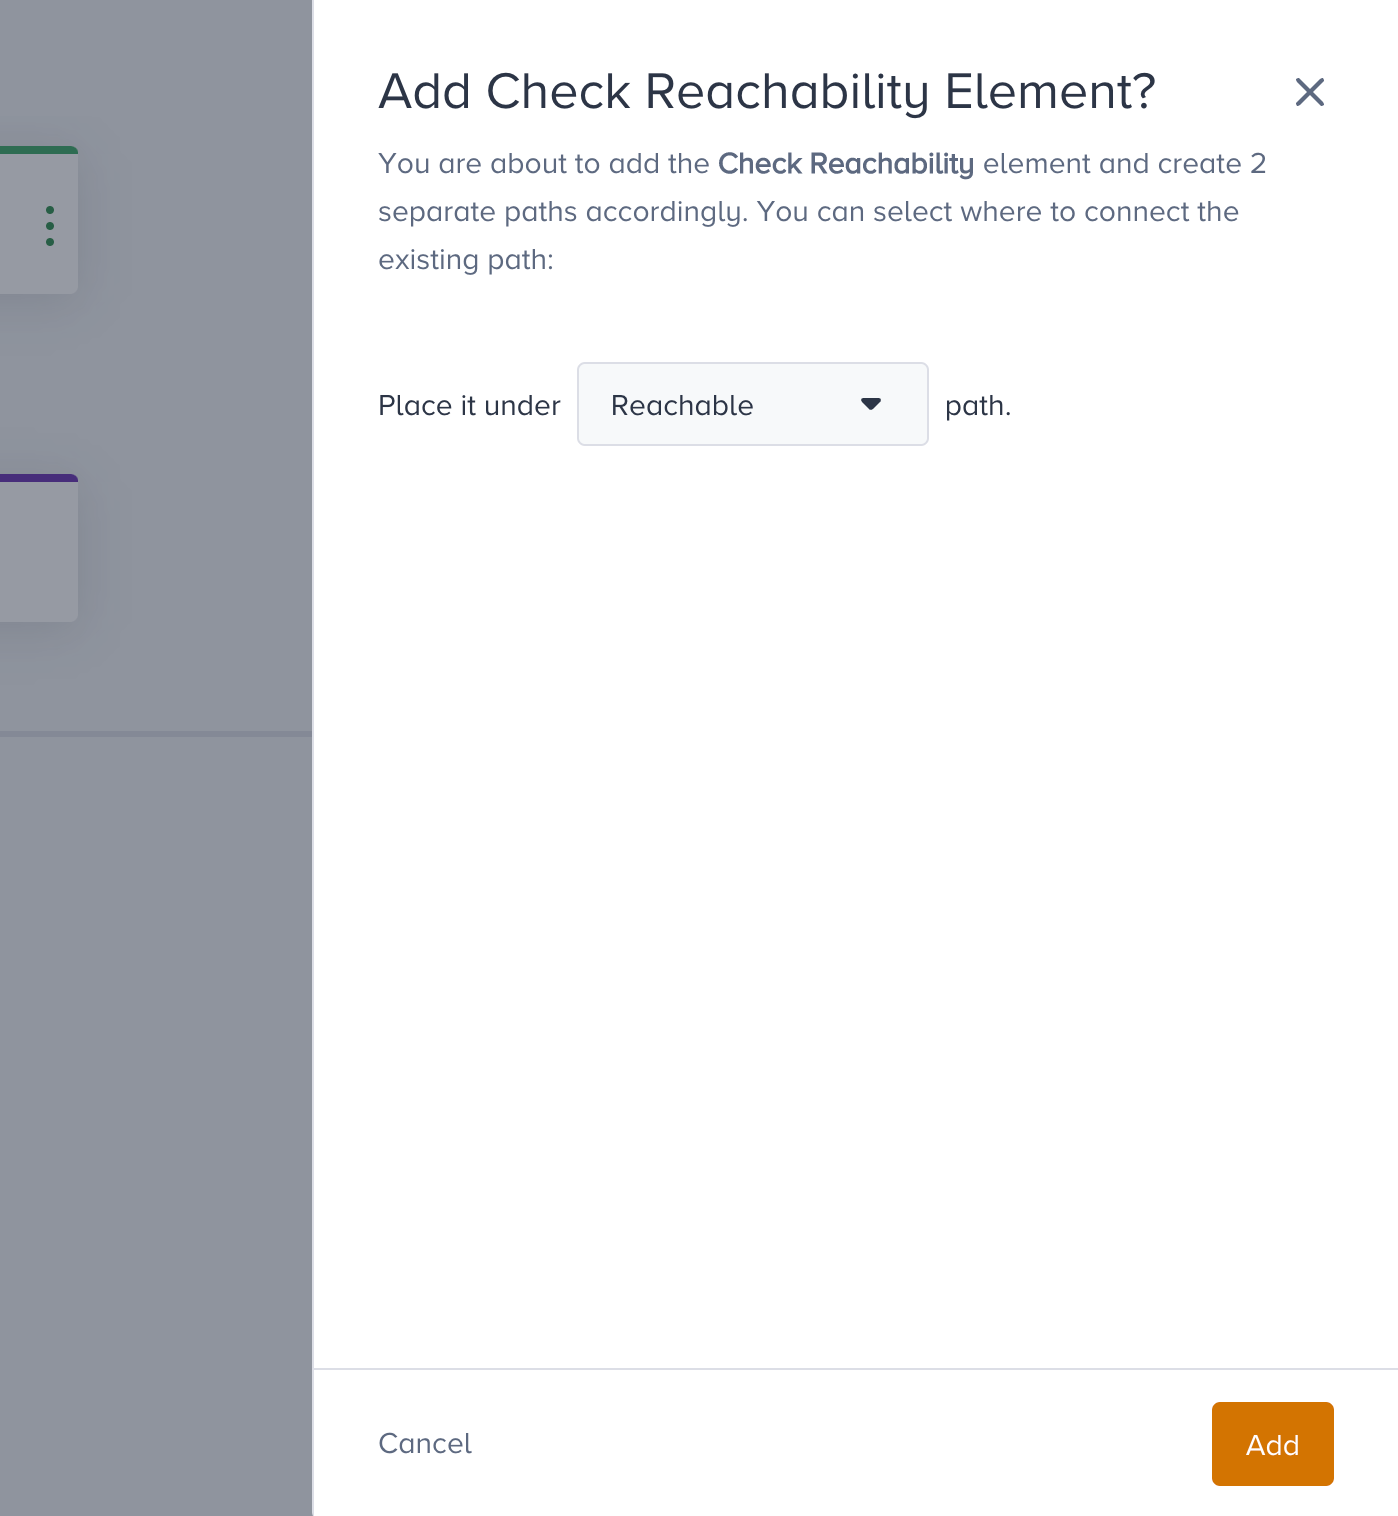
When you want to add a branchable element (Check Element, Next Best Channel, A/B Split) between two elements, it will ask you to choose the path you want to add your element on.
Copy/paste element
Copy button is placed at the top right corner of the elements. When you hover on any element, you will see Copy element among the options. Copy option enables you to copy your element and paste it to another part of the journey with its content and configured settings.
- Click the Copy button on the element that you want to copy. You will see the button saying "Copied!" to confirm that you successfully copy your element.
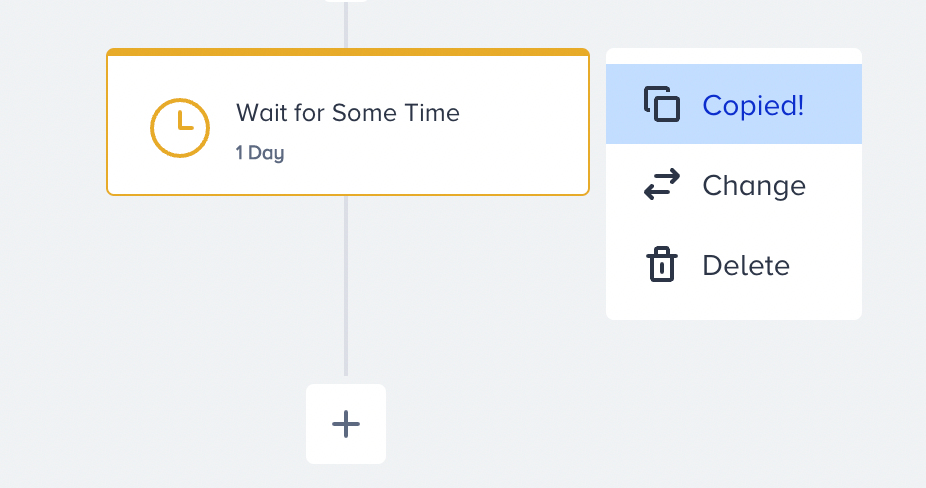
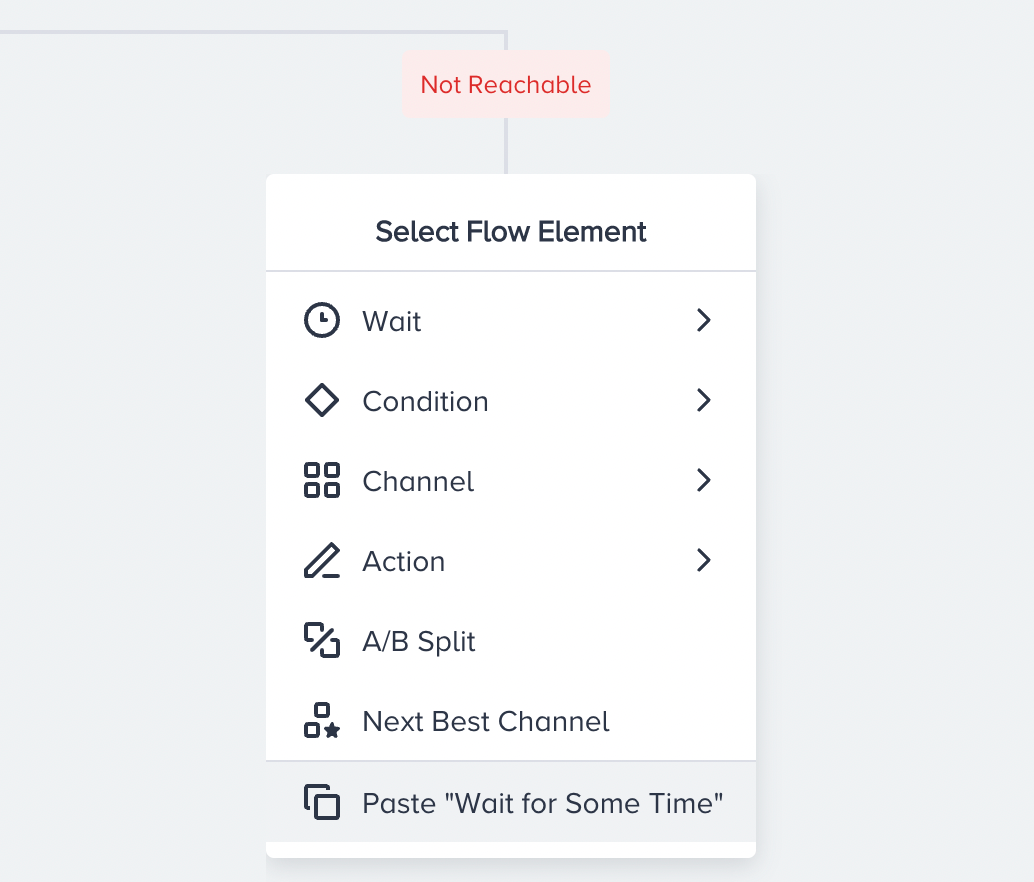
- Click the Add button where you want to paste your copied element. You will see the "Paste: {elementname}".
- Click "Paste: {elementname}" to paste your element.


your title goes here
You cannot copy and paste the Next Best Channel element.
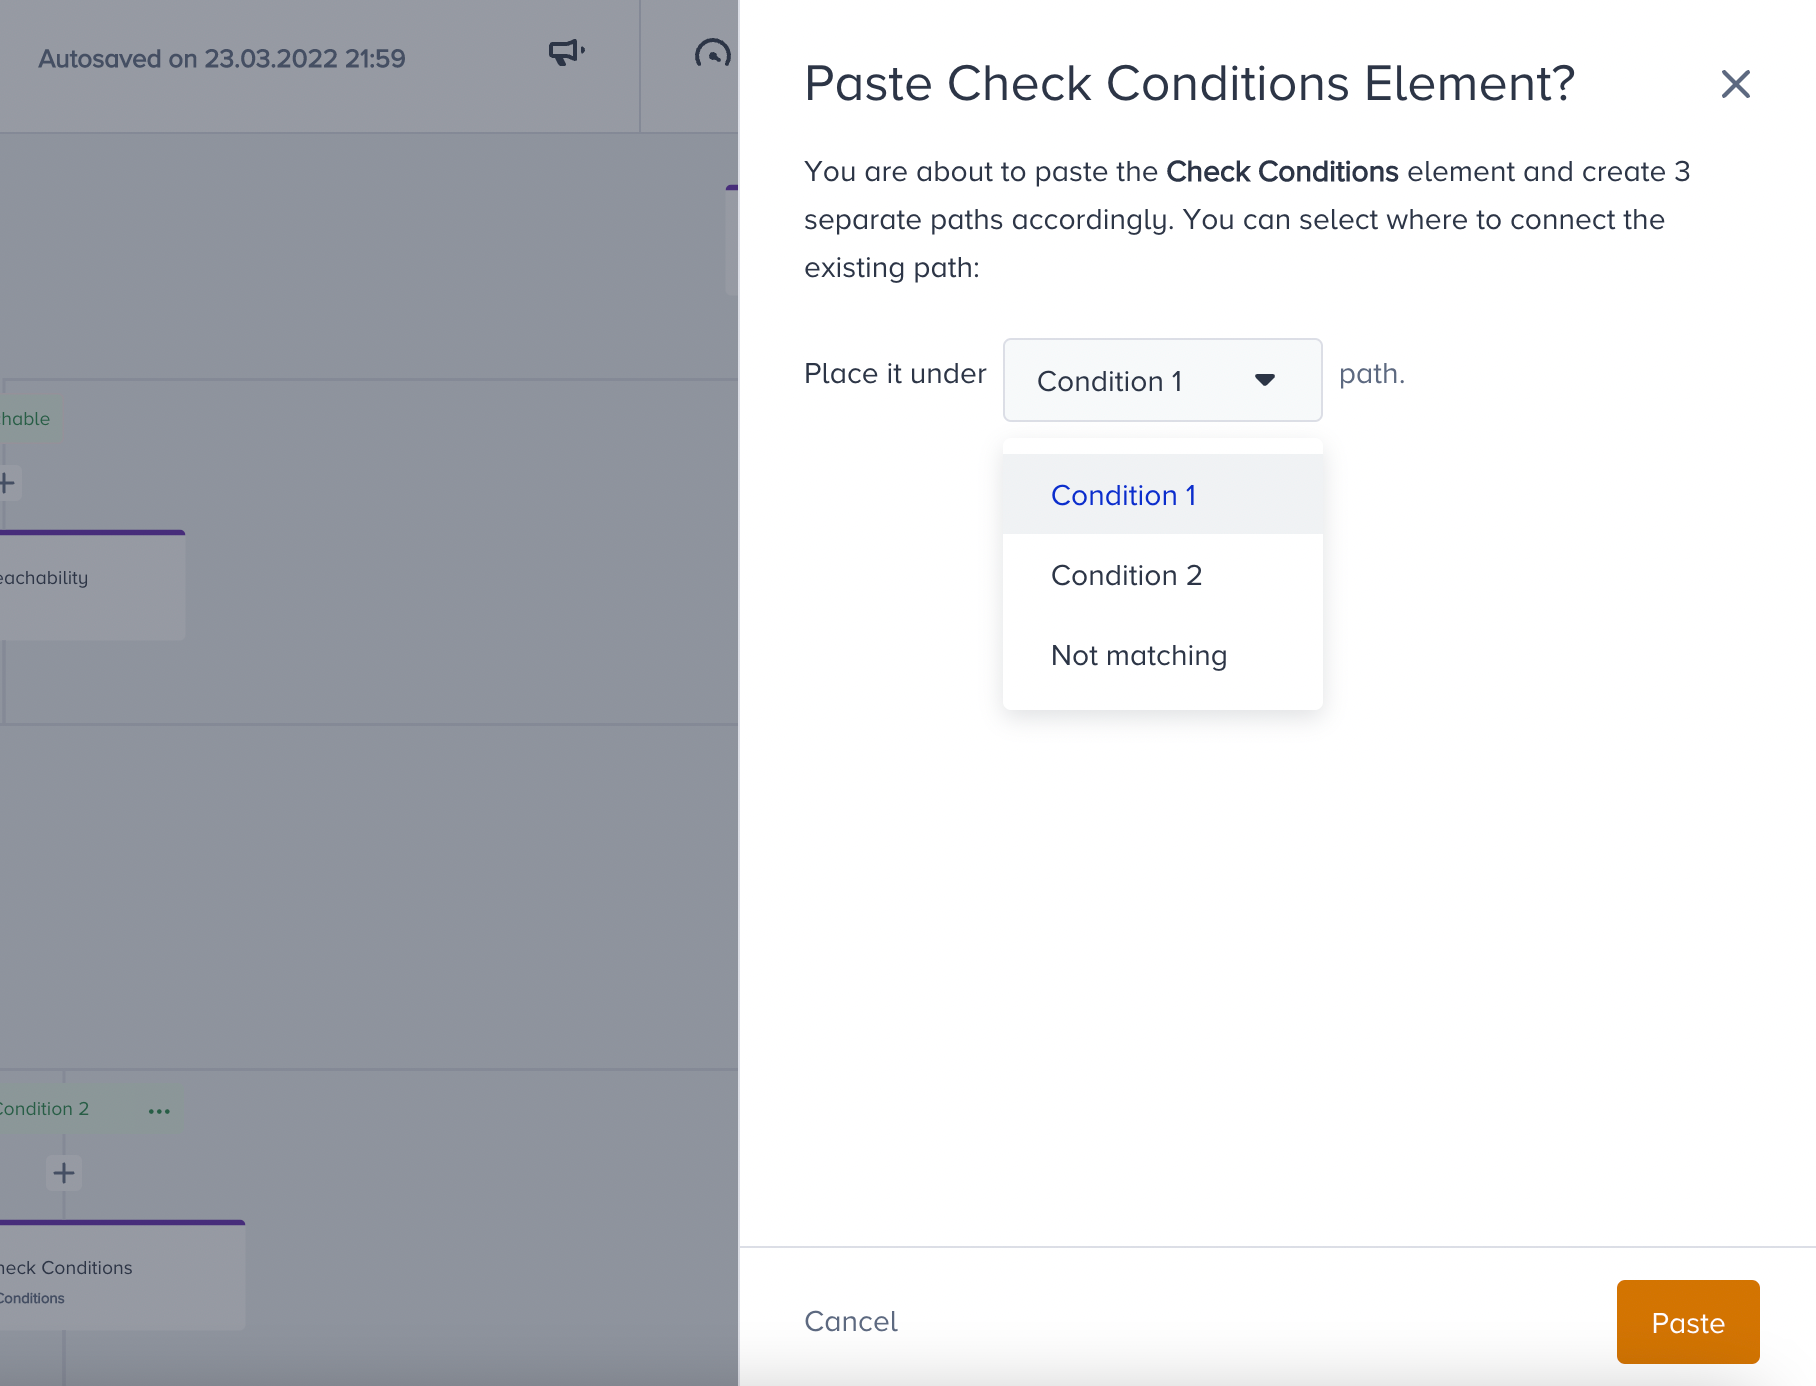
When you want to paste a branchable element (Check Element, A/B Split) between two elements, it will ask you to choose the path you want to paste your element on.
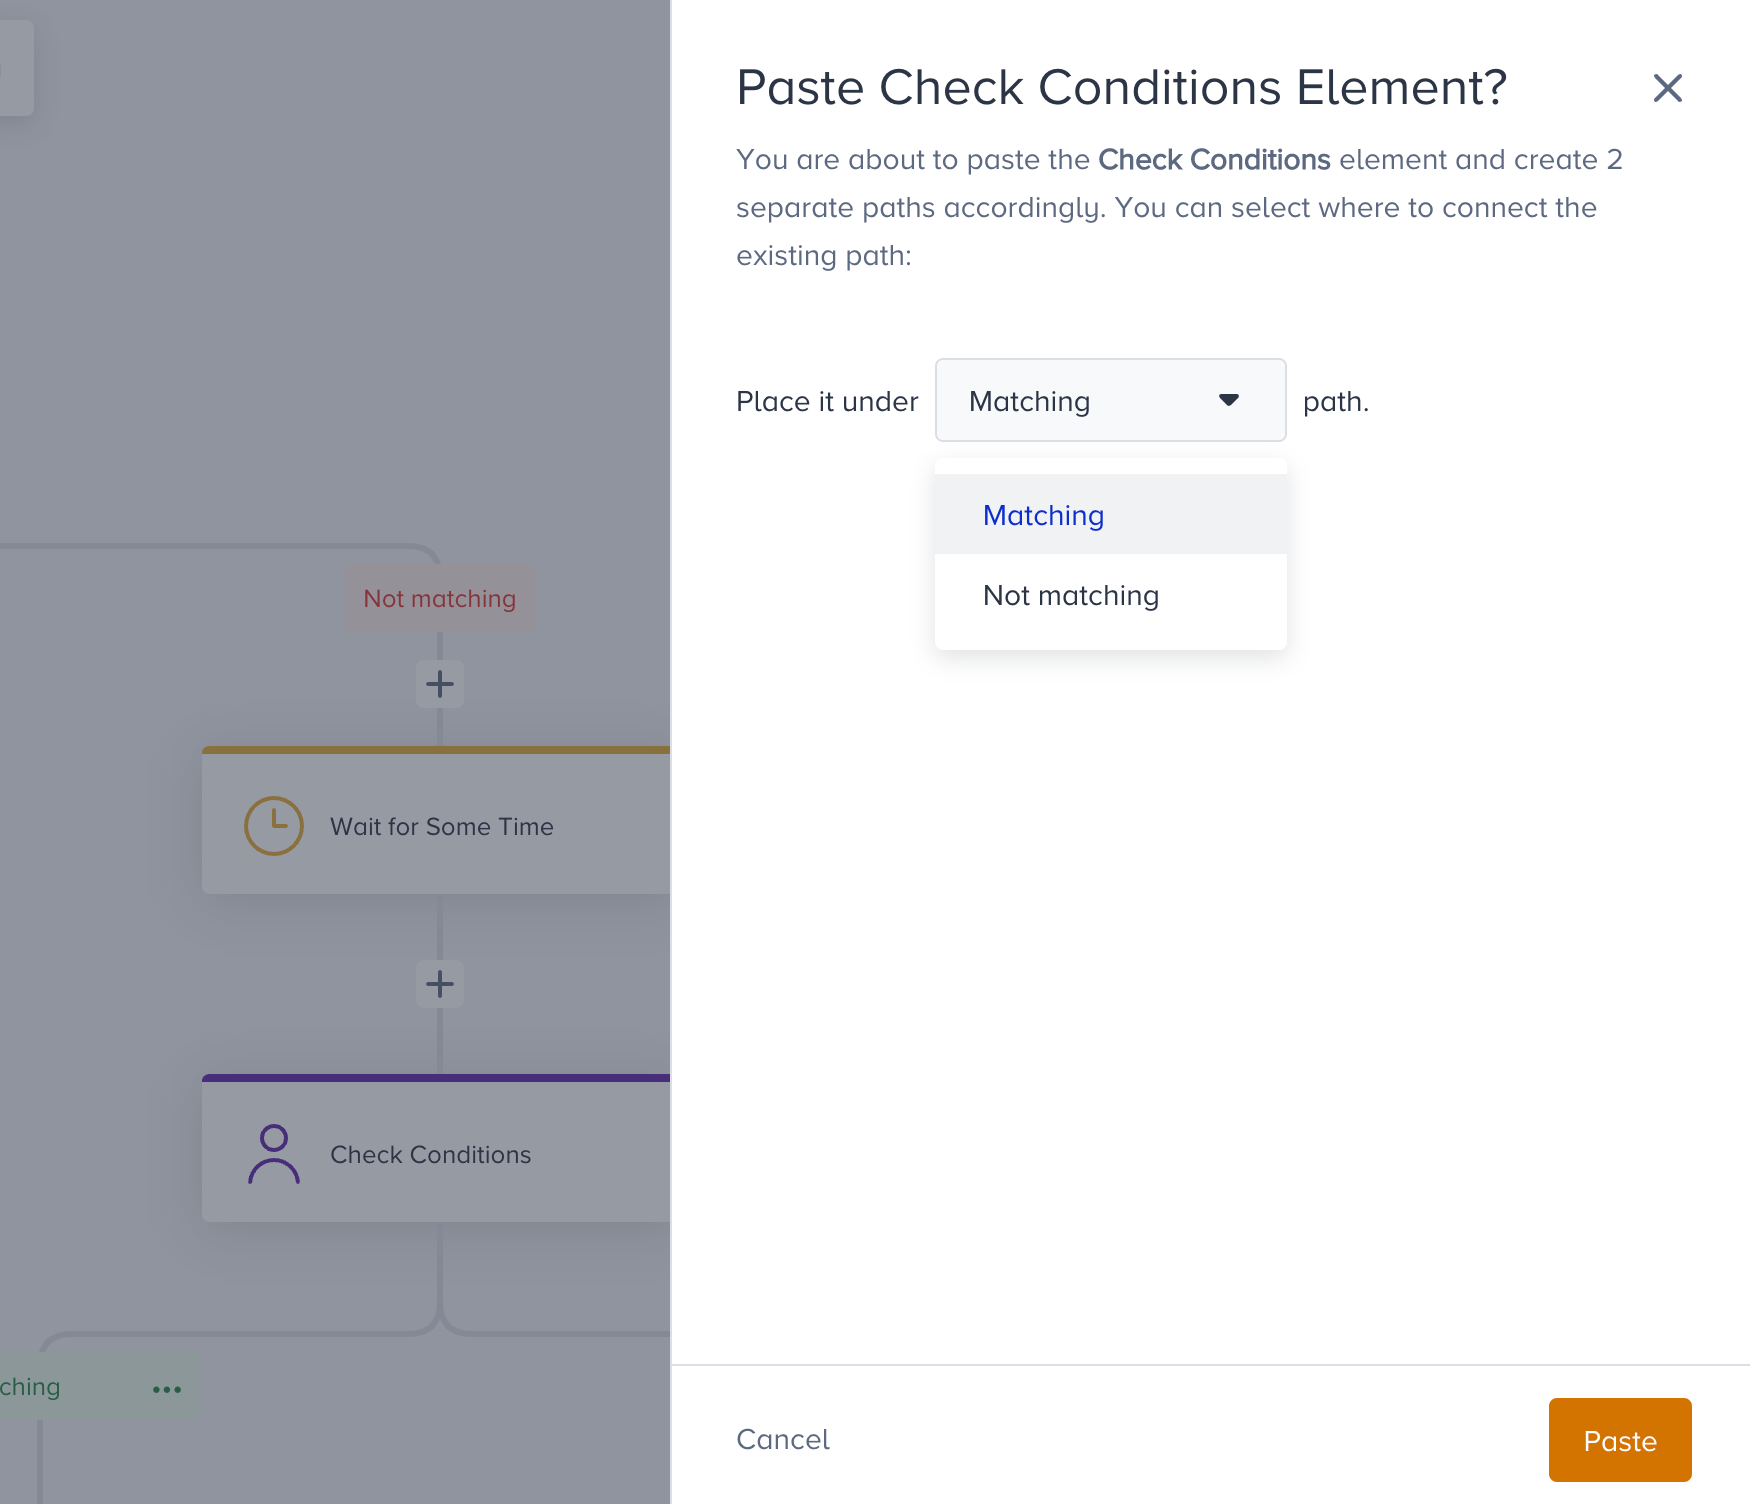
When you want to paste a branchable element with more than 2 paths (Check Conditions, Check Reachability, A/B Split) between two elements, it will ask you to choose the path you want to paste your element on.
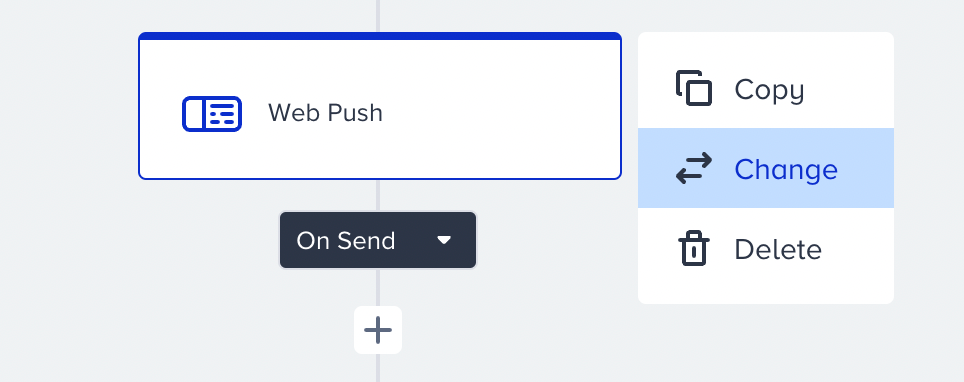
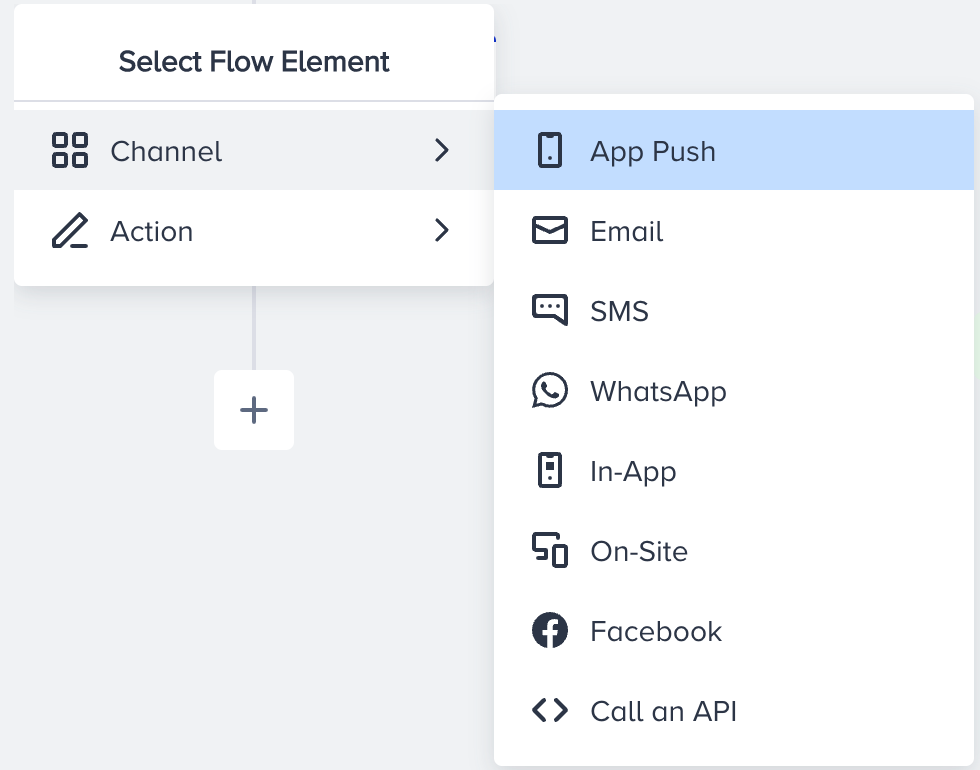
Change Element
Change button is placed at the top right corner of the elements. When you hover on any element, you will see Change element among the options. Change option enables you to replace your element with the same element types without needing to delete or add again.
For example, channels can be changed to other channels, and also to action elements. Check elements can be changed to check elements. Wait element can be changed with wait elements.
your title goes here
A/B Split and Next Best Channel cannot be changed to the other elements since they are a unique type of elements.
When you want to change multi-branching check elements with more than 2 paths, it asks you to choose the path you want to keep after changing the check element.
your title goes here
Not Matching and Not Reachable paths are always kept.
.png)
Delete Element
Delete button is placed at the top right corner of the elements. When you hover on any element, you will see Delete element among the options. Delete option enables you to delete your element from the flow.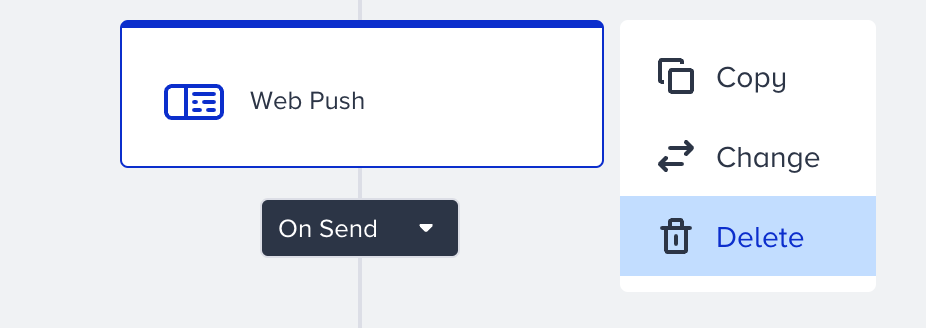
When you want to delete a branchable element (Check Element, Next Best Channel, A/B Split), it will ask you to decide which path that is connected to the element you want to delete should be kept.

Reconnect Paths
After branching flows in your journeys, you can connect them to continue with one path. This way, you can avoid creating the same messages and steps again eliminate the manual work. Also, you can read your journey easily as you will have a smaller journey. You can reconnect your journeys in two methods:
- Connect to a single path
- Merge all
Undo/Redo
Undo and Redo buttons are located on the top left corner of the canvas. You can simply click on these buttons to undo or redo your changes on the canvas. You can do unlimited undo or redo on the same page.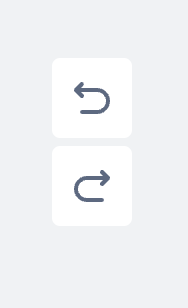
Zoom In/Out
Zoom In/Out buttons are located in the bottom right corner of the canvas. These buttons help you zoom in and out on journey paths and elements. The button in the middle resets the zoom in/out, and the canvas goes back to its default size.
Instead of these buttons, you can pinch out to zoom in or pinch in to zoom out. Also, the zoom in/out function can be performed by the (ctrl)control^ + mouse wheel action. Navigating around canvas can be performed with a two-finger action on the mousepad as well.
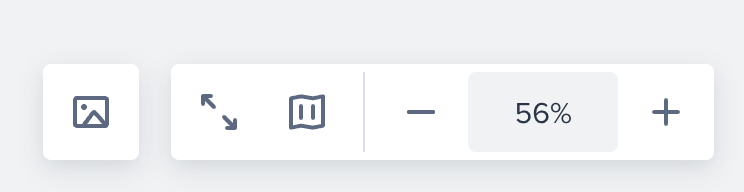
Minimap
The minimap button is located on the bottom right corner of the canvas next to the zoom-in/out buttons. Minimap helps you navigate around in canvas when your journey has a wide and long anatomy.
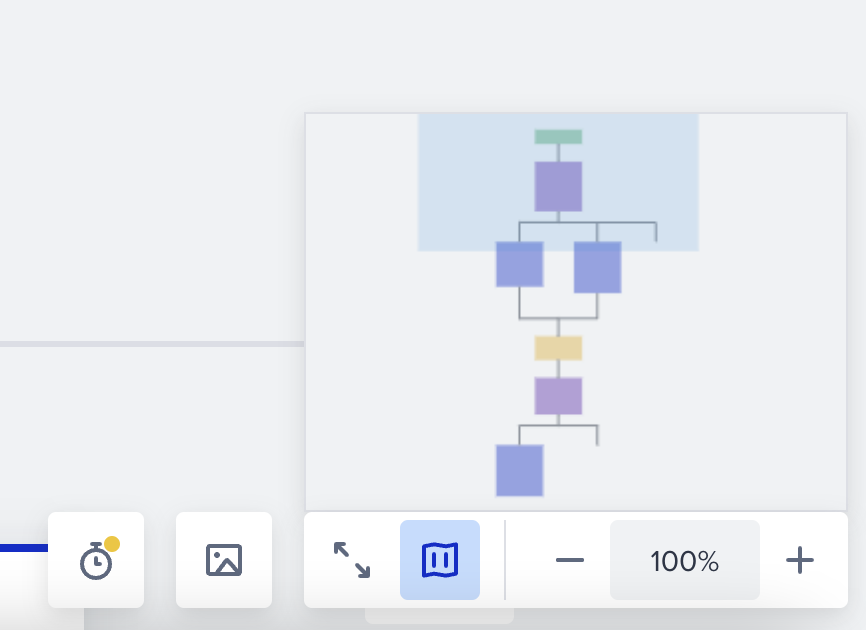
You can drag the blue box in minimap via your mouse to navigate around. The blue box basically shows the area that your screen covers.
Different type of elements are colored with different colors as follows:
- Green for starter elements
- Yellow for wait elements
- Purple for check elements
- Blue for channel elements
- Orange for Next Best Channel element
- Red for A/B Split element.
Fullscreen Mode
The fullscreen button is located in the bottom right corner of the canvas next to the minimap button. This button enables fullscreen mode for canvas so that you can have a wider space to edit your journeys. You can also activate the fullscreen mode with (ctrl)control^ + F combination.
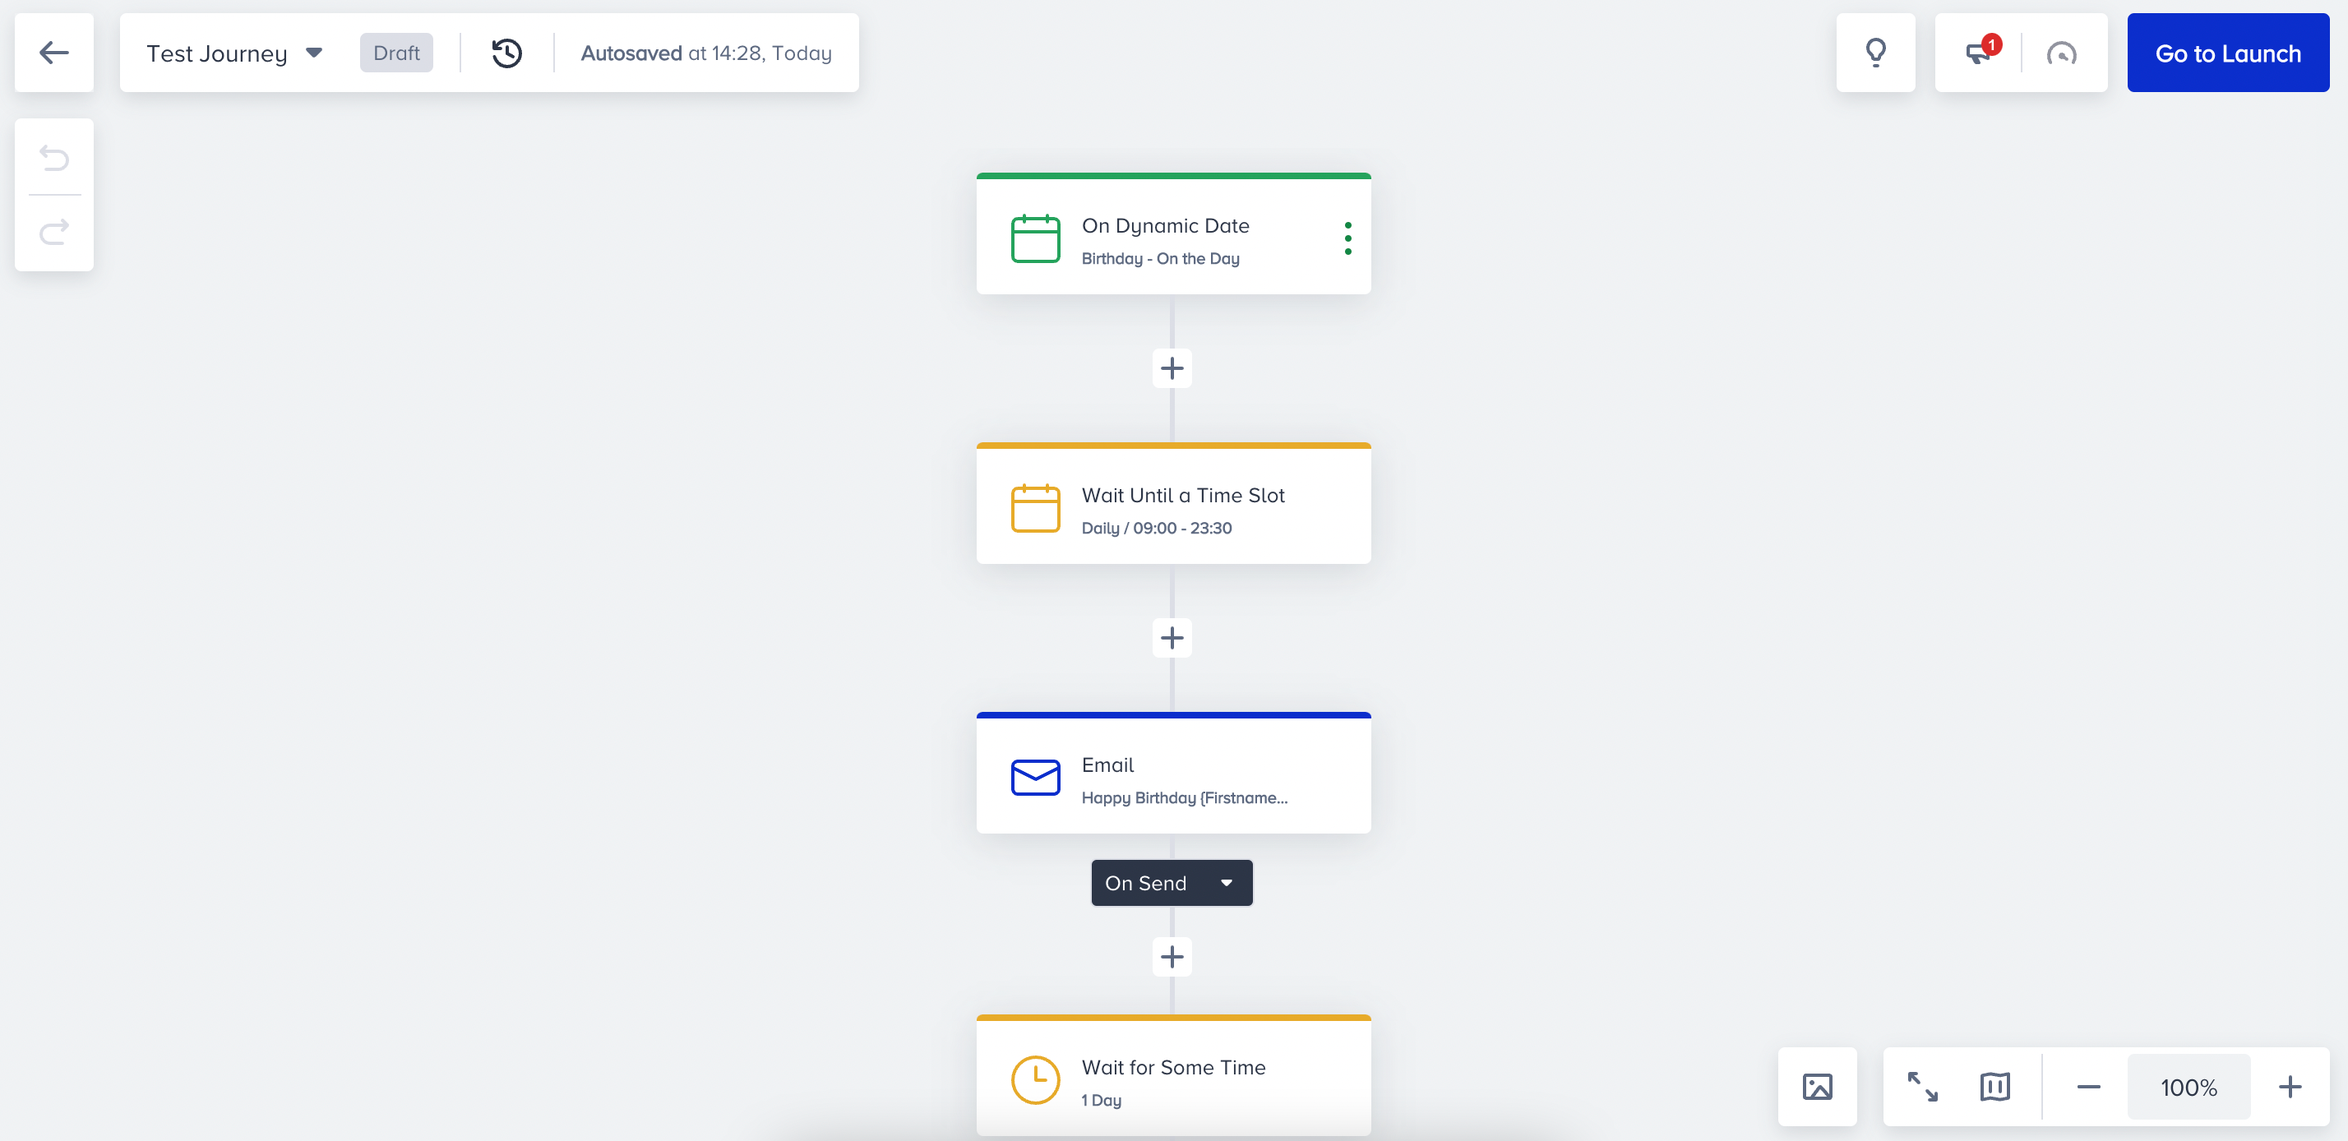
Starter Preview
You can preview the starter conditions and setup on the canvas by clicking the Preview (3 dots) button on the starter element box.
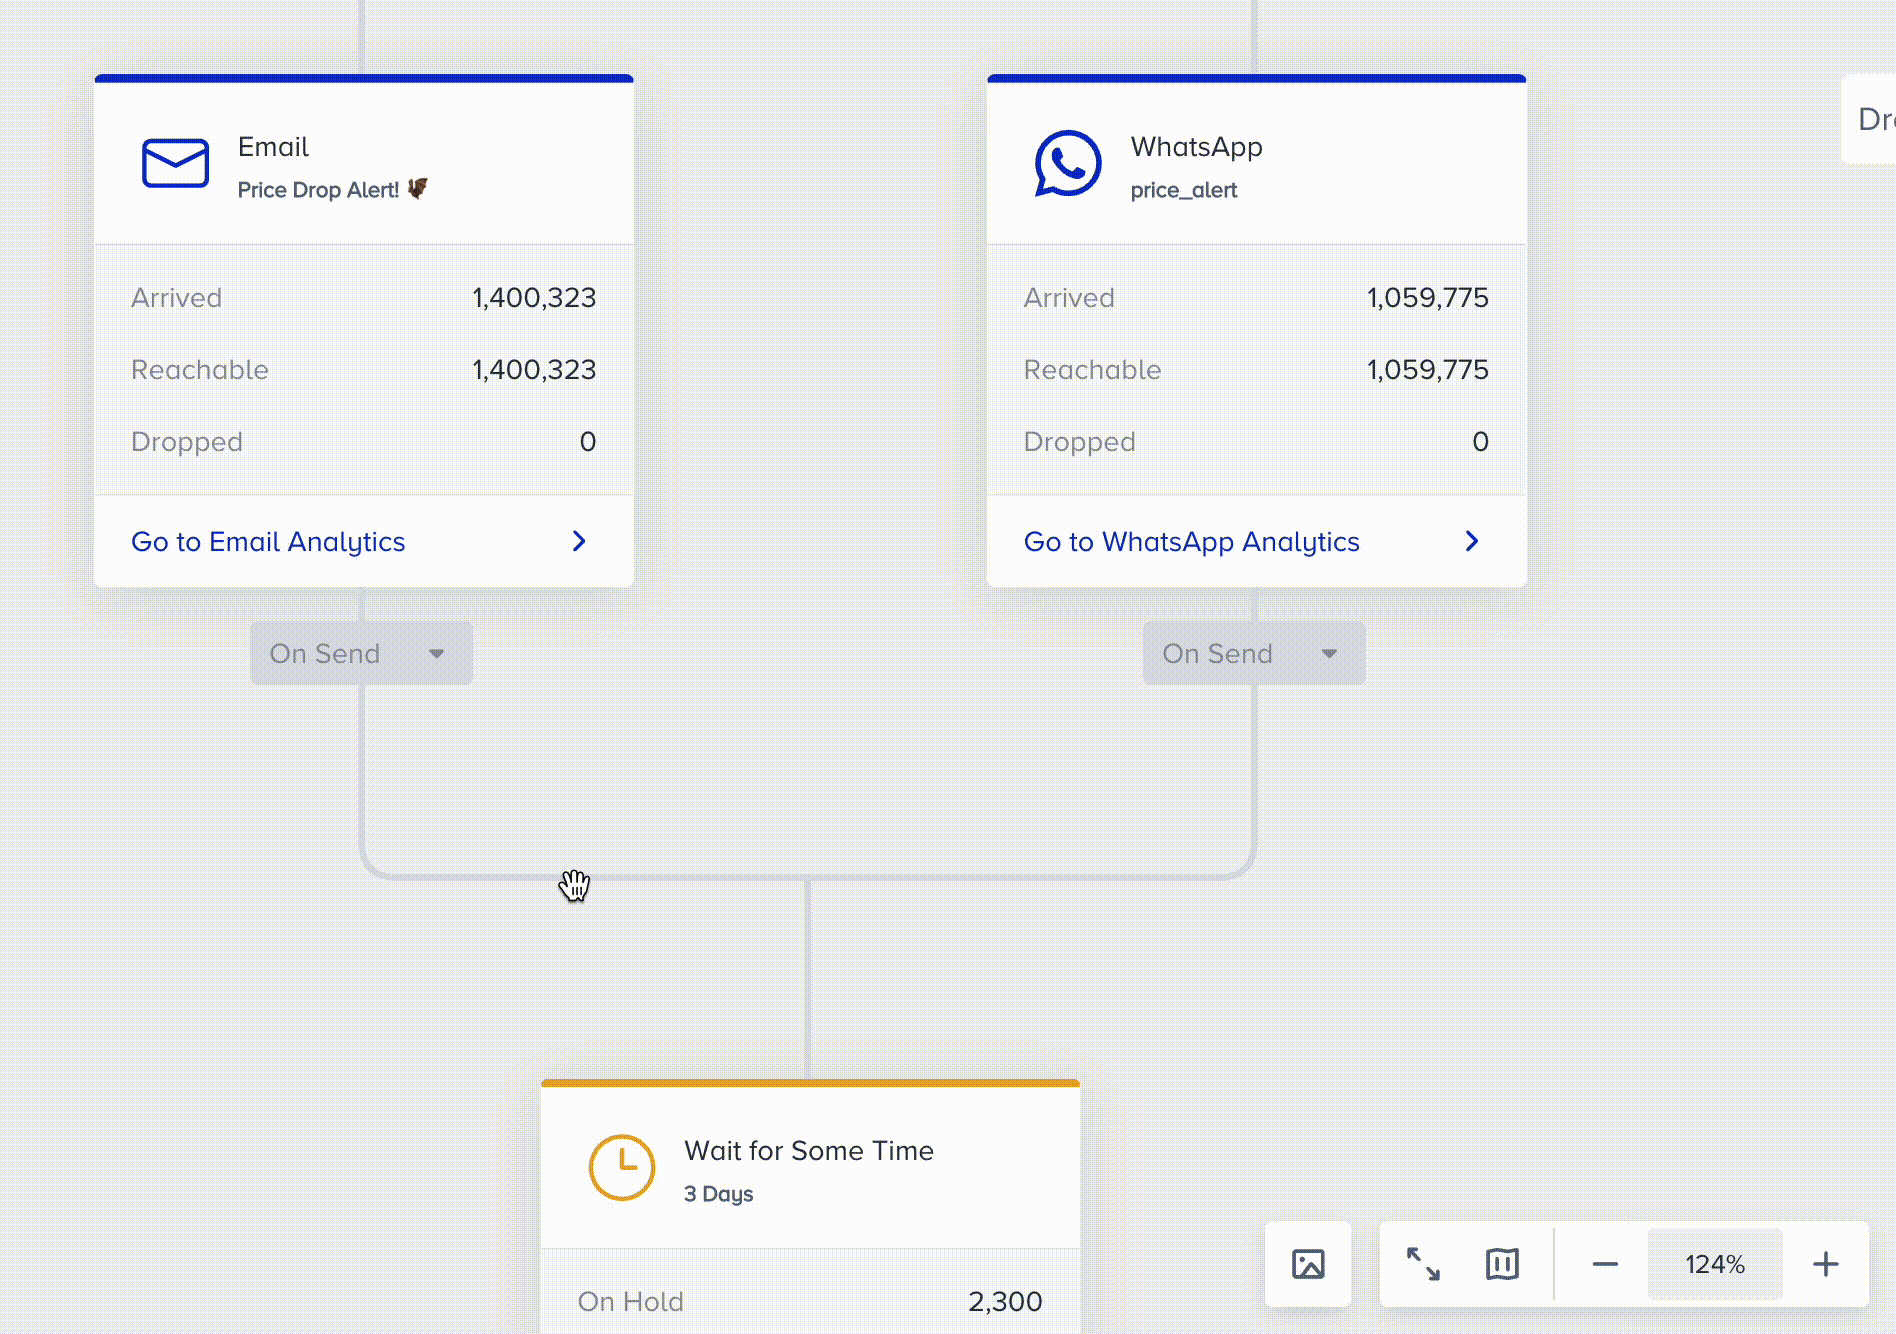
Channel Preview
You can preview the channel content on the canvas by clicking the Preview button located below the zoom in/out buttons at the bottom right corner of the canvas. Once you click the Channel Preview button, you will see the message contents on your channels.
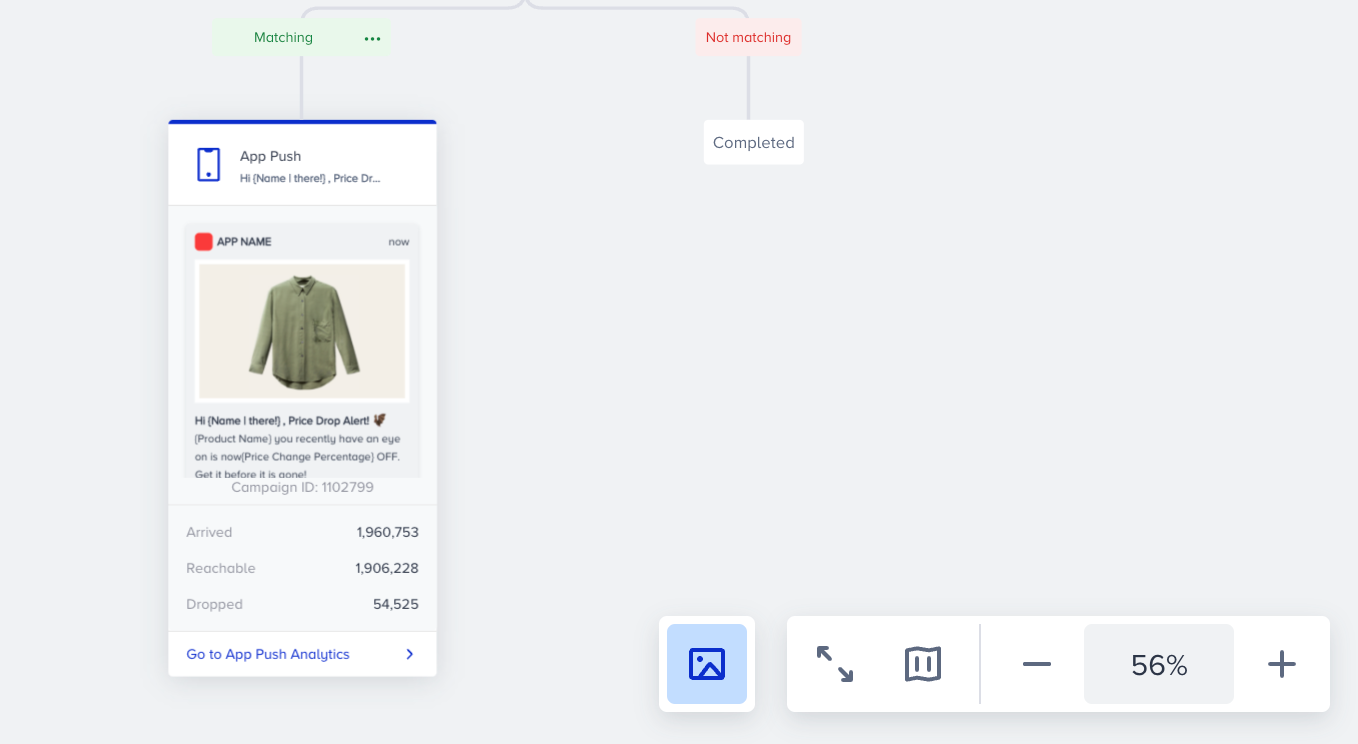
For Onsite, In-App and Email channel previews, you can zoom in and zoom out by pinching so that you can easily control your content without opening the inner page of the element.
Check Conditions Preview
You can preview the conditions on the canvas by clicking the Preview button on the path name (label) when you save the Check Conditions.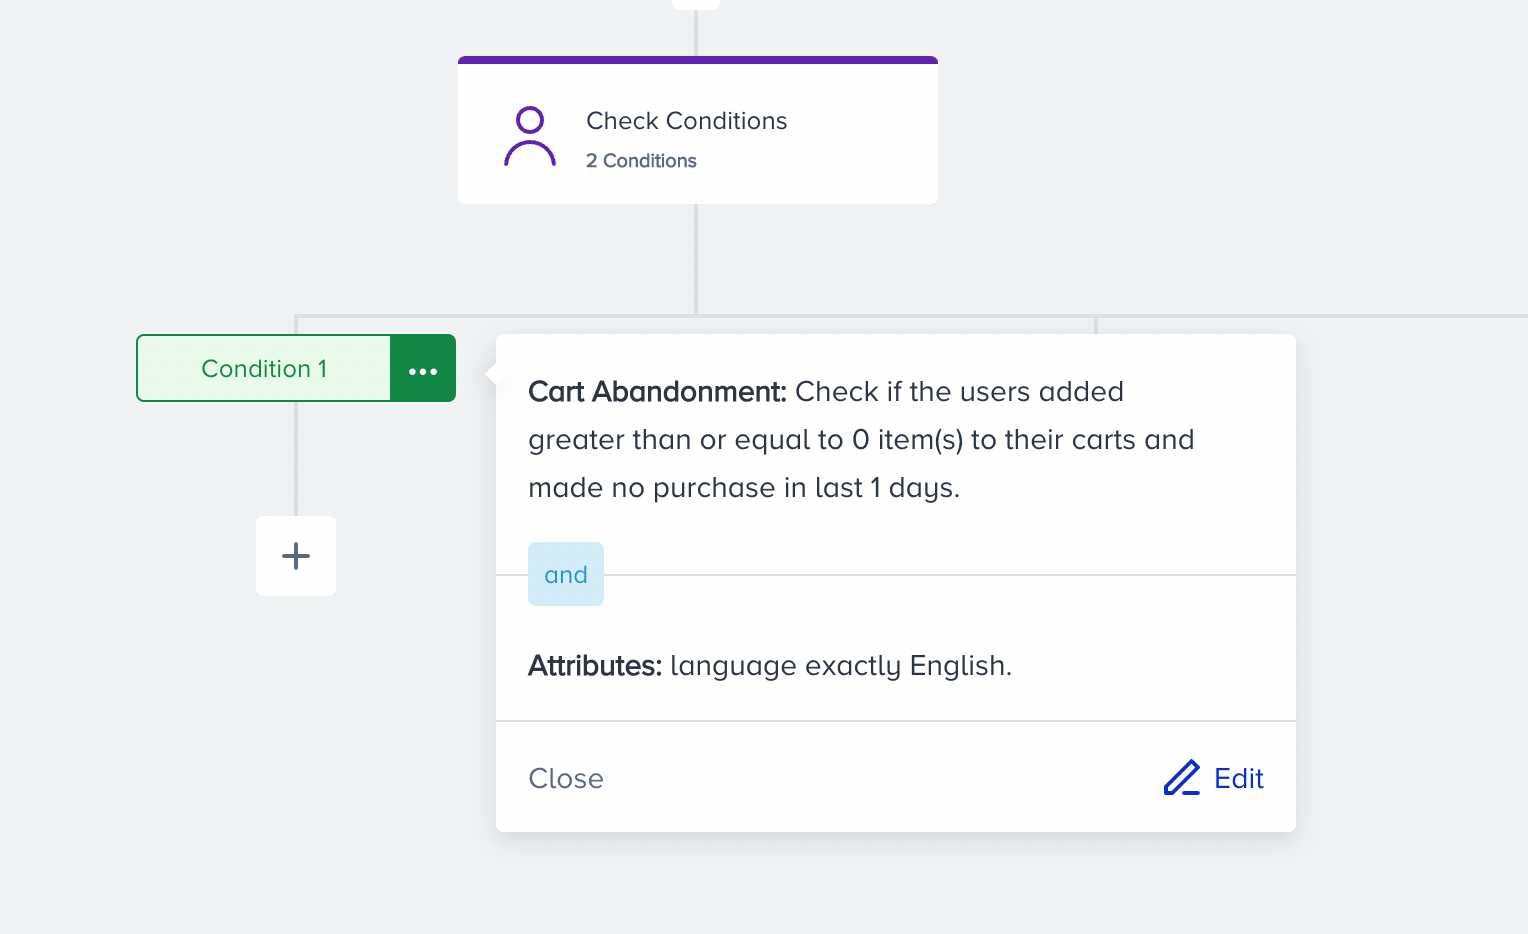
Version History
Version History helps you follow up on certain events on your journeys (e.g. adding/removing/changing elements, changing element parameters, and configurations).
You can find out logs for the creating, changing, and deleting actions performed by users in detail. The detailed information contains the following:
- The performed action
- The affected elements
- The date the action is performed in “DD MMMM YYYY, HH:MM” format
- The user who performed the action with their email or name (if available)
Your title goes here
If you perform an action, you will see your name displayed. If your name is not available, your email address will be displayed. If an Insider user performs an action, you will see this action performed as Insider Staff / Staff name.
In the following cases, you will see the action performed by Insider Architect System.
* Dry run status switched to passive after 2 days
* Sunset status switched to passive after 6 months of sunset
* Journey paused by the system because of coupons expiring or running out
In the following cases, you will see the action performed by Insider Architect System.
* Dry run status switched to passive after 2 days
* Sunset status switched to passive after 6 months of sunset
* Journey paused by the system because of coupons expiring or running out
Your title goes here
You can track the latest 30 days of actions. Logs older than 30 days will be permanently deleted.
To view version history:
1. Click the Version History button..png)
2. The history logs will be displayed in a side modal on the right hand of the screen.
3. Scroll down to click the Load More button to see more logs if available.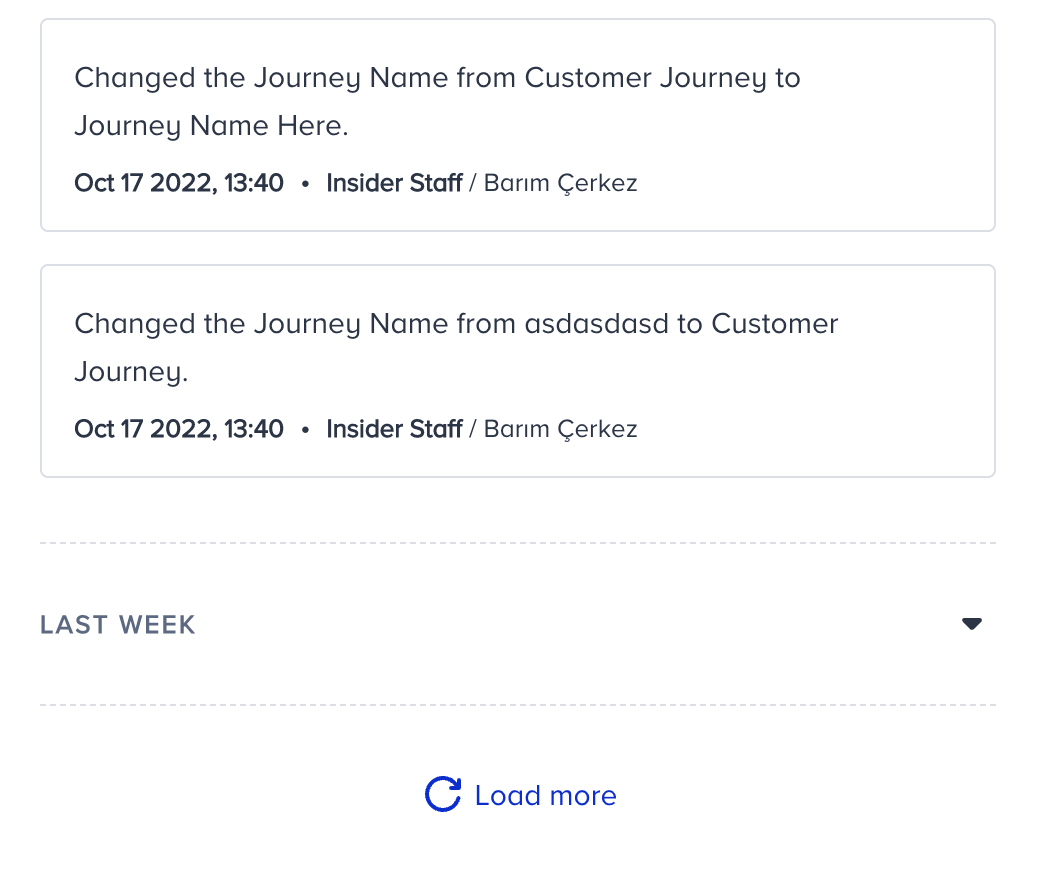
4. Click the dropdown icon to view more details about the affected element. Click the Show on Canvas button to focus on the affected element.
Your title goes here
If the element is deleted afterwards, this function will not be available.
Your title goes here
Version History displays logs for the last 30 days.
5. To find your logs easily, use the filtering options to filter the actions based on their action type, element type, user, and date.

6. To view the renamed elements on canvas like channels, check the Show only the renamed items box.
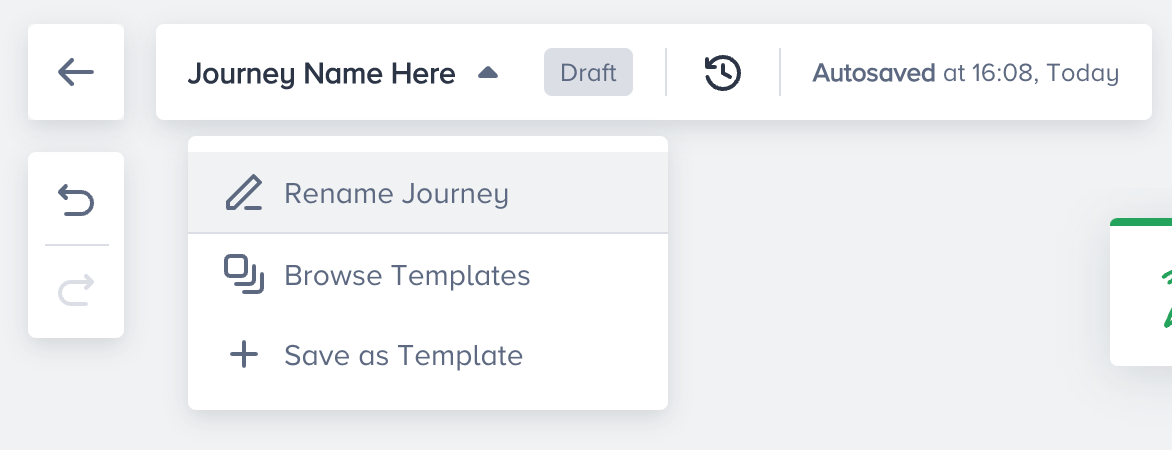
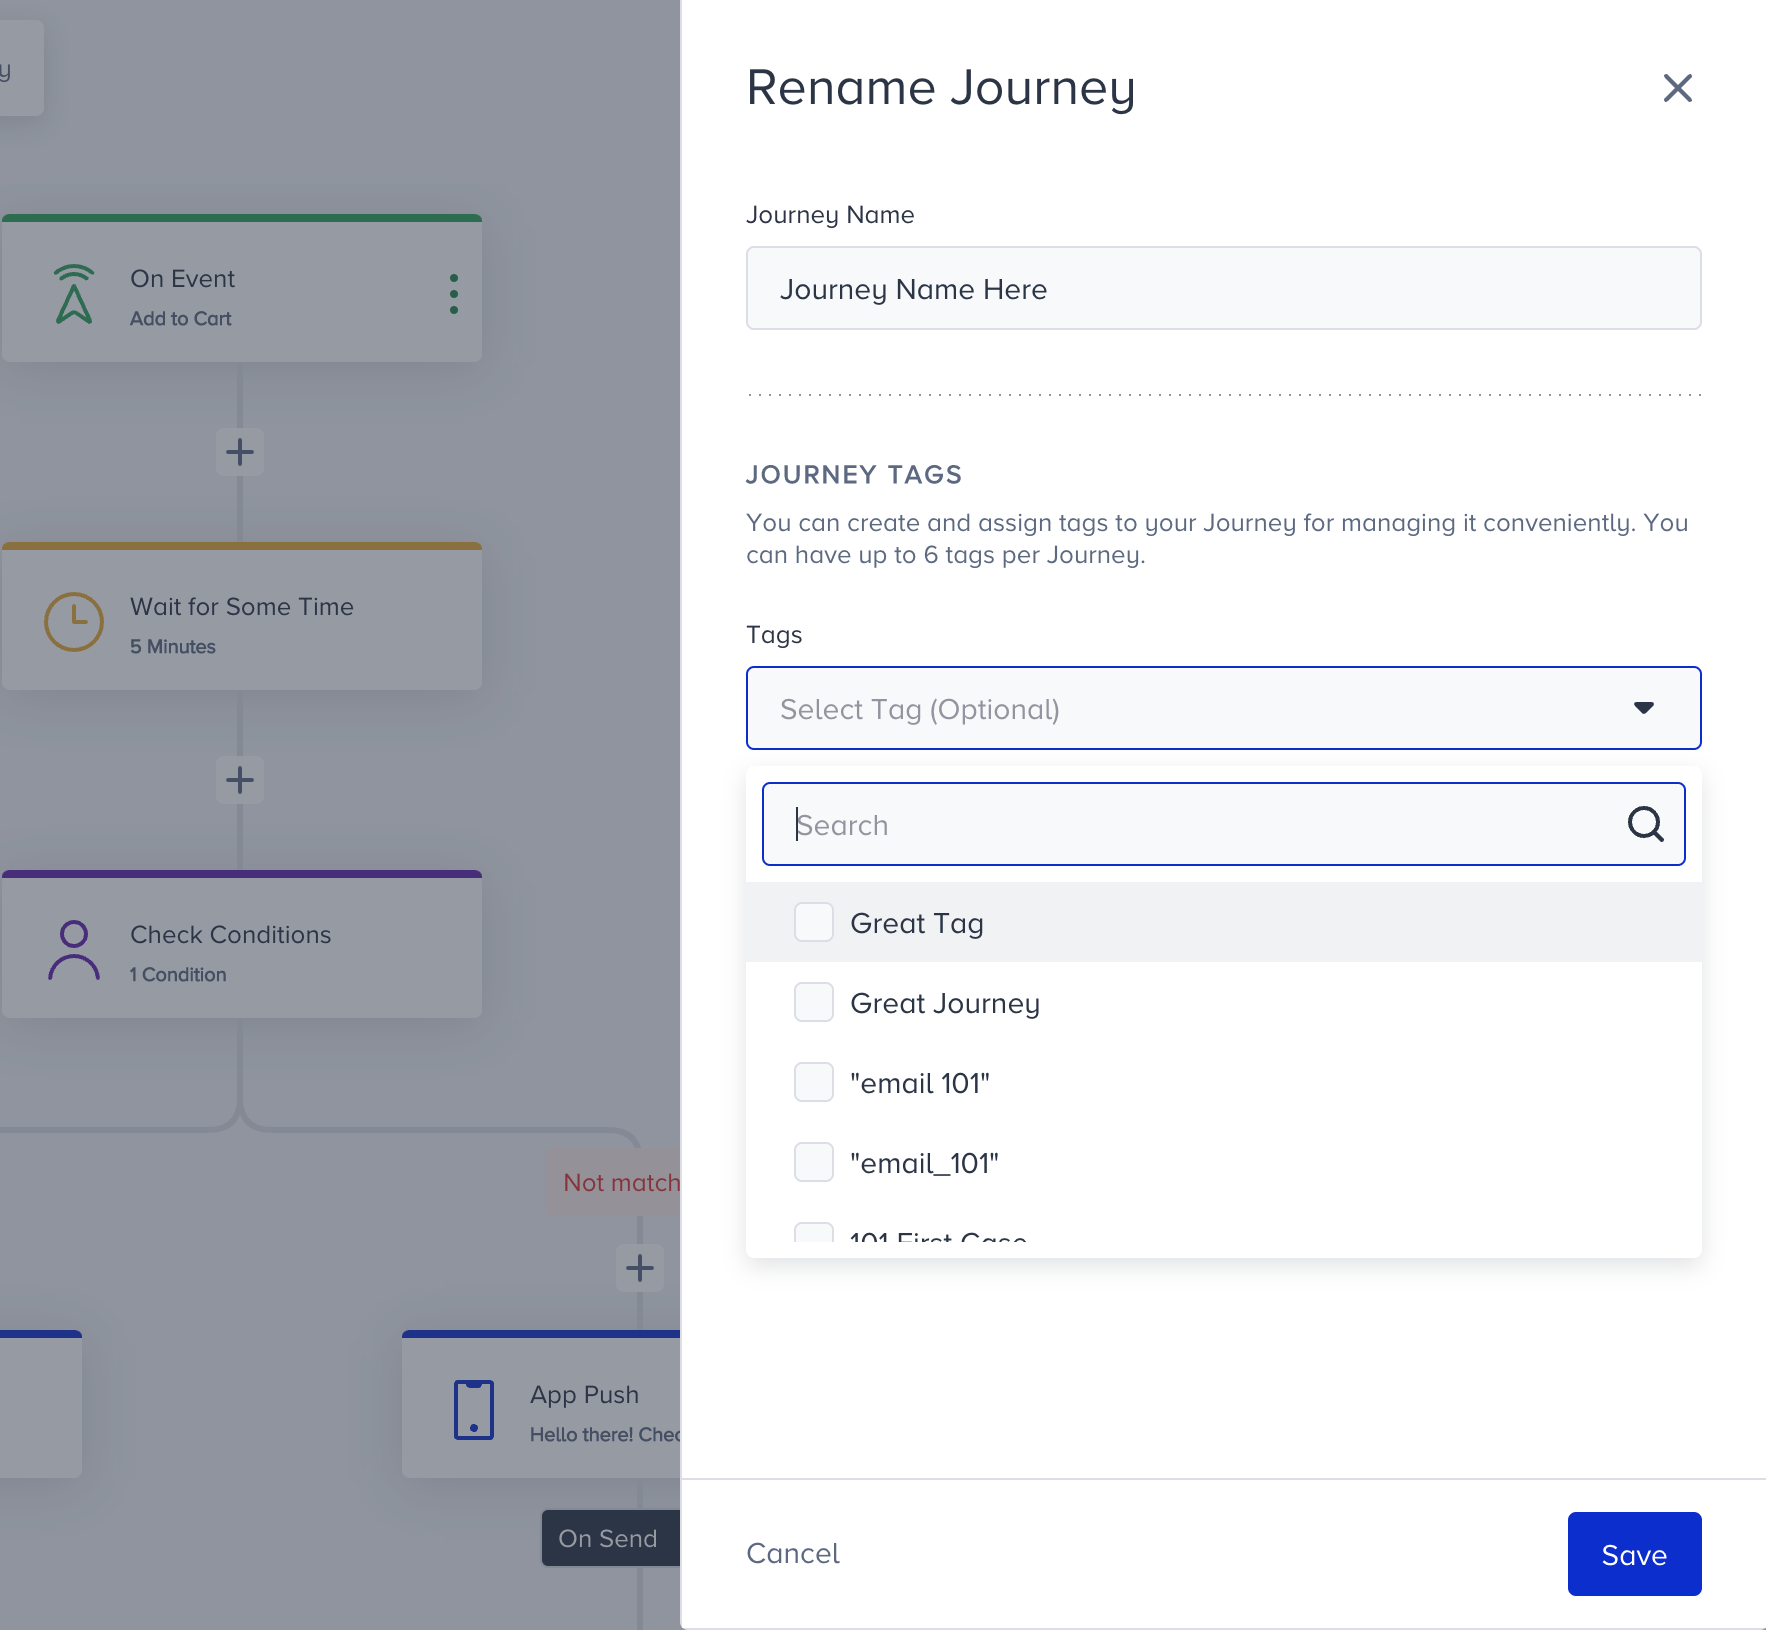
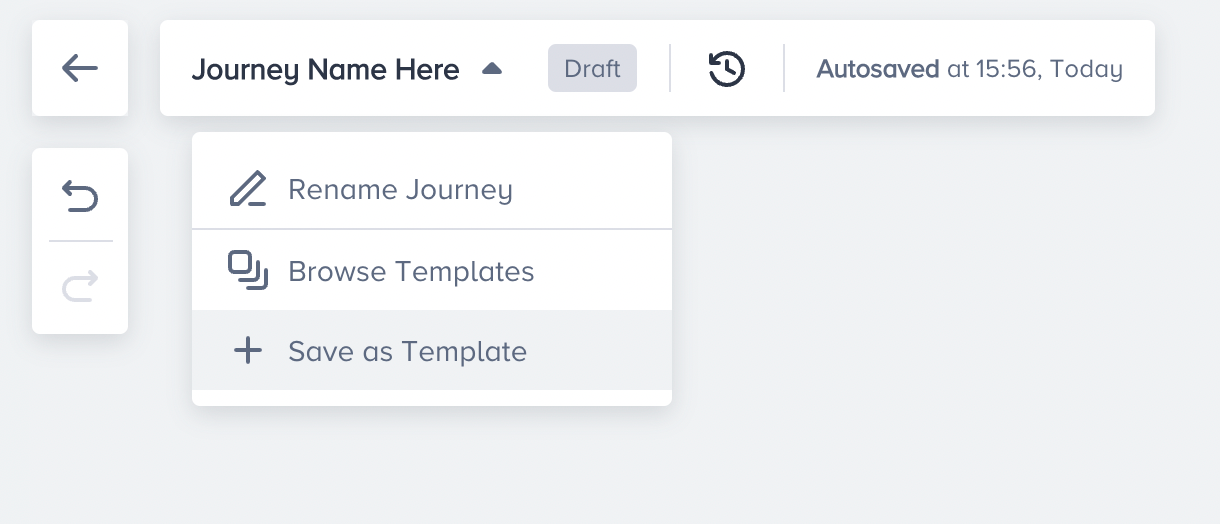
Rename Journeys
You can edit your journey name and selected tags without going on the listing page. Under the journey name with a dropdown, you can reach “Rename Journey”, “Browse Templates” and “Save as Template” buttons.
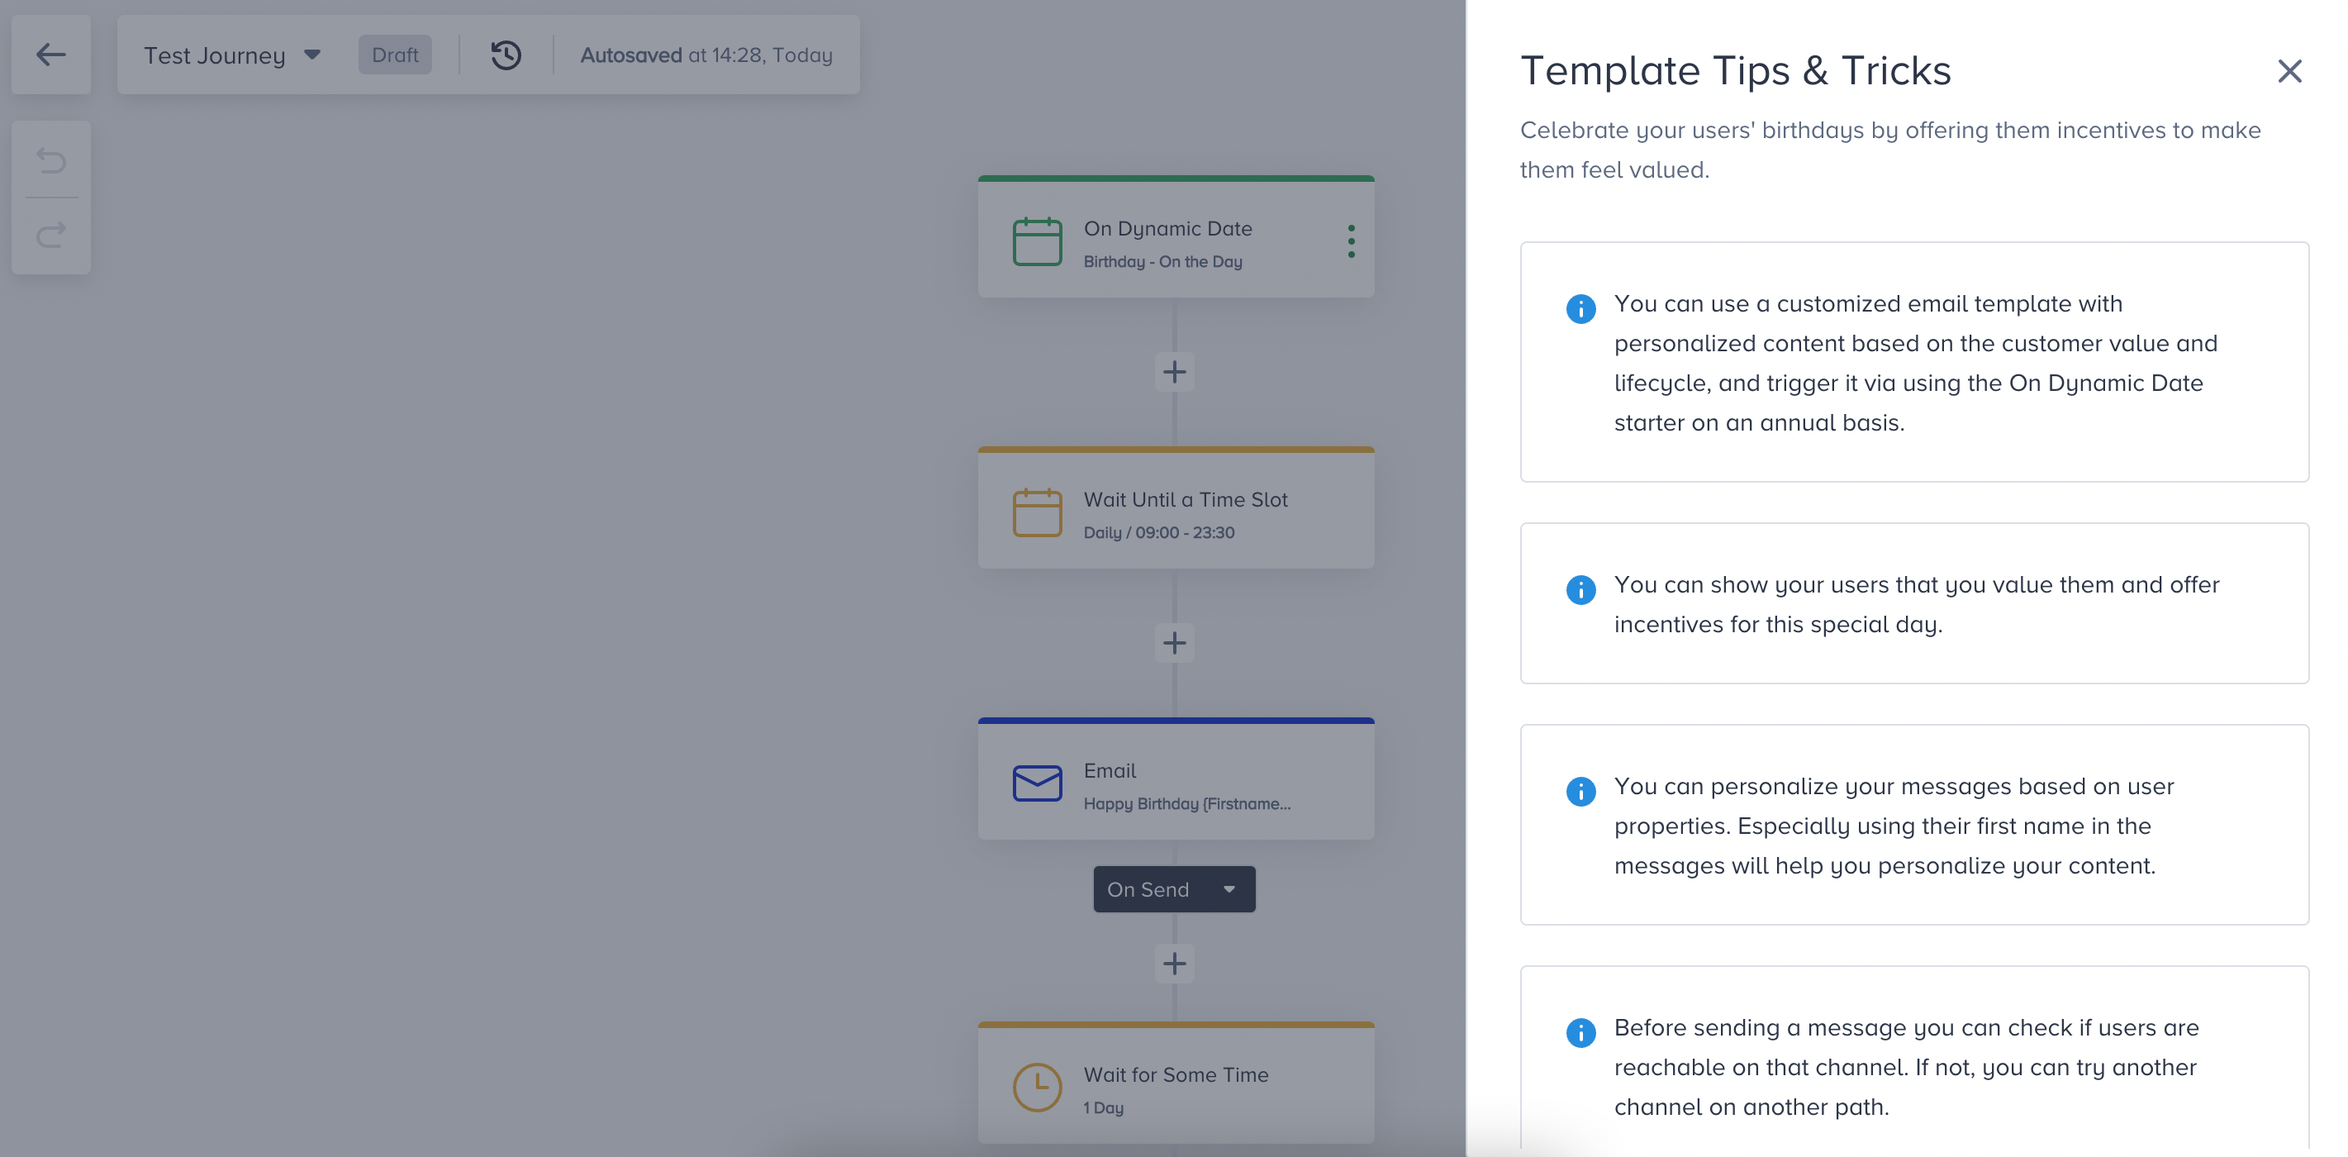
Template Tips & Tricks
You can click the Tips & Tricks button to view them on the selected template. Tips & Tricks button is visible until the status of the journey is changed from Draft to another.
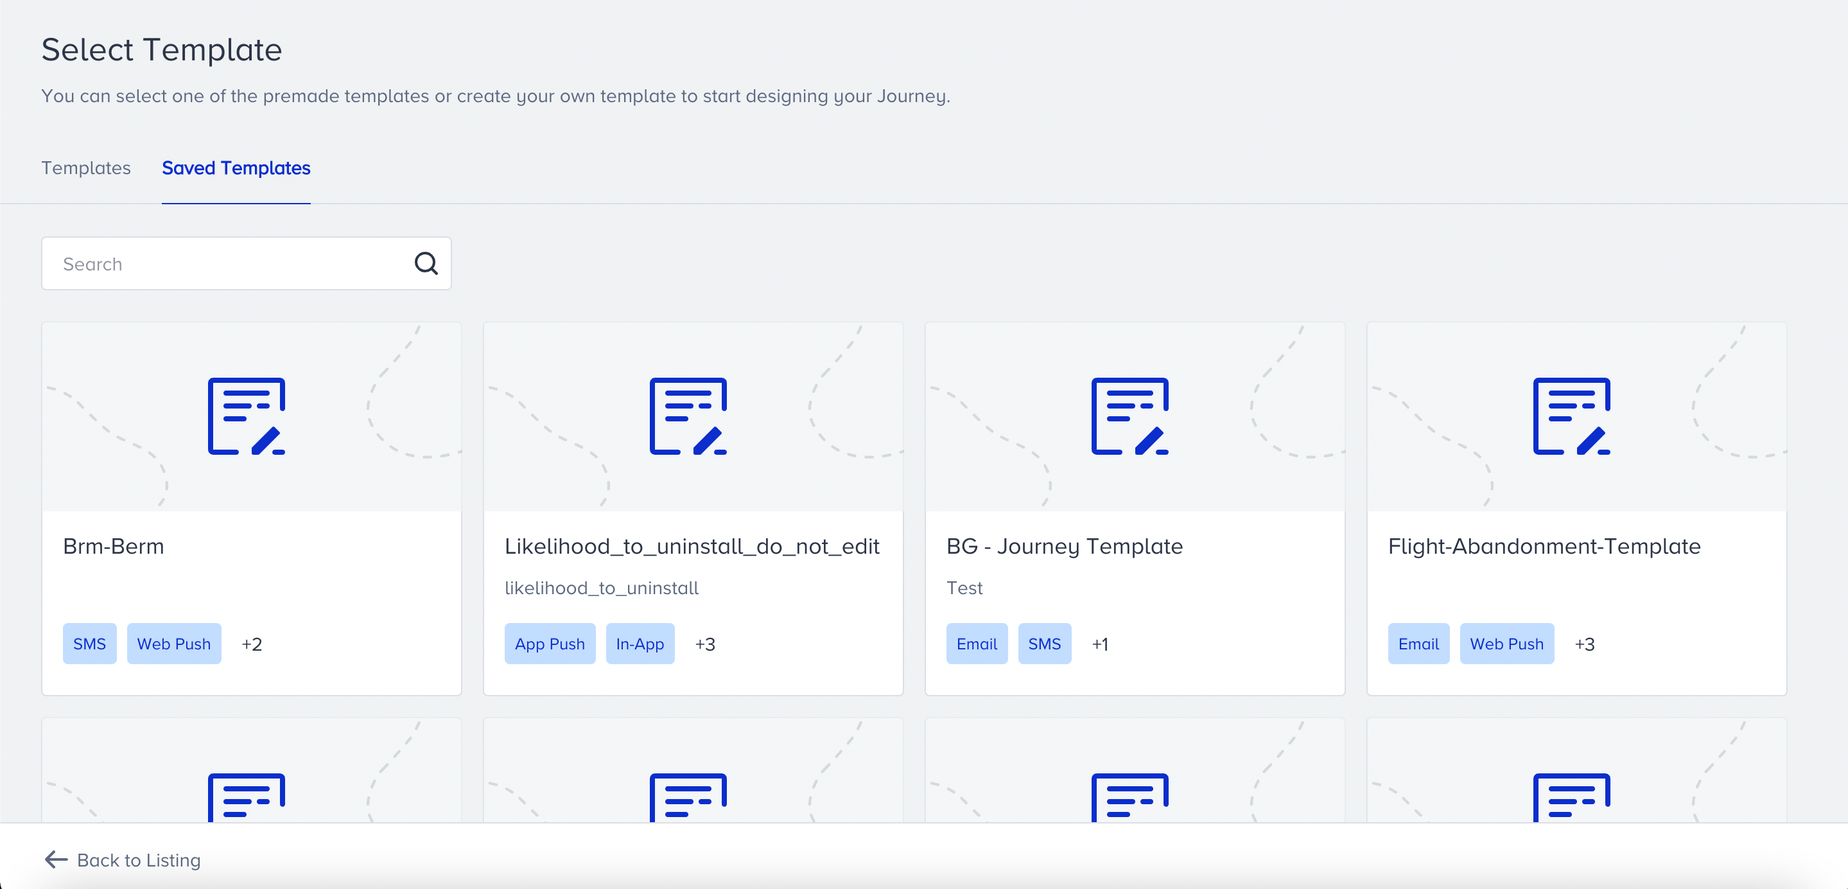
Save Journey Template
You can save your journey flow as a template to use it later again. You can name your journey, add a description and save it on the canvas. Click the journey name area dropdown to reach your saved templates or default templates.
your title goes here
If you confirm the warning message after clicking Open Templates, your existing changes will be discarded.
After saving your journey template, you can see your saved template(s) by selecting My Templates on the template selection screen.
Validation Errors
Validation errors show you missing or not allowed points on the canvas to launch your journey. When you click the Launch button, errors will be displayed if there are any.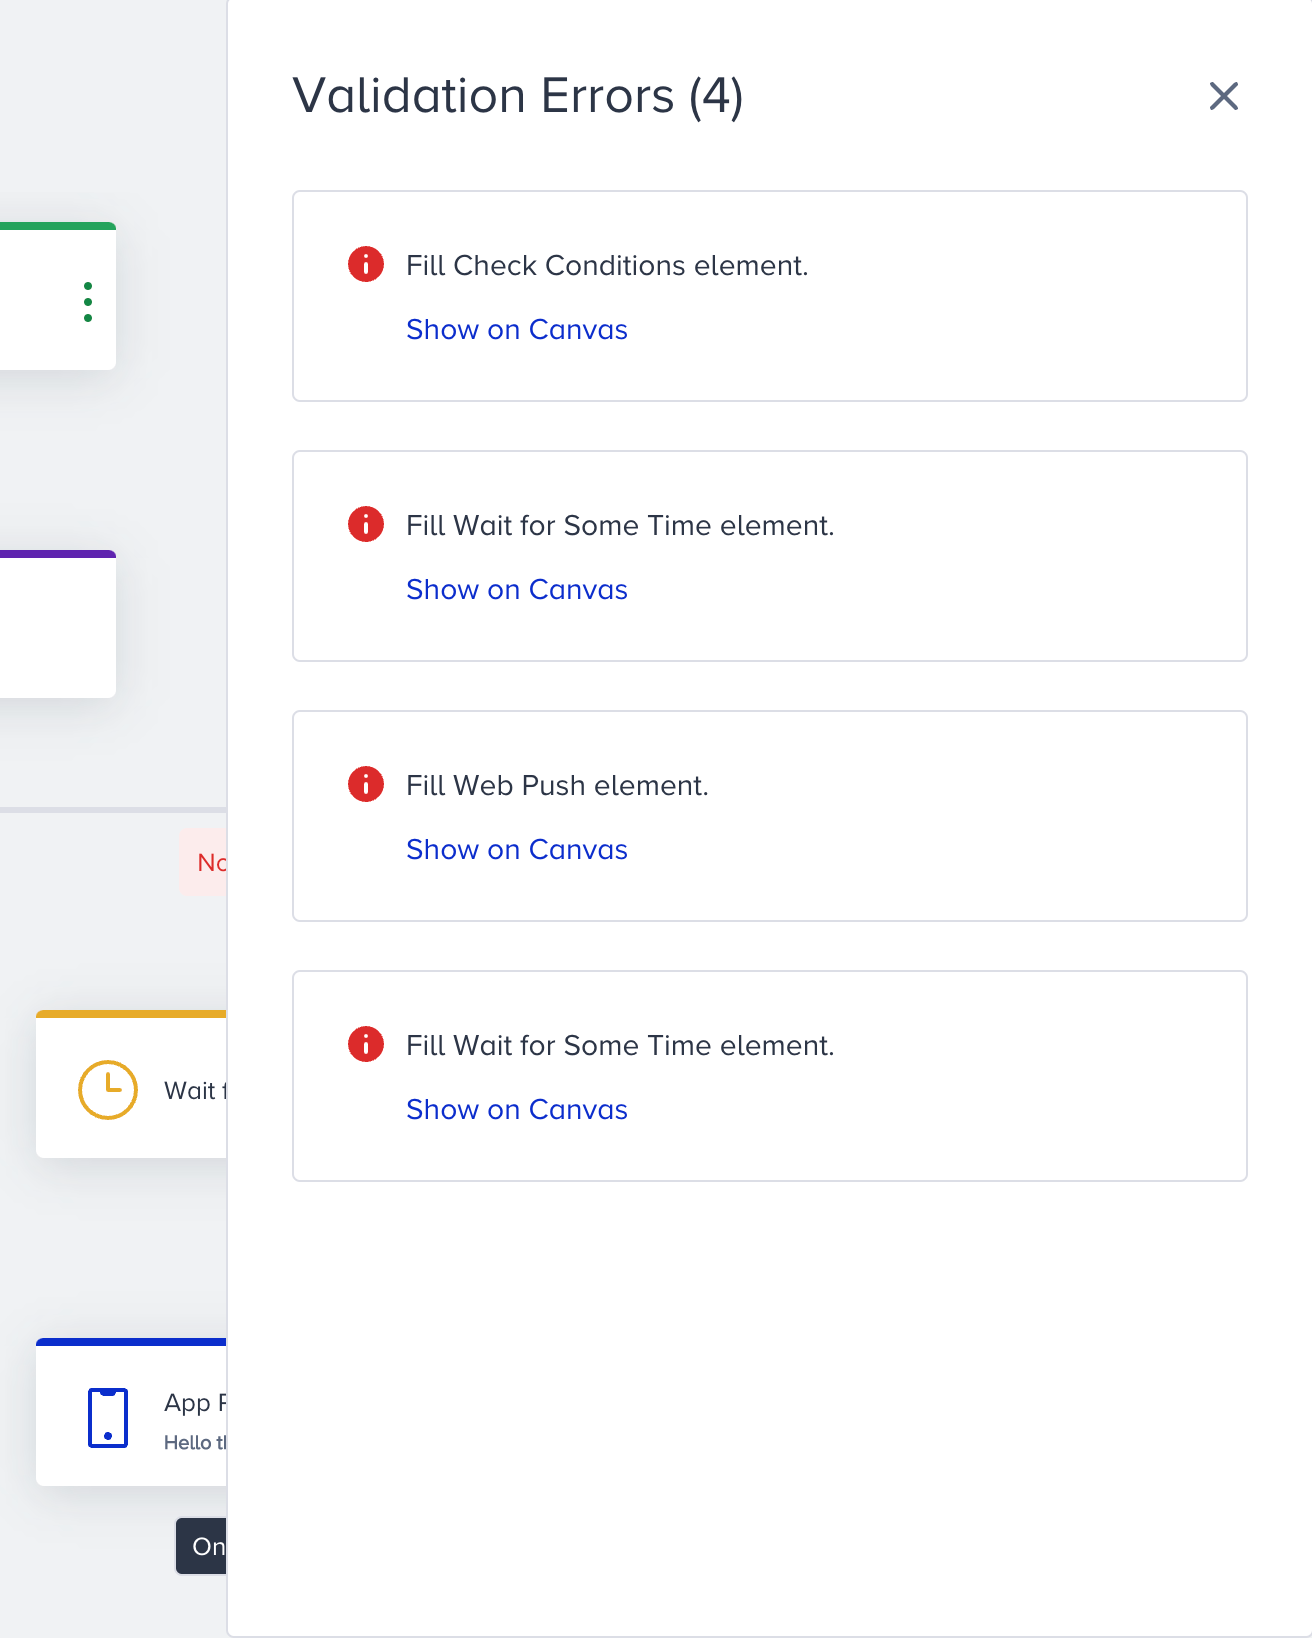
You can click the Show on Canvas to see the respective point on the canvas. Once you solve the missing component, the notification will disappear. You can see the number of errors at the top of the header.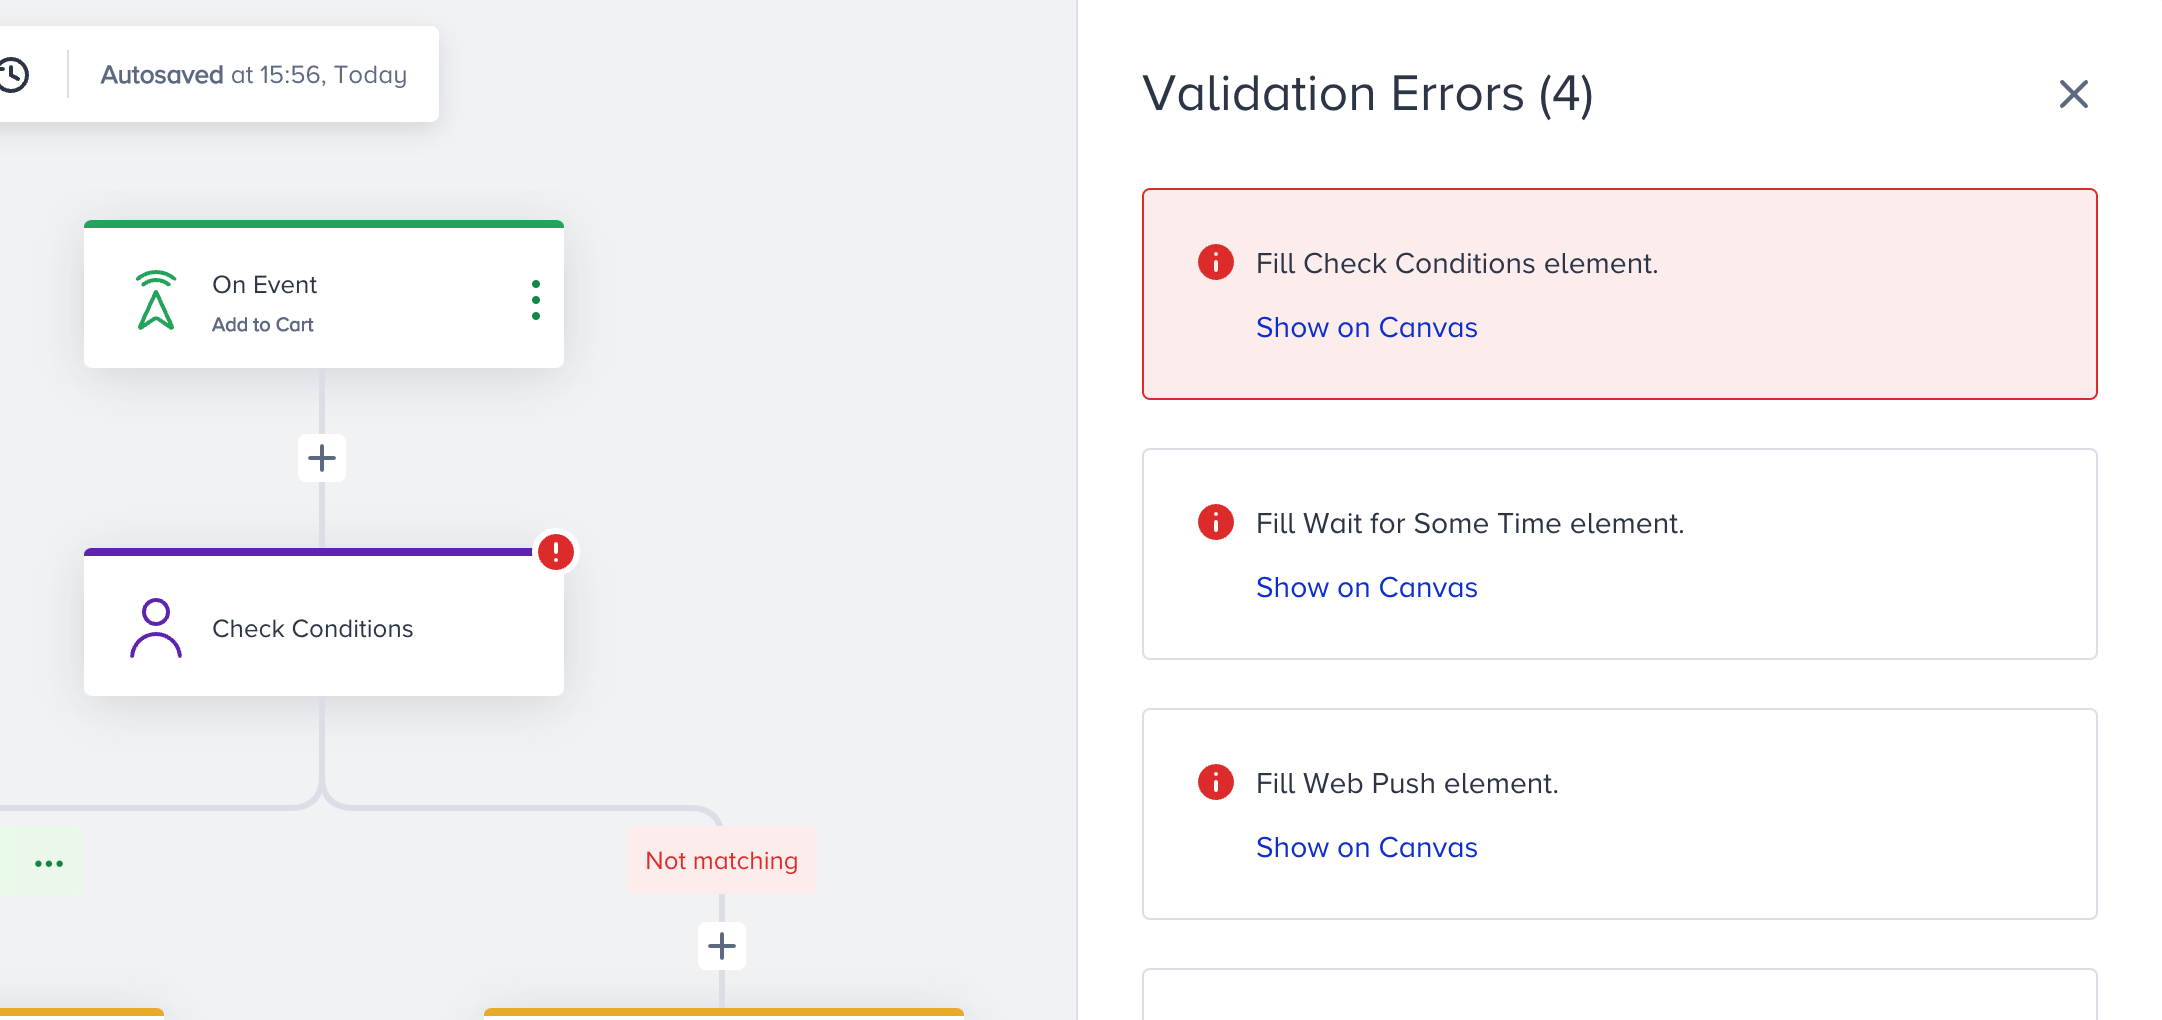
You might see an error notification if:
- there is an empty element on the journey.
- the last element of the journey isn’t either Channel or Action element.
- the same type of wait elements are added consecutively.
- Wait for Some Time and Wait Until a Time Slot elements are added consecutively.
- you do not add a channel element to the journey but add a Check Interaction element.
- you add any type of element other than the channel element after the Next Best Channel element’s paths.
- you add the same channel element to different paths after the Next Best Channel element.
- the coupon list is expired before you launch the journey.
Journey Optimizer
Journey Optimizer offers recommended practices to optimize your journeys before launching them. Therefore, your journey will be more efficient and your journeys result better. It also shows alerts if occurred any. For example, if no user entered your journey in the last 2 days, it will create an alert.
Based on the number and importance of optimization or alert items, you will see different numbers in different colors on your journey listing page. The red, yellow, and blue colors represent the most important, important, and less important items respectively.
You can find the Journey Optimizer is located at the top bar of the canvas and also on the journey listing page.
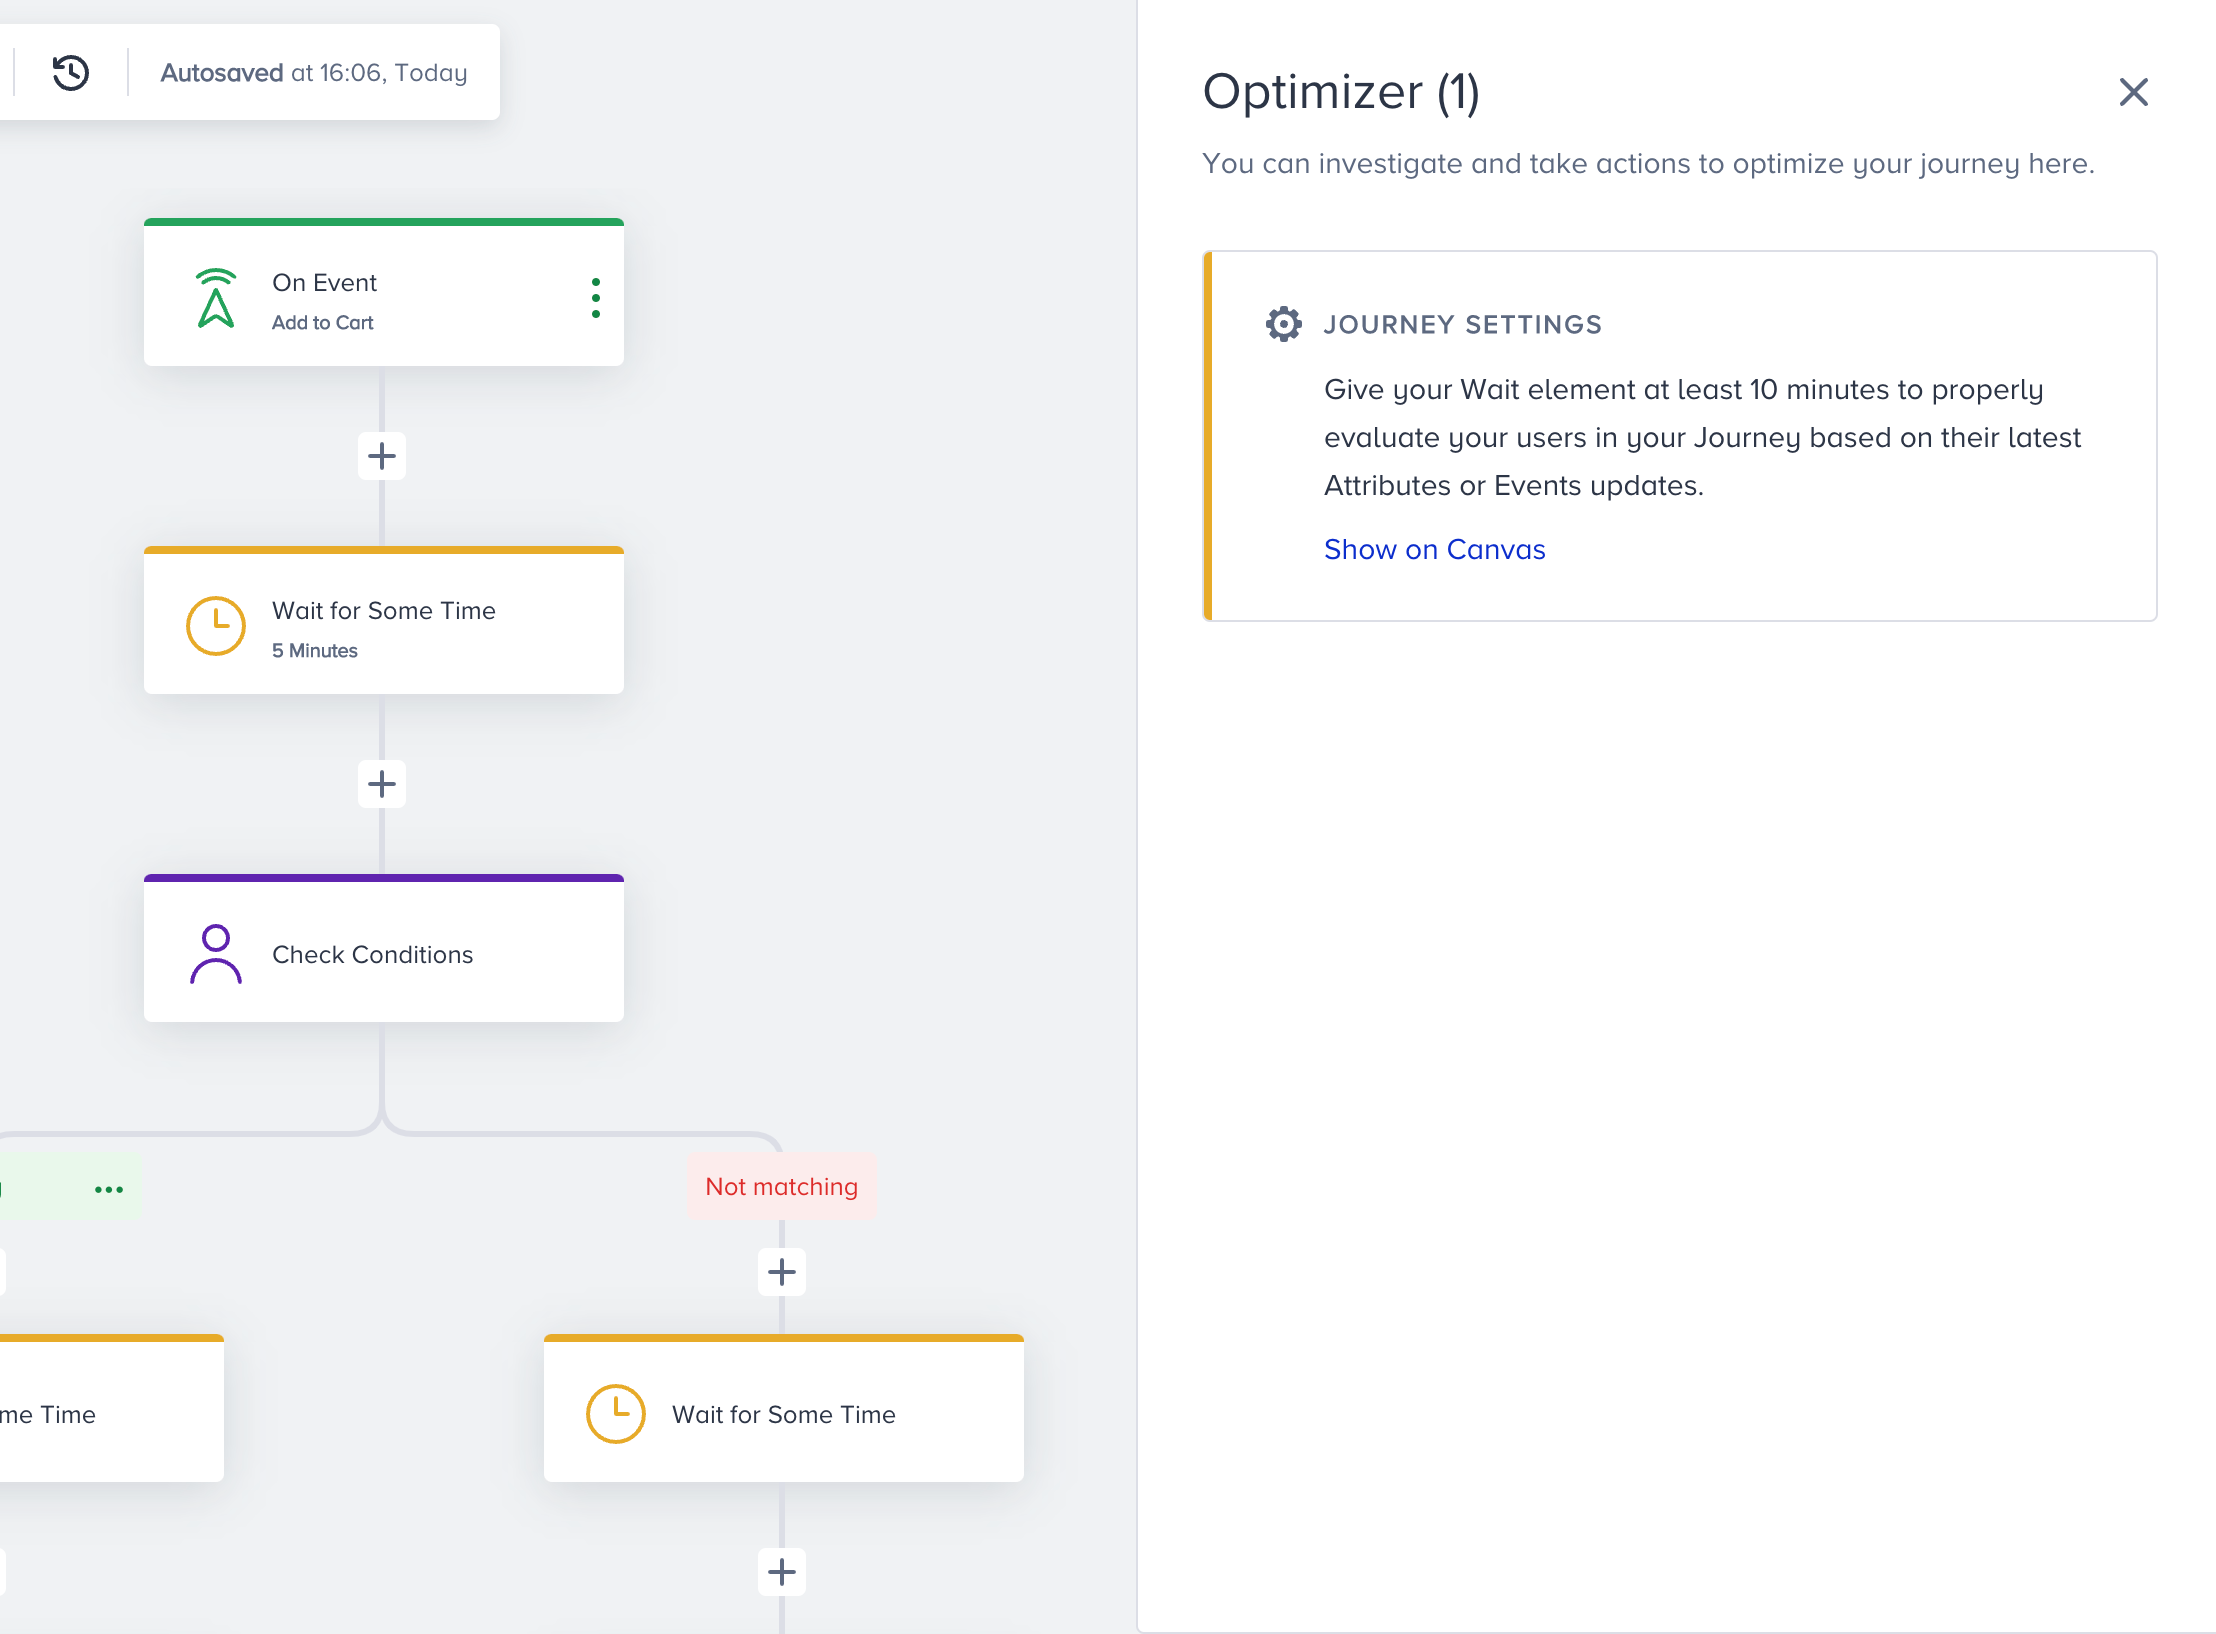
Click on the Show on Canvas button to see what to optimize in your journey. Once you solve the optimization point, the notification will disappear.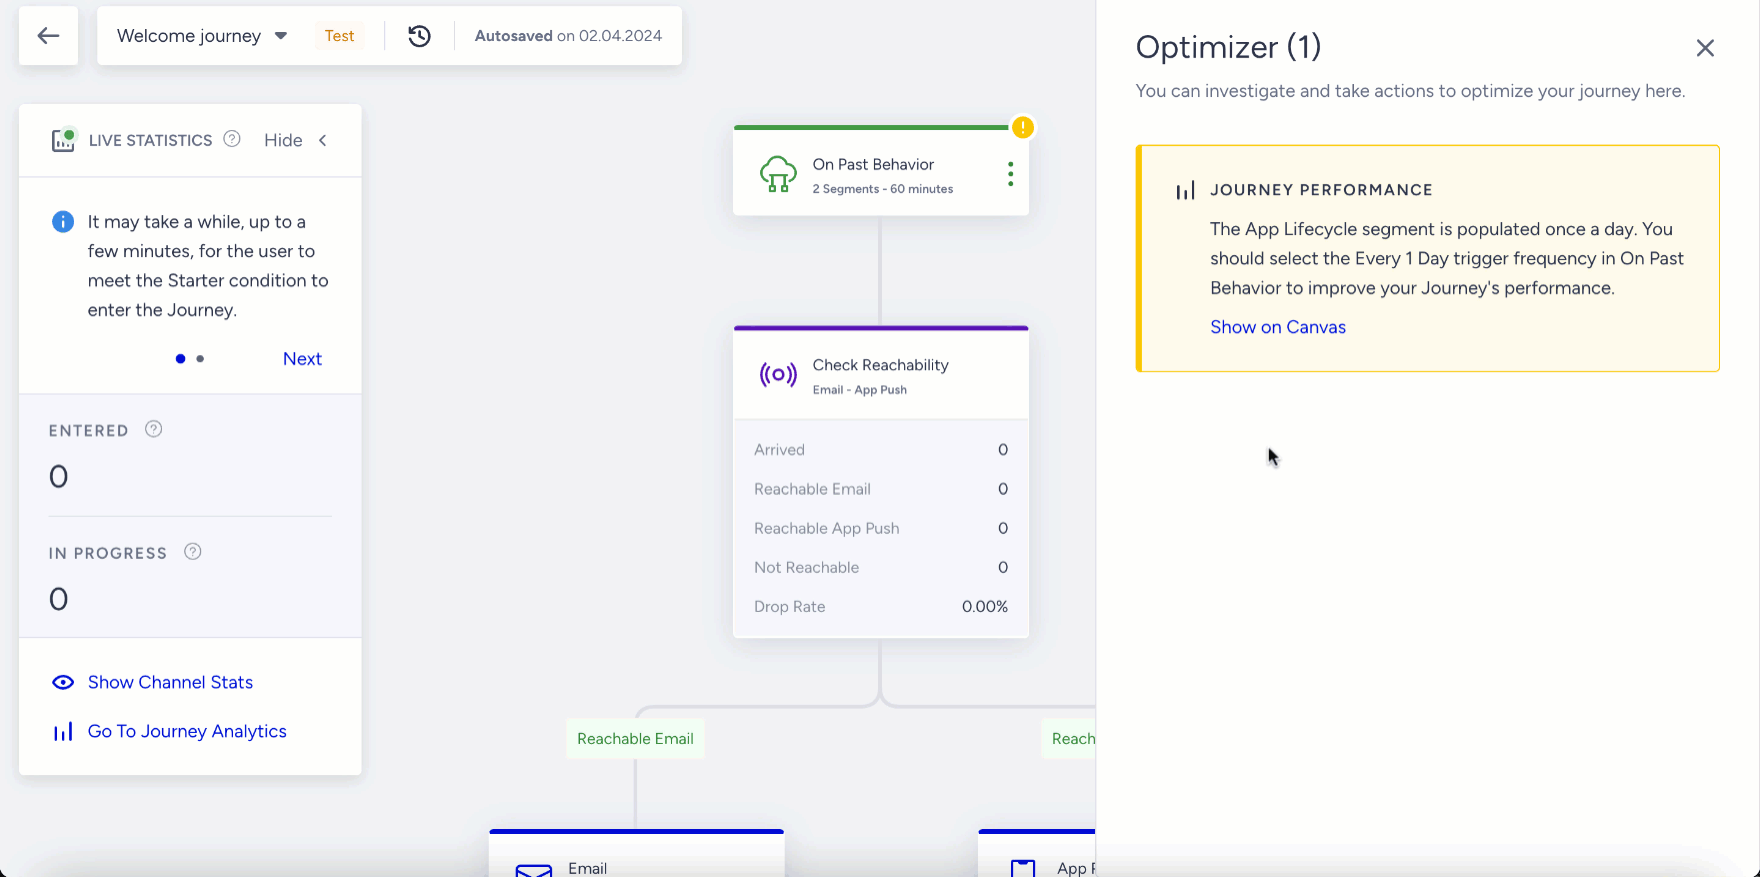
You can see the optimization count at the top of the header.
You can also see the optimizer message once you open the Launch.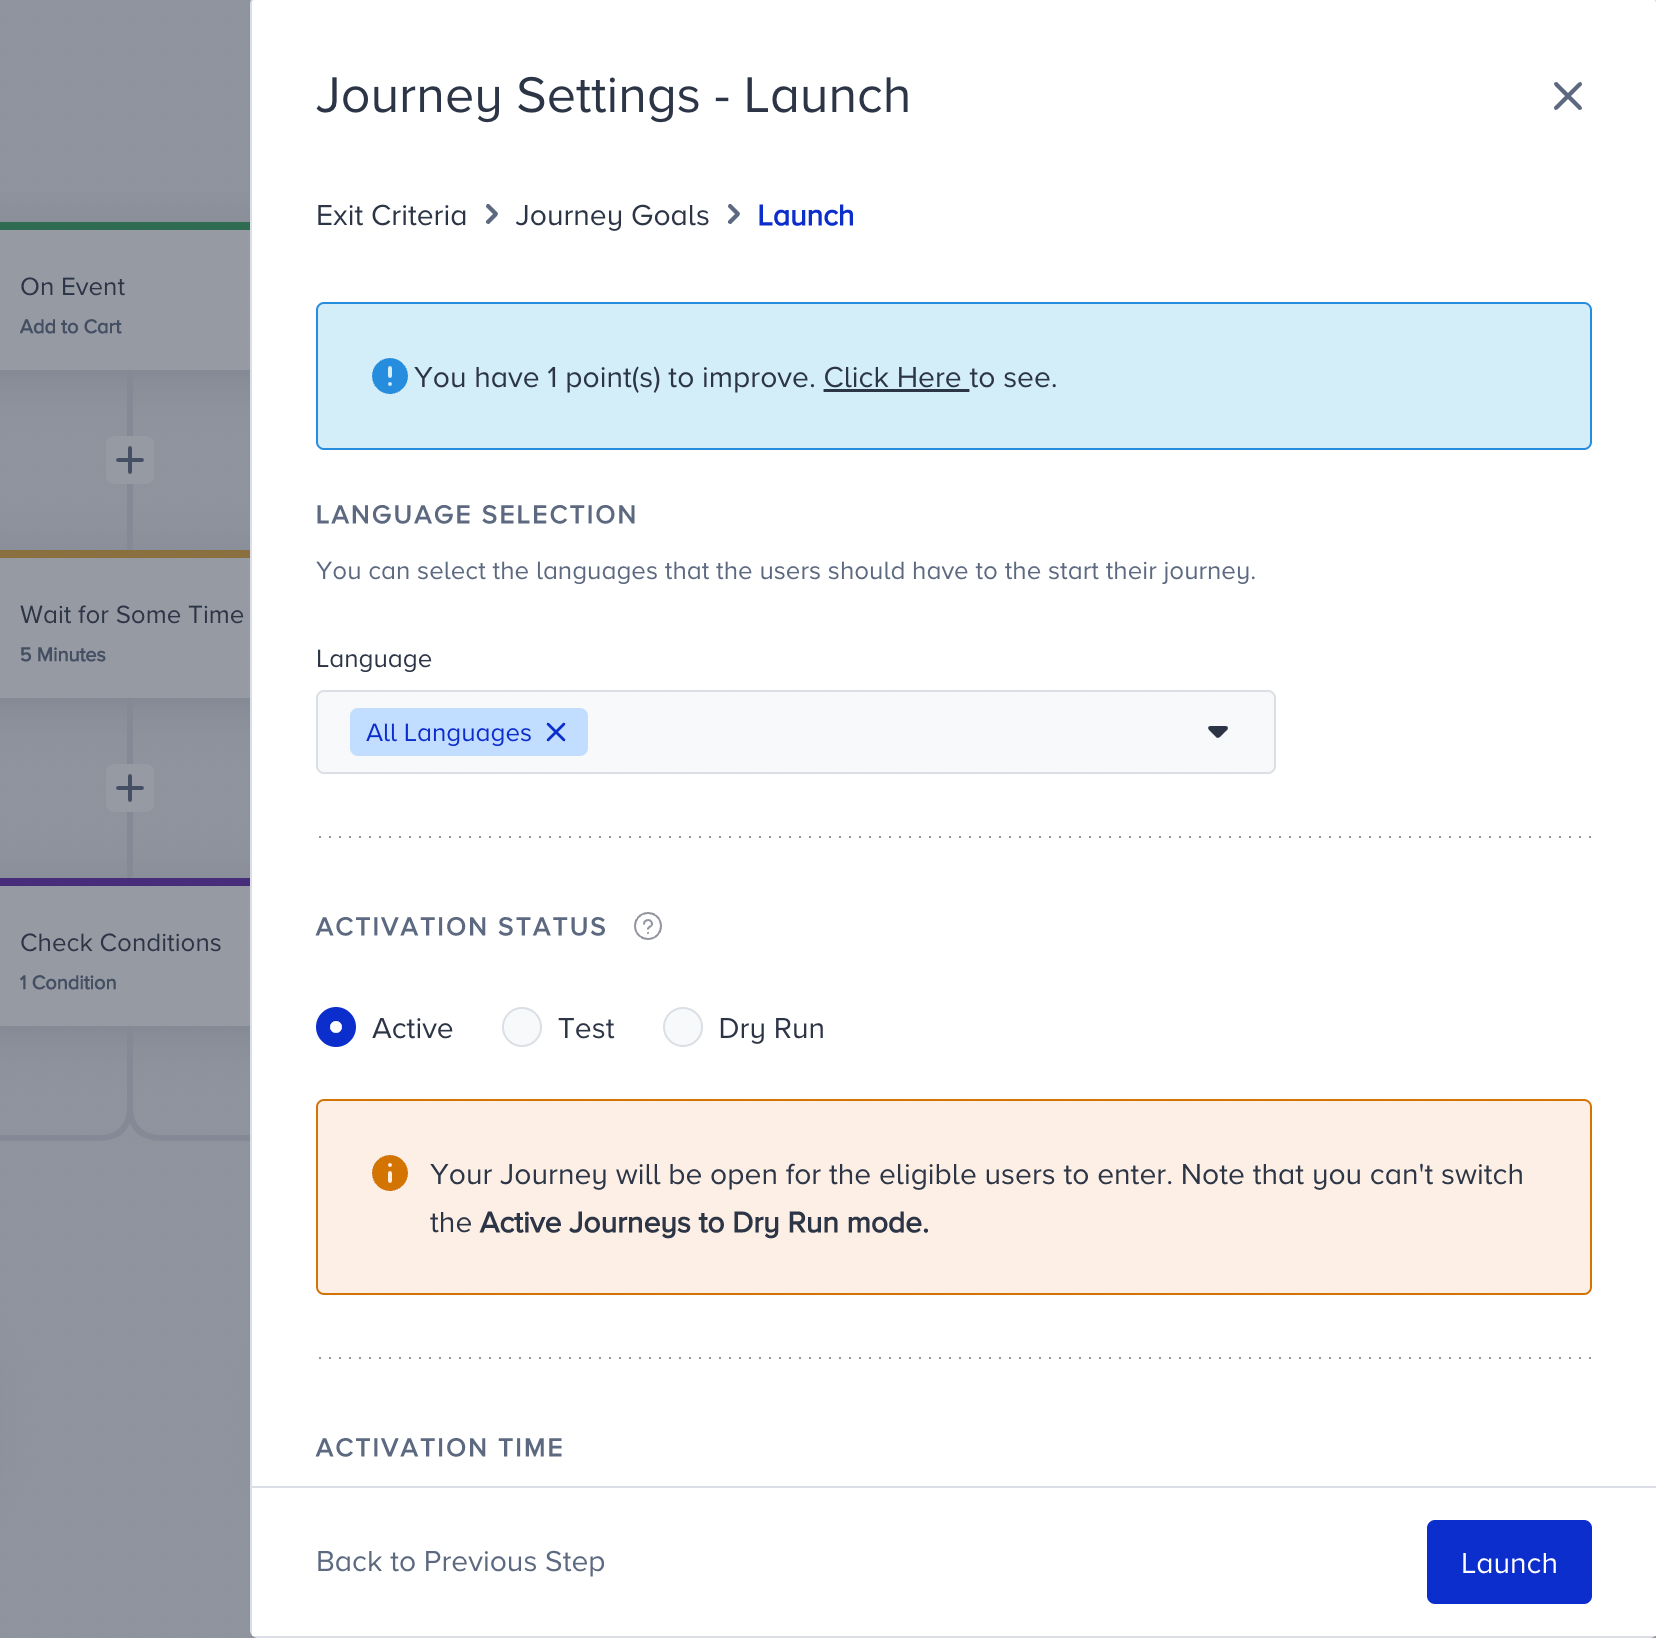
Your title goes here
Optimization points are not required to resolve. You can launch your journey without applying them.
You might see Optimization notifications;
- If there is no Channel element before the Check Interactions,
- If there is no Wait element between Check Interactions and Channel element,
- If there is no Wait element between Check Conditions and On Past Behavior if they are consecutively added,
- If Check Reachability’s channel path and the channel element you add do not match,
- If the channels are the same on different paths after the Check Reachability element,
- If the starter triggers more than 200k users at the same time if you want to have real-time sensitivity in your journey,
- When there are more than 100 elements in the journey,
- If there is a wait element with less than 10 minutes,
- If there is On Past Behavior and Call an API in the journey and if there is no selected Reachability in the On Past Behavior or if there is no Check Reachability before the Call an API,
- If App Lifecycle is selected in the On Past Behavior: Select 'Every 1 Day' trigger frequency in the On Past Behavior to not decrease your all journey performances since Install/Uninstall segment is populated once a day,
- If total journey wait duration is longer than the journey start-end date duration,
- If journey eligibility duration is longer than journey start-end date duration,
- If double opt-in is selected and eligibility is selected multiple times.
You might see Alerts:
- When coupon codes on your coupon lists are about to expire or run out
- If Journey Drop Date is more than 40%
- If there is no one entered in the 2 days following the journey launch
- If Call an API requests get failed more than 30%
- If there are lower than 50 sent or impressions on the journey in 10 days following the journey launch
- If your App Push certifications expire or are not valid on platforms such as IOS, Android
- If there are Call an API or Facebook channel elements under A/B Split paths
- When Winner Autoselection is enabled inside A/B Split and there are Call an API or Facebook channel elements under A/B Split paths
- If the journey end date is later than the coupon list expiration date
Your title goes here
Journey Optimizer cannot be viewed in a passive journey unless you click the Edit Flow button.
Was this article helpful?