Architect Use Case: Welcome/Onboarding
- 12 Jul 2023
- 6 Minutes to read
Architect Use Case: Welcome/Onboarding
- Updated on 12 Jul 2023
- 6 Minutes to read
Article Summary
Share feedback
Thanks for sharing your feedback!
When new users come to your website or mobile app for the first time and subscribes to your newsletters, they share their email addresses or phone numbers. This creates a big opportunity for you to show a warm welcoming, introducing your brand and your offers. This very first moment is a chance of creating an exclusive first impression to drive conversion and activate these users.

Goals
While engaging your users with welcome journeys, you can also increase user retention. Each targeted and converted user will help you:
- Activate users,
- Convert new users to buyers,
- Increase customer loyalty,
- Increase revenue,
- Increase average order value.
Starting Point of a Welcome/Onboarding Journey
You can start a welcome/onboarding journey with various starters depending on your use cases. Fundamentally, a welcome journey starts when a new visitor opts in to receive your newsletters or signs up to your website or mobile app. You can trigger your welcome journeys in the following actions :
- When a user registers on the website or mobile app,
your title goes here
For this case, Insider has a default event: sign_up_confirmation.
- When a user subscribes to your newsletter/bulletin,
your title goes here
This case requires a custom event. You can create and pass this event from your website.
- When a user joins the Insider lead collection campaign and leaves their lead,
your title goes here
For this case, Insider has a default event: lead_collected.
- When you detect a new user,
your title goes here
You can use the When user enters a segment starter and target new visitors.
- When a user signs up for a loyalty program in your offline store,
your title goes here
You need to ingest this data to Insider from your CRM.
- When you send an attribute or event of a new user via the API.
your title goes here
You need to ingest this data to Insider from your CRM.
Requirements
- You should have Insider Tag integrated on your website.
- You should have Insider Object integration completed.
- Before starting to use any channel in your journeys, integrations for the respective channels should be completed. Depending on the channels you want to use in your journeys, additional integrations might be required.
- If you have a mobile app, you should have SDK integration completed.
- In case you need to have some custom events, you need to create and pass them to Insider.
your title goes here
Read more on the implementation guide.
Creating a Welcome Journey
A welcome journey is a sequence of interactions after visitors sign up or complete any other action on your website.

1. Select a starter
Welcome messages are real-time interactions as you send these messages right after users complete the given actions.
You can use different starters for different use cases.
On Event
This starter tracks user events and takes them into the journey immediately after users perform the specified events.
- You can select Sign-up if you want to target the users who signed up for the website.

- You can select Submit the Form if you want to target the users who filled out the Insider lead collection form. In case you have more than one lead collection campaigns on the website, you can use the event parameters of the lead_collected event and choose which campaign and variation you want to consider.

- You can target the same events in Default & Custom Events as well. If you have any custom events, you can use them in this starter.


On event starter considers every platform to take users (e.g. website, mobile app, offline data passed from CRM, etc.).
your title goes here
If you have any other filter to take users into the journey, you can use Optional Segment Filters. For example, you can target users who are in the United Kingdom and sign up to your website.
your title goes here
Read more about On Event.
User Website Action
This starter tracks the segments and rules on the website. You can use this starter if you want to target only website users.
- You can select New/Returning Visitor in the Visiting Behavior and select New User for visitor type.
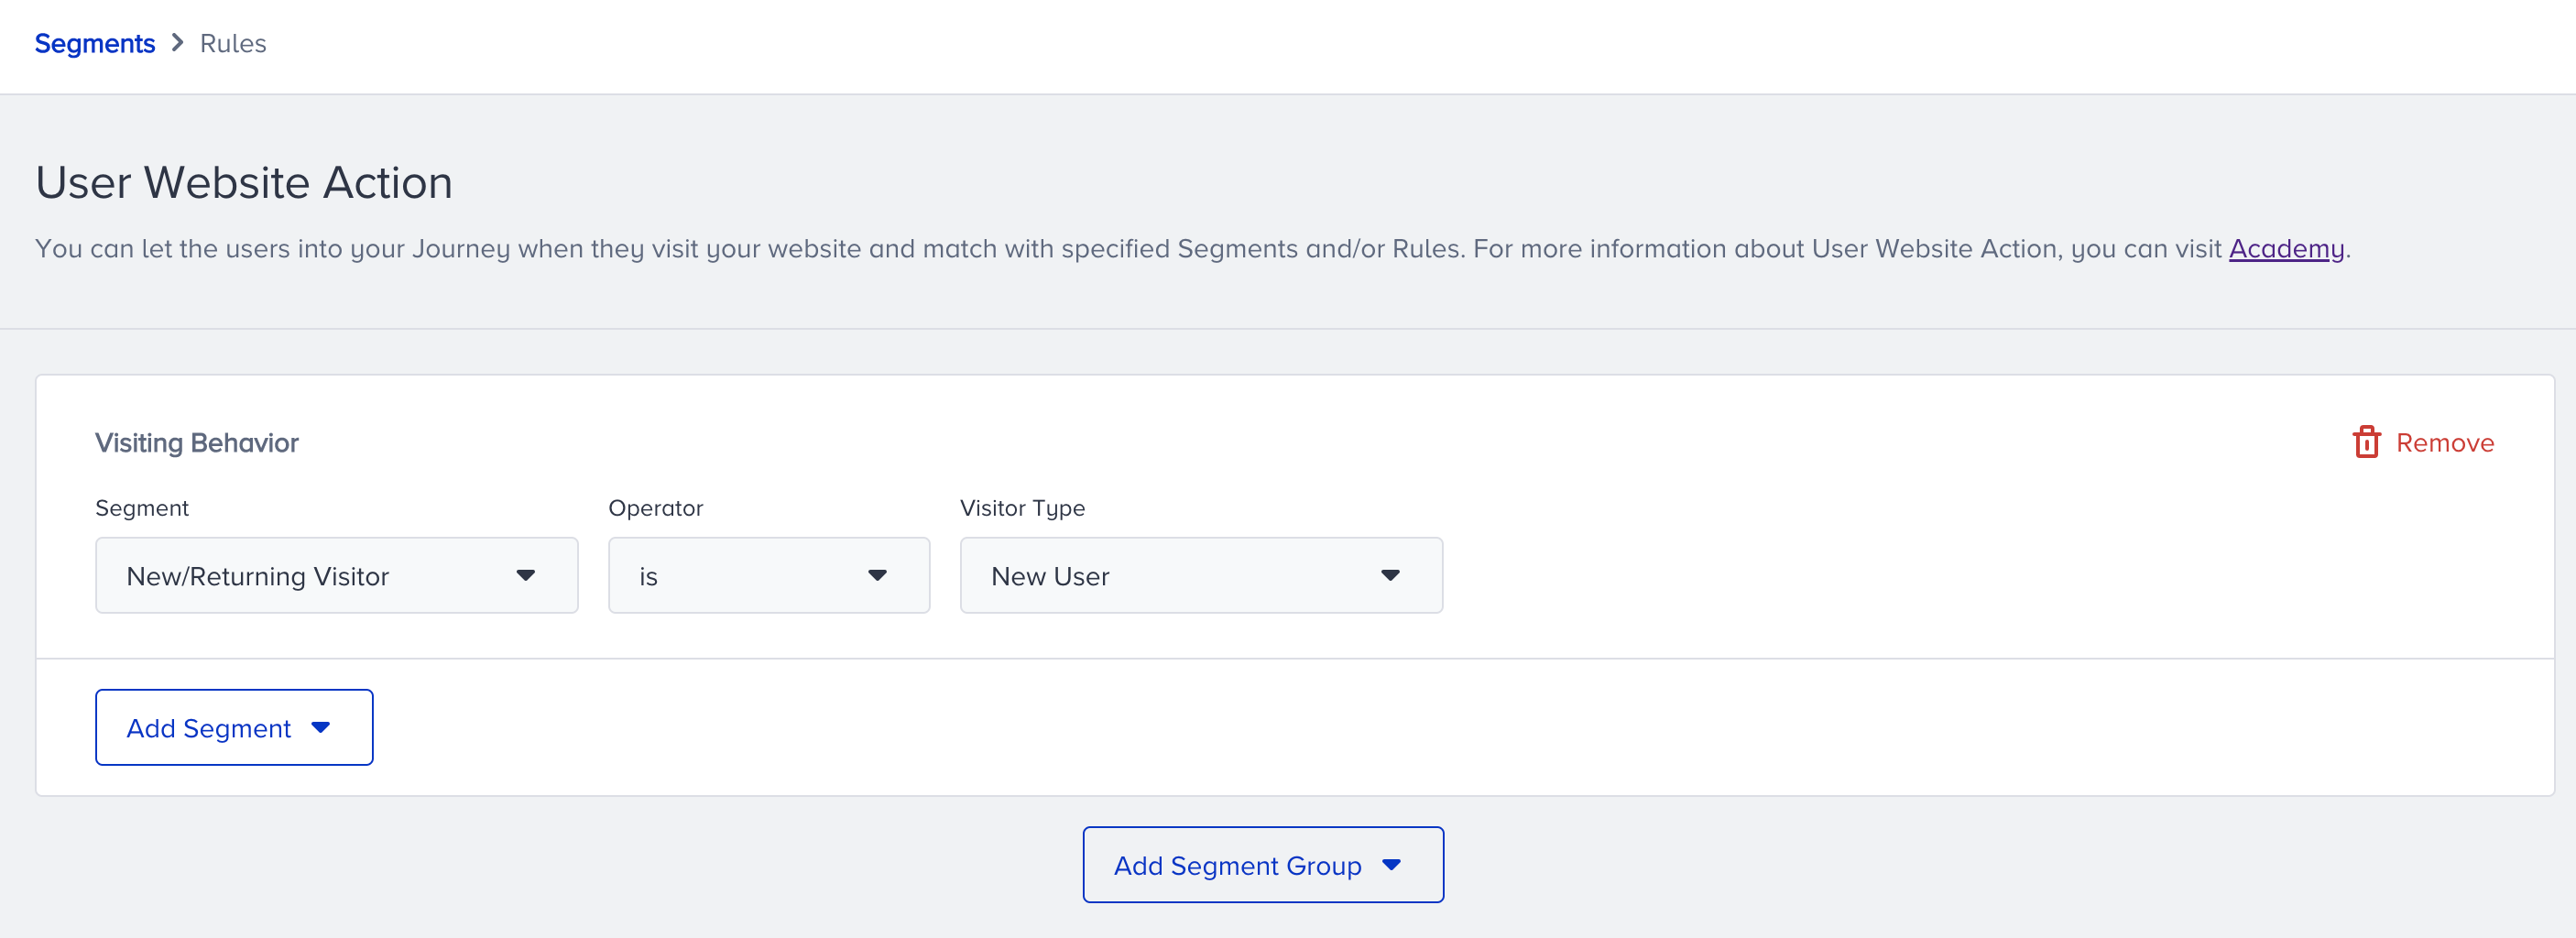
- You can select Logged in User in the User Rules and select the is not operator.
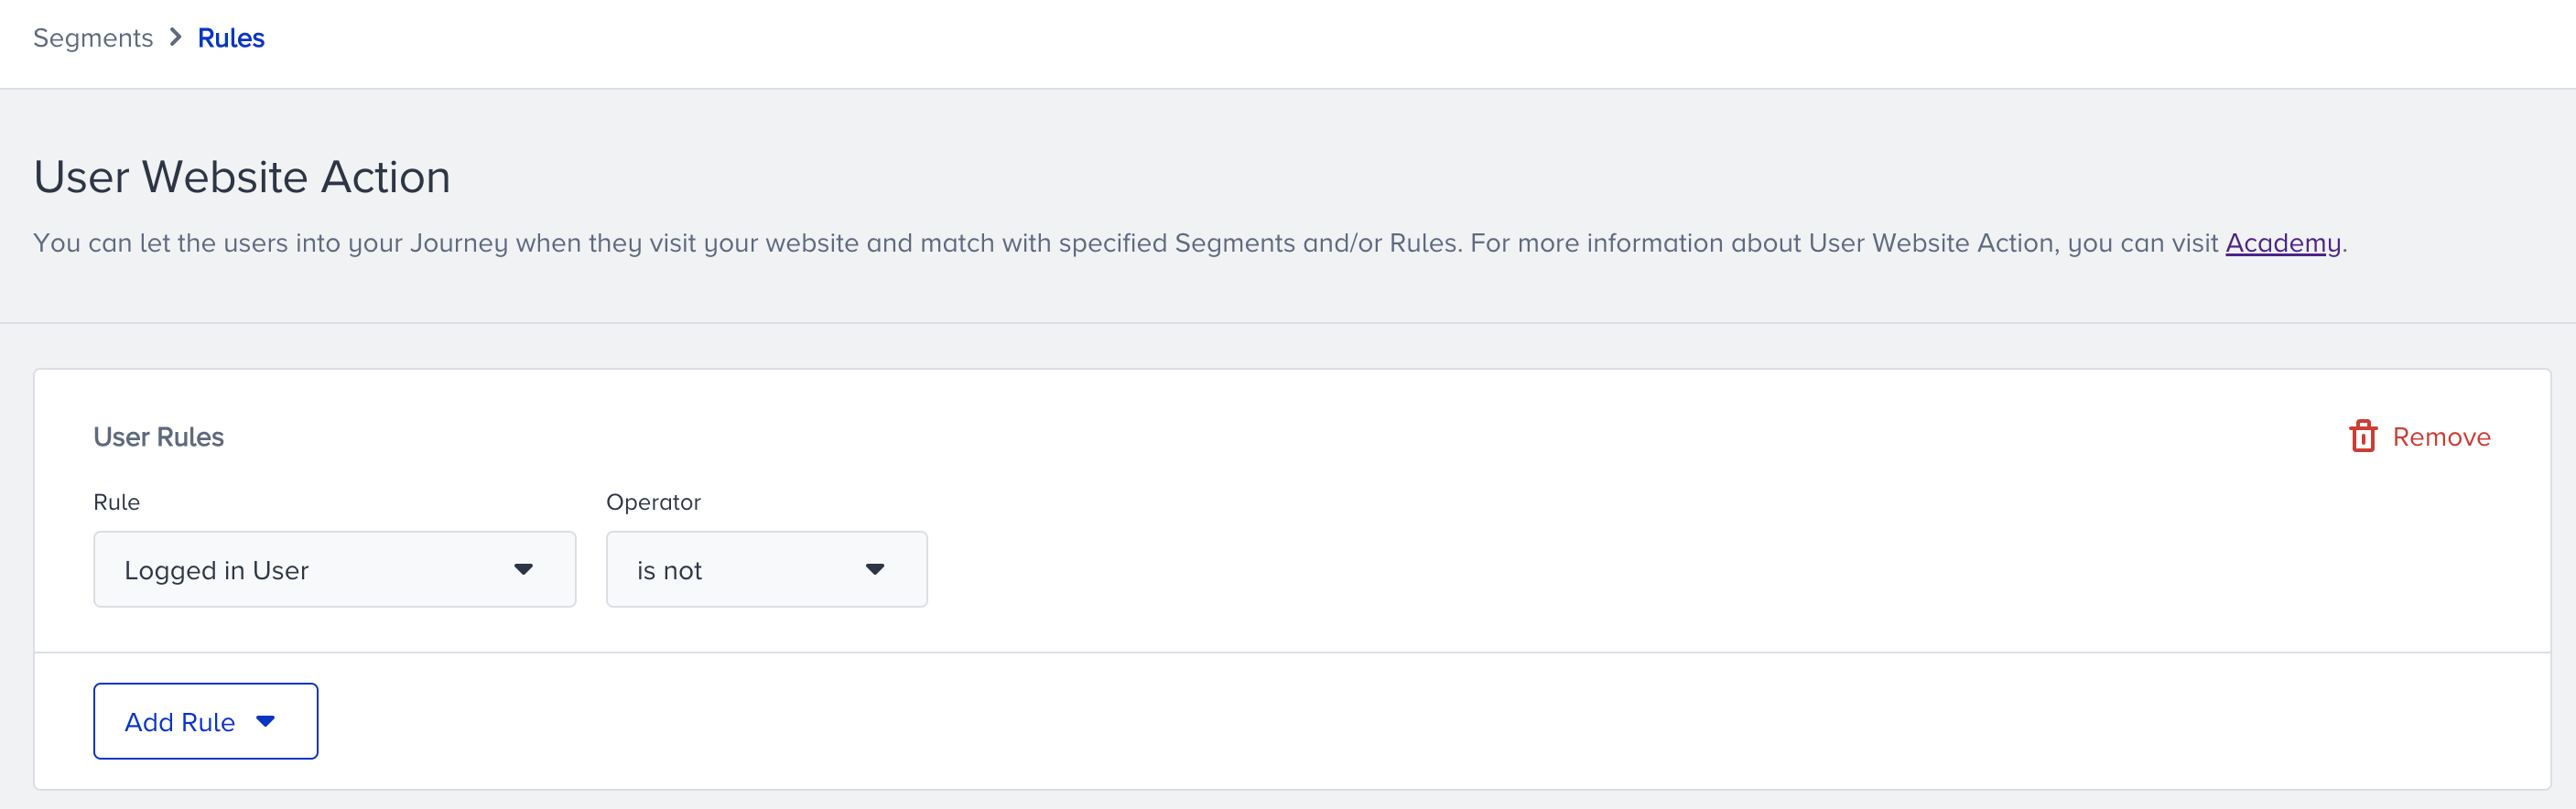

your title goes here
Read more about User Website Action.
On Attribute Change
This starter checks if a user attribute takes the desired value. If you have attributes for users, you can use them in this starter.

your title goes here
Read more about On Attribute Change.
On Past Behavior
This starter is a lookback window to take users into journeys. You can use this starter for complex segments or when you want to track if a user has not completed an action.
If you want to send a welcome message immediately after a user registers, we do not recommend you use this starter as it works every hour.
You can use the First/Last Time Open segment yo take your mobile app users into the journey.

your title goes here
Read more about On Past Behavior.
2. Add flow logic
Before sending a welcome message, you can check if users are reachable on that channel. If not, you can try another channel on another path.

your title goes here
Read more about Check Reachability.
You can add a Wait element after the messaging step with at least a 1-hour duration to wait for users to perform the desired action. Afterwards, you can check if they reach your goal (e.g. purchase, sign up, book a room, etc.). Accordingly, you can branch your journey flow to the different paths to send more relevant, contextual messages.
your title goes here
Read more about the Wait elements.
You can select one of the predefined segments in the Check Conditions.

For example, you select the purchase segment to see whether a user has not made a purchase based on the waiting duration (1 hour).
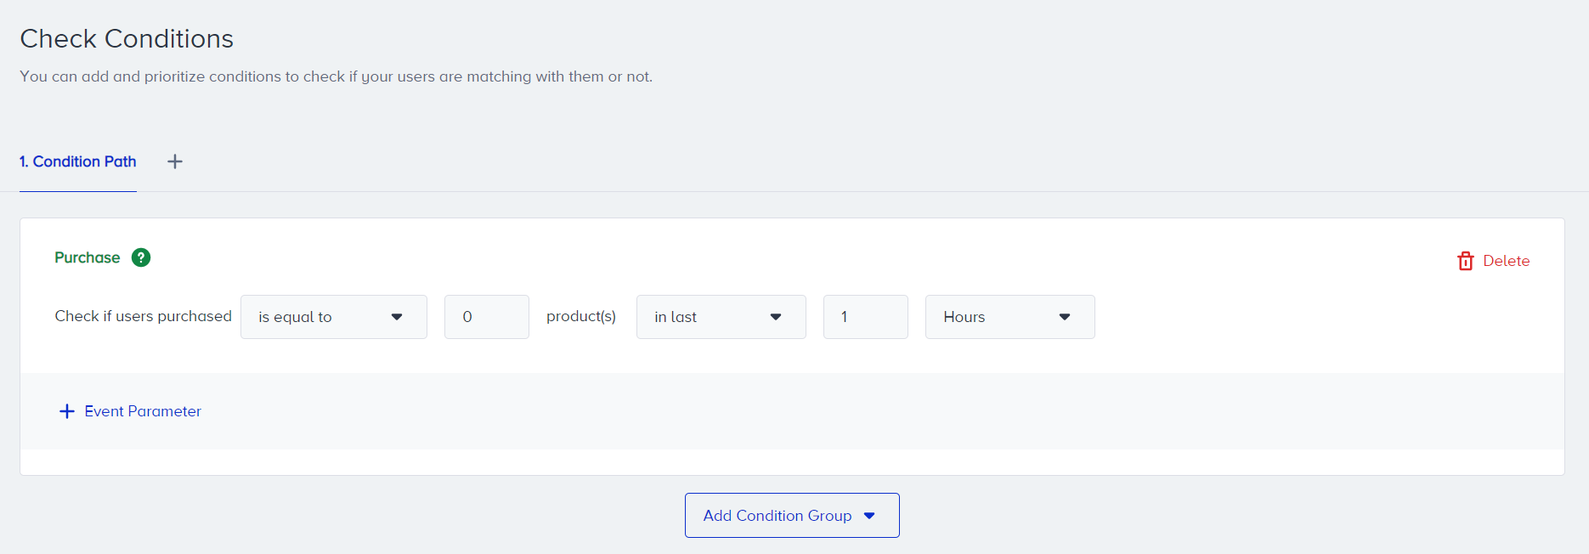
You can also select standard segments to filter out users.
your title goes here
Read more about Check Conditions.
3. Creating content
You can use one of the messaging channels (e.g. email, SMS, web push, app push, WhatsApp) in your welcome journeys or you can display a welcome banner on your website and mobile app via the on-site and in-app channels.
Welcome messages are your brand’s first impression. You can use this valuable moment to show your warm welcoming with outstanding content.
- You can personalize messages based on user properties. For example, you can address your users by their first name.
- You can give some special offers or discounts to new users to engage them.
- You can add your some how-to guides to offer a smoother experience.
- You can share popular products in your email.
Your title goes here
We strongly suggest the content design be consistent with the design on your website and mobile app, and the images & GIFs have high resolution.
Web Push

App Push

SMS

You can utilize and customize ready-to-use welcome email templates placed on the template selection screen.


On-Site

In-App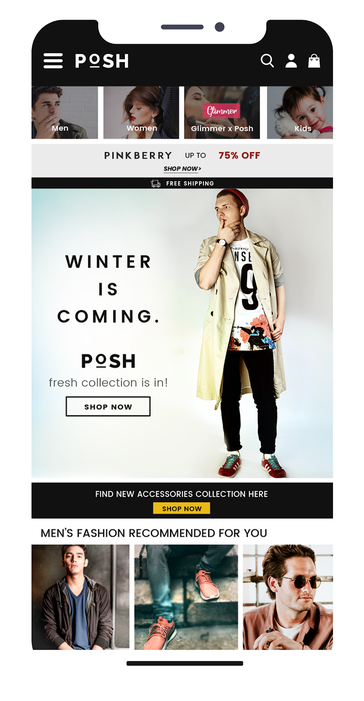

Advanced Welcome Journey
You can move your journey to an advanced level by checking user behavior and interactions. For example, you can check how many pages a user visited on your website and app after signing up. You can contextualize your journey based on their visit history.
You can branch your journey flow based on user properties such as age, location, or any other status you have.
You can have the second interaction step with non-engaged users who did not perform your desired action after the first welcome message.
The Wait element helps you have a break between two messages. The first welcome message may be sent immediately. However, adding a wait element before the second message will avoid bothering users with a few messages in a short time.
You can set special goals besides purchase for the users who enter the welcome journey (e.g. ride booking, redeeming coupons, adding items to cart, etc.). You can have a custom event to set goals or you can use default events as well as their event parameters.

Was this article helpful?