Architect Journey: Check Conditions
- 26 Feb 2024
- 5 Minutes to read
Architect Journey: Check Conditions
- Updated on 26 Feb 2024
- 5 Minutes to read
Article Summary
Share feedback
Thanks for sharing your feedback!
Tracking users' behavior and actions within the flow is one of the most important aspects as we run automation to send the right message to the right users at the right time. It allows you to personalize your journey flow and create real-time experiences for your users.
The Check Conditions element evaluates users' events, attributes, purchase history, visit history, predictive segments, RFM segments, predefined segments, saved segments, and email engagement segments as you set them.
.jpg)
‘Check Conditions’ evaluates users irrespective of the platform such as mobile, web site, offline environment. The same users can perform various events or have a variety of attributes across the platforms. In this case, the ‘Check Conditions’ element relates to the last action or last updated attribute of users.
For example, you may select a product page view event and select purchase history as the purchase count is ‘1’, with the user visiting the product page on the mobile app but making a purchase on the website. The user will be considered as meeting the condition and will proceed with the matching path.

You can click the Preview button on the path name to preview the conditions on the canvas when you save the Check Conditions.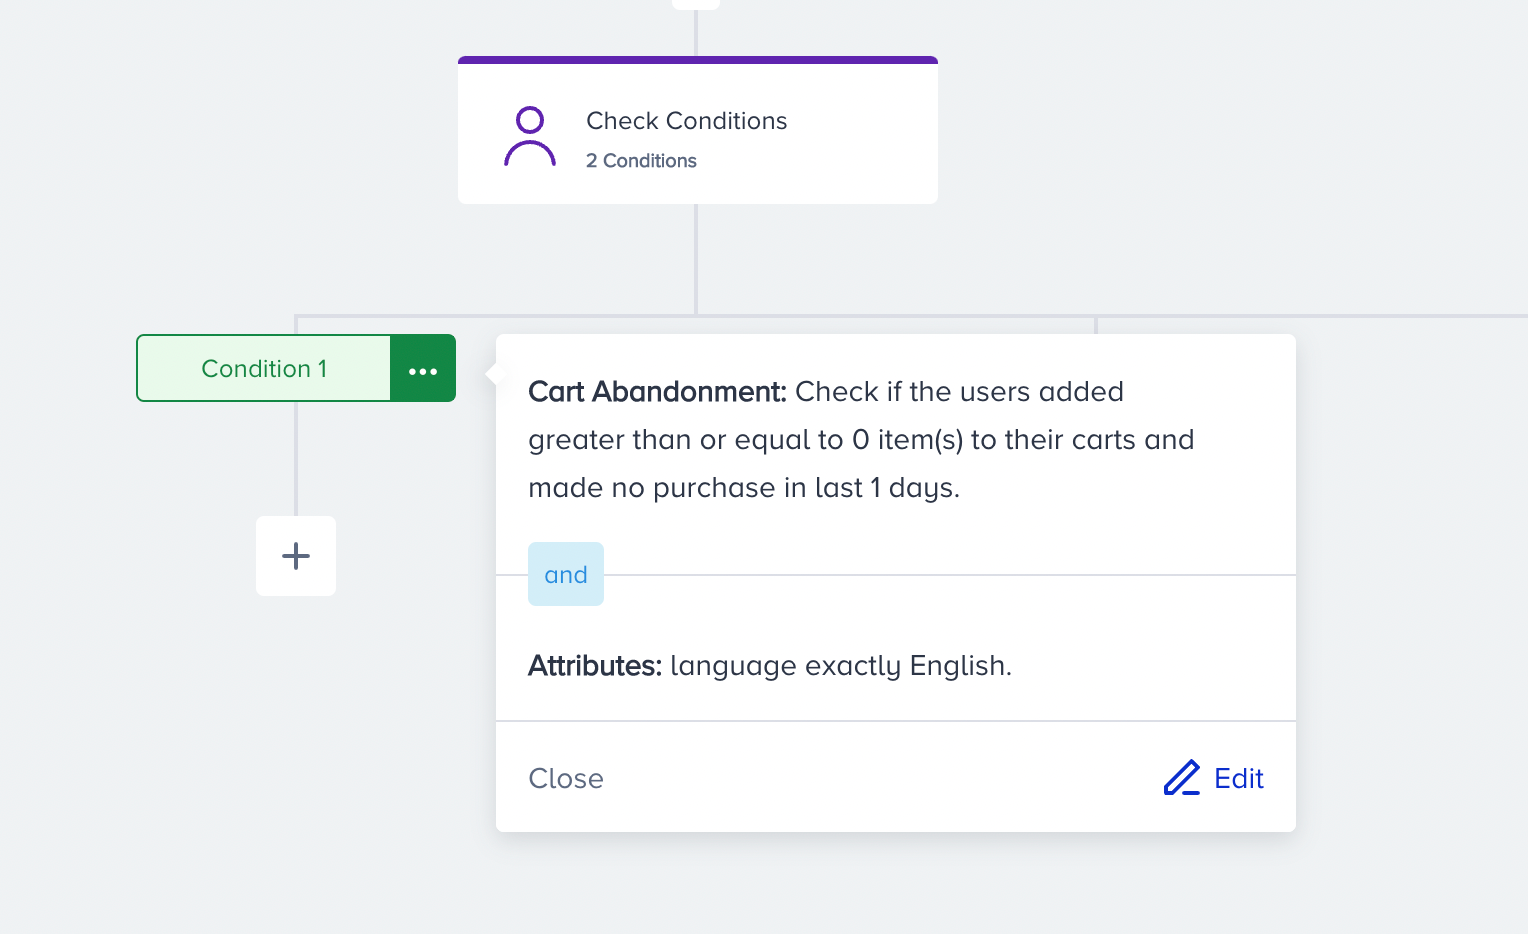
How does it work?
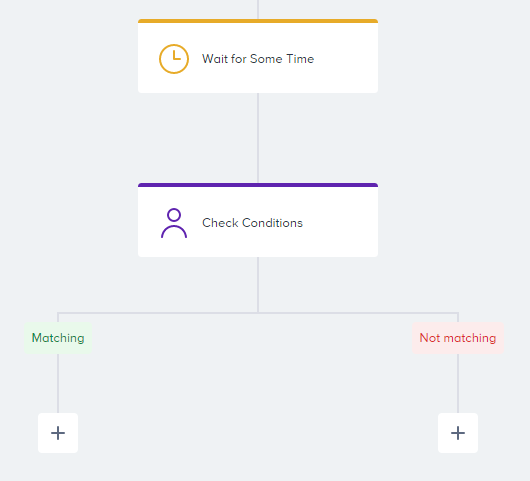
The ‘Check Conditions’ element divides users into Matching and Not matching paths based on their attributes, events, and segments. Basically, you create a true or false query that evaluates users and directs them to the next steps.

- Matching path: The number of users who met the specified conditions and proceeded down the “matching” path.
- Not matching path: The number of users who did not meet the specified criteria and proceeded down the “not matching” path.
If there is no element following one of the paths after the ‘Check Conditions’ element, users will go down that path and exit the journey. In this case, this journey will be counted as completed. Meanwhile, users who don’t meet the condition(s) will go down the “not matching” path.
Conditions are evaluated when users come to the ‘Check Conditions’ element.
Let's say, you are in the process of setting up a cart abandonment journey. You might be targeting users who added items to their carts. An hour later, you might want to check whether the users have completed the purchase in the ‘Check Conditions’ element. Users who haven’t finalized the purchase will go down the “matching” path, while others will go down the “not matching” path.
your title goes here
Note: There can be a delay in passing the users to the next step, which might happen depending on the queue size.
your title goes here
A race condition may occur if you are using the check element directly right after the starter element. For example, you may start your journey with the on event starter, and there may be check conditions right after the starter. There may not be enough time to update the user’s attributes to check them in the check conditions and users may proceed to not matching path. To avoid such a race condition, you should add a wait element with a minimum of 5 minutes before the check element.
Adding More Paths for Check Conditions
You may want to send different contextualized messages based on your users' properties or actions. This feature enables you to add more than 2 paths to your journeys.
Click the + (plus) button to create one more path after check conditions element. Each tab creates a different condition path. There is always a not matching path where the user will go down in case they do not meet any path’s condition.
If you want to copy condition paths with ease, click the dropdown menu to duplicate your condition path.
After duplication, you may edit, prioritize, and publish the condition paths.
In the multi-branching case, check conditions element considers each tab’s conditions in the order you put them in. You can drag and drop the tabs to prioritize different condition paths.
Your title goes here
If you reconnected paths after the Check Conditions element, you cannot drag and drop the tabs to prioritize. To do this action, you need to break the connected paths after the Check Conditions.
For example, in the first condition tab, you select the language attribute with the value English. In the second tab, you select the same attribute with the value French this time. When a user arrives at check conditions, the system first checks whether their language is English. If yes, they go down to the first condition path. If no, the system checks whether their language is French. If yes, they go down to the second condition path. If no, they go down to the not matching path.
You can click the Rename button that appears when you click the tab to rename the condition paths. When you rename the condition paths, the path name will be changed on the canvas. You can click the Delete button to delete the tab. When you delete the tab, the linked condition path will be deleted completely.
your title goes here
- Each condition path must have an element. Only the not matching path can be kept empty. The last element of each path must be a channel or action element.
- You can have a maximum of 10 condition paths. The not matching path is not counted.

Tips & Tricks
- You can use the Predefined Segments without the need of selecting any attributes (Do not forget to check the requirements before using the Predefined Segments.).
- You can use the RFM segments if they are enabled for your account. If not, you can consult Insider team.
- You can contextually personalize journey flow by multi-branching to send different content of messages.
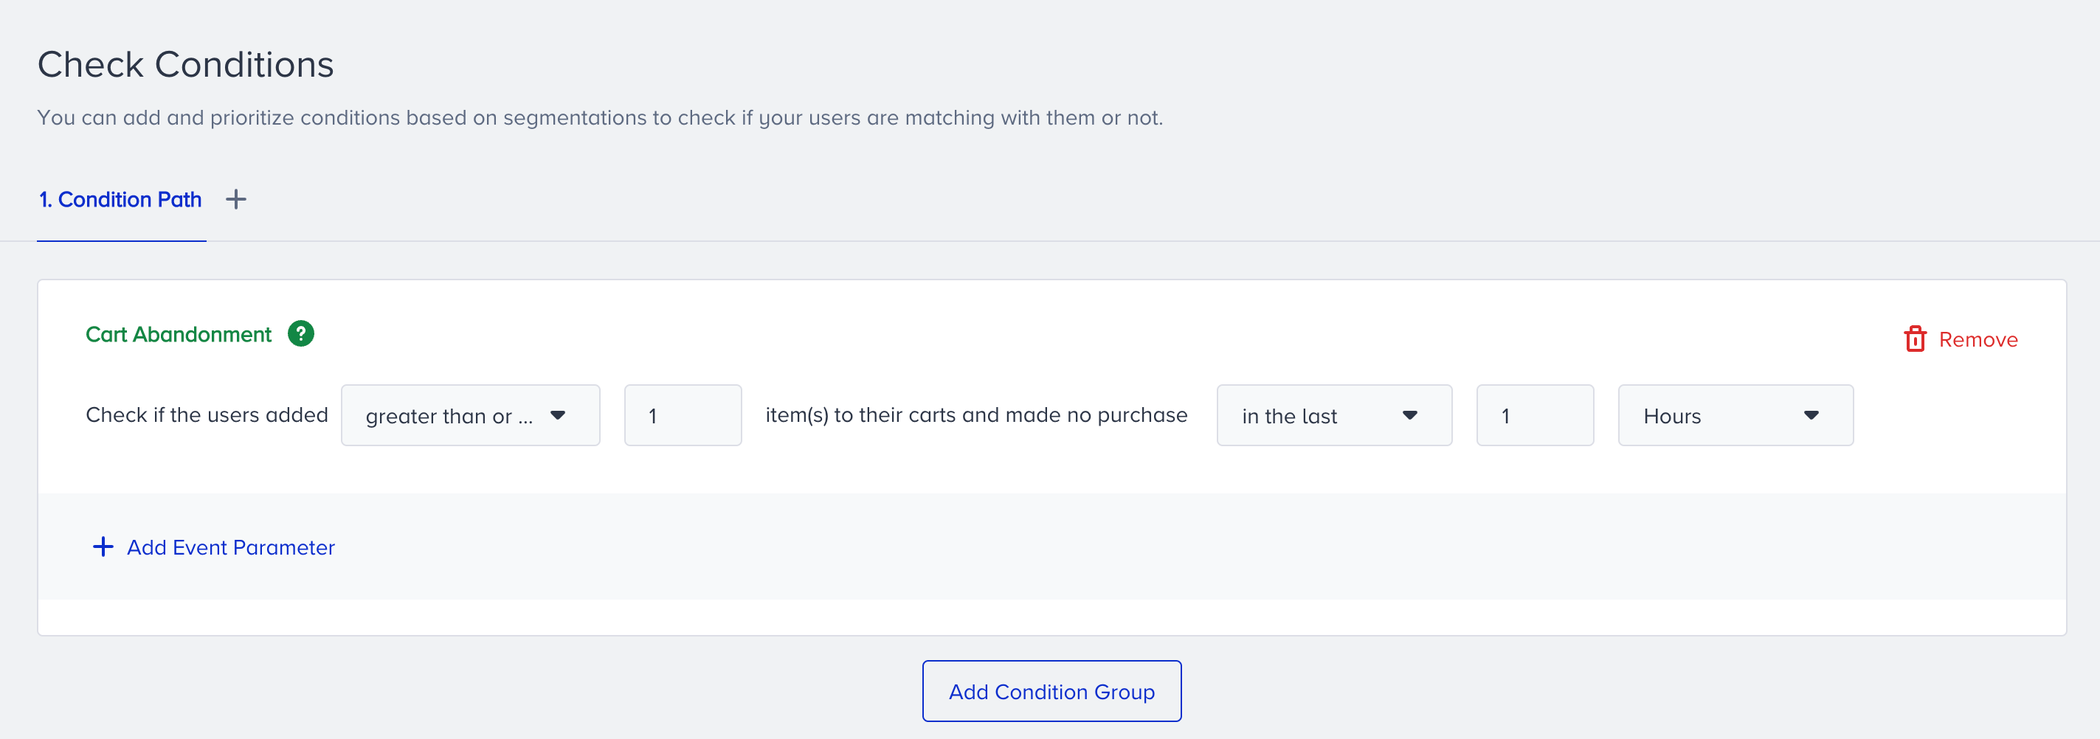
- You can combine events with attributes.
- You can use event parameters to narrow down the segments and to eliminate irrelevant/out-of-scope users.
- You can check if the users are in the selected saved segment.
- You can use custom events that you create manually in ‘Check Conditions’. You can use Default, Custom, CRM, Mobile App attributes in ‘Check Conditions’.
Use Cases
- Check if users made a purchase.
- Check if users' language is a specific one; if yes, send a personalized message.
- Check if users' country is a specific one; if yes, send a personalized message.
- Check if users subscribed to your lead form.
- Check if users added an item to their cart.
Requirements
- Insider Tag integration should be completed.
- SDK integration should be completed for mobile app data reading.
- System rules should be defined for your account.
- Events should be activated.
- Events should be sent from the website, mobile app, offline environment (if you are using any).
Was this article helpful?