Integrating Insider via Google Tag Manager (GTM)
- 29 Mar 2024
- 2 Minutes to read
Integrating Insider via Google Tag Manager (GTM)
- Updated on 29 Mar 2024
- 2 Minutes to read
Article Summary
Share feedback
Thanks for sharing your feedback!
Now you can complete this integration on Insider's new onboarding center. Refer to Insider Onboarding Center for further details.
This integration allows you to integrate Insider Tag on your website with ease via Google Tag Manager (GTM).
Following these details will provide you more details about the integration:
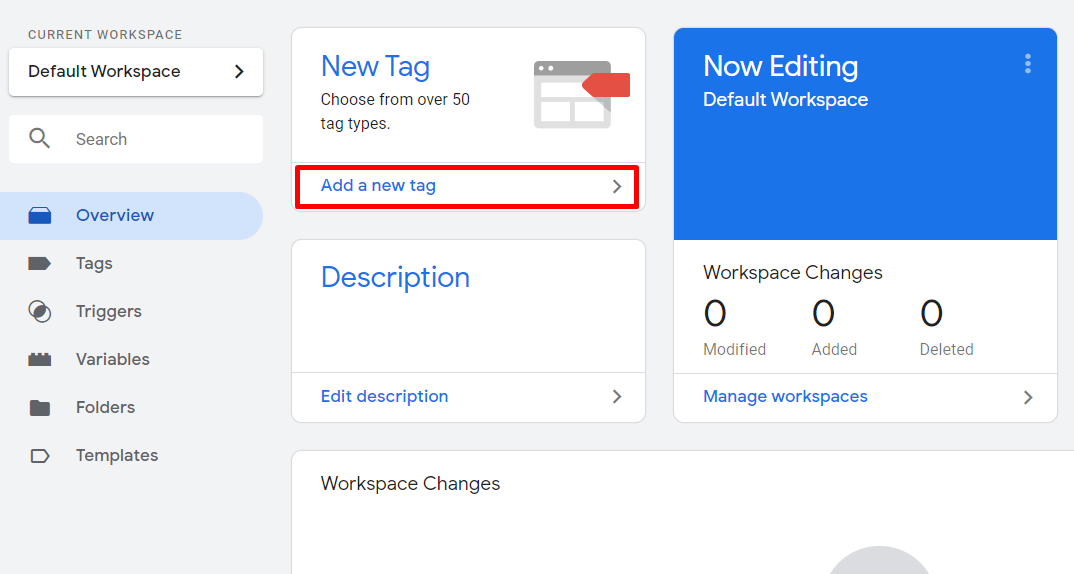
Add a new tag
Log in to your Google Tag Manager (GTM) account and click Add a new tag.
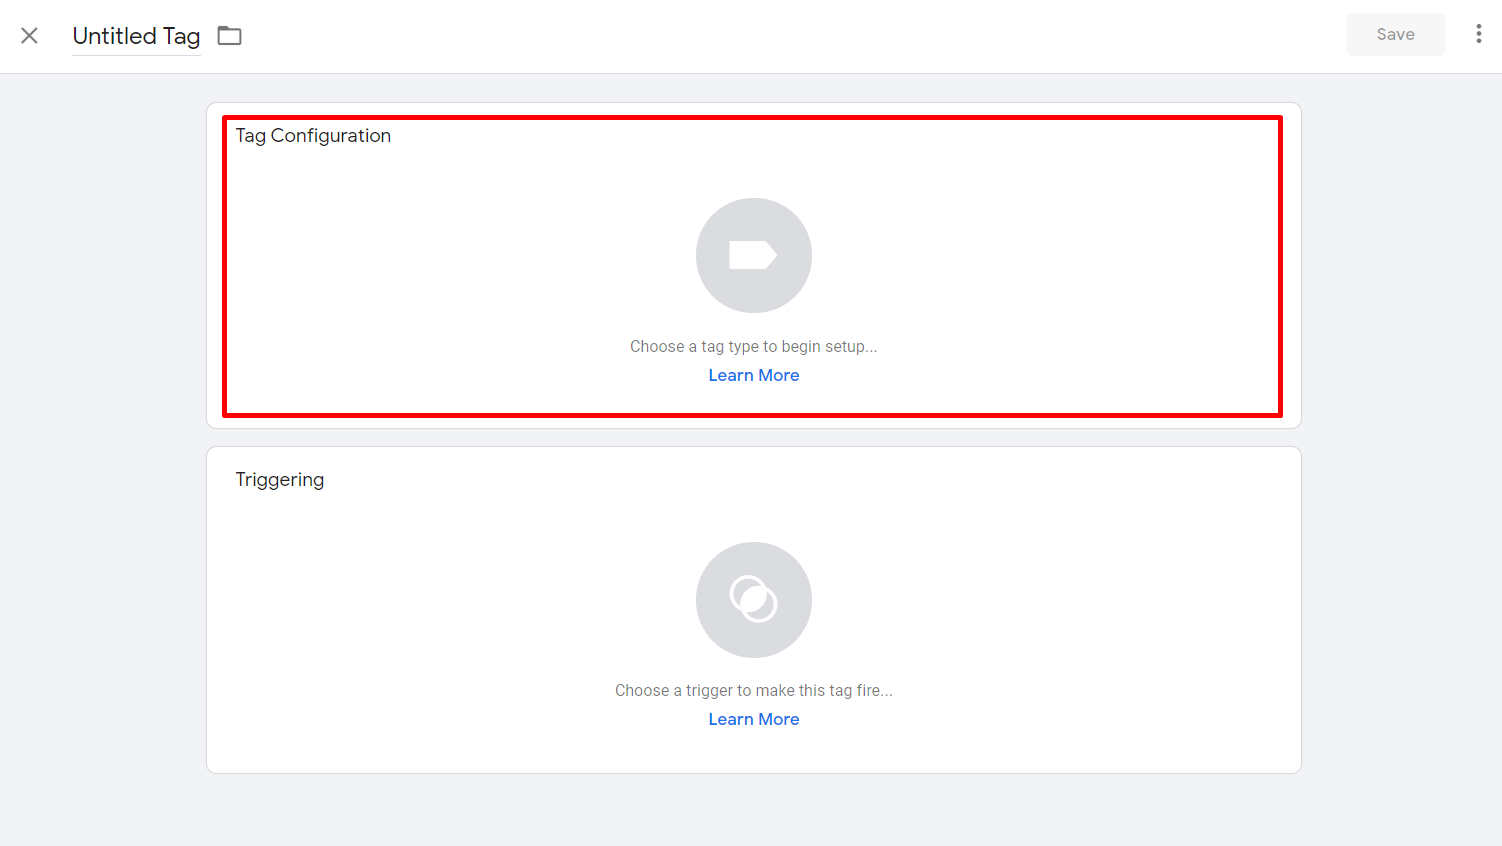
Configure your tag
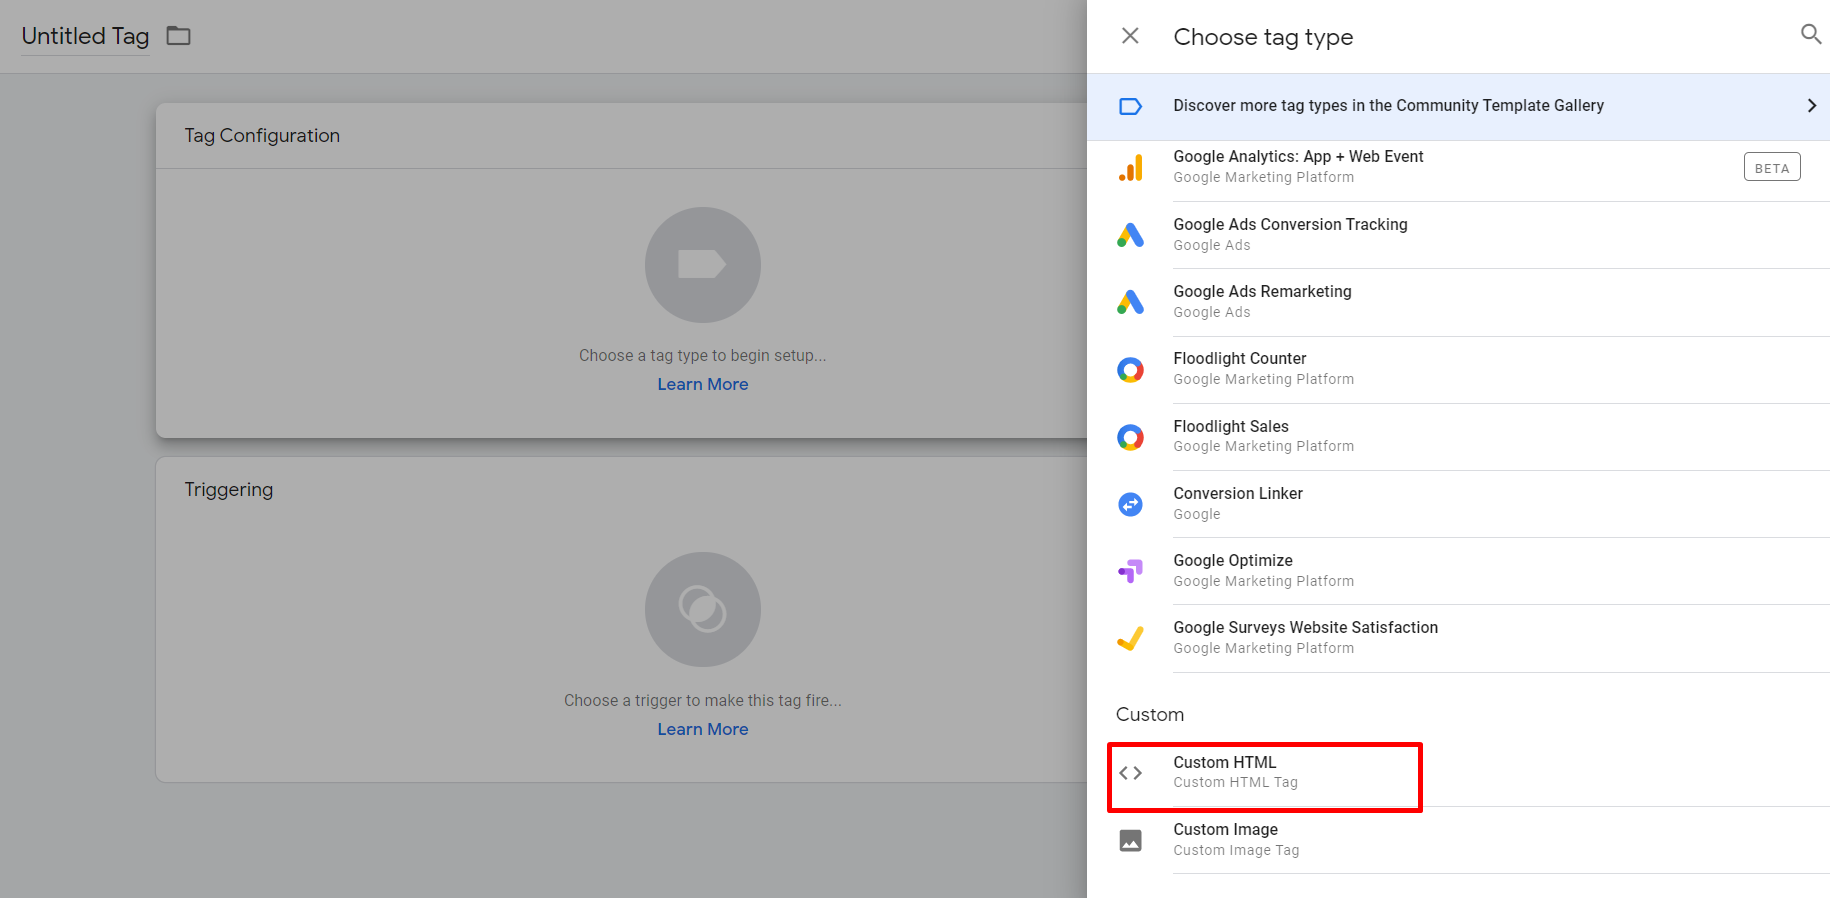
1. Click Tag Configuration to configure your tag. In the Choose Tag Type window, select Custom HTML.
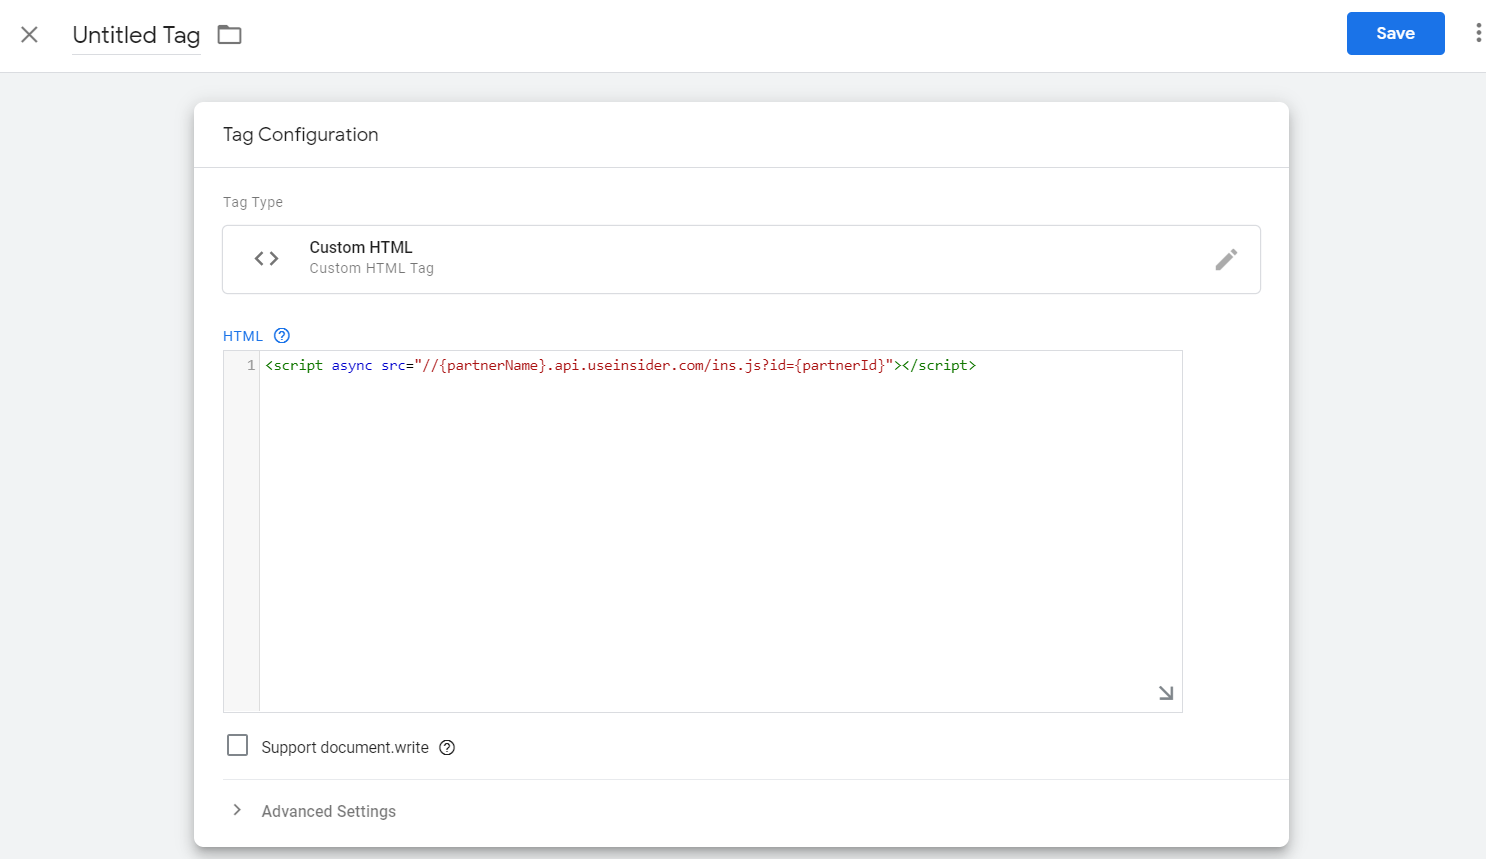
2. Copy and paste the Insider Tag in the HTML field.
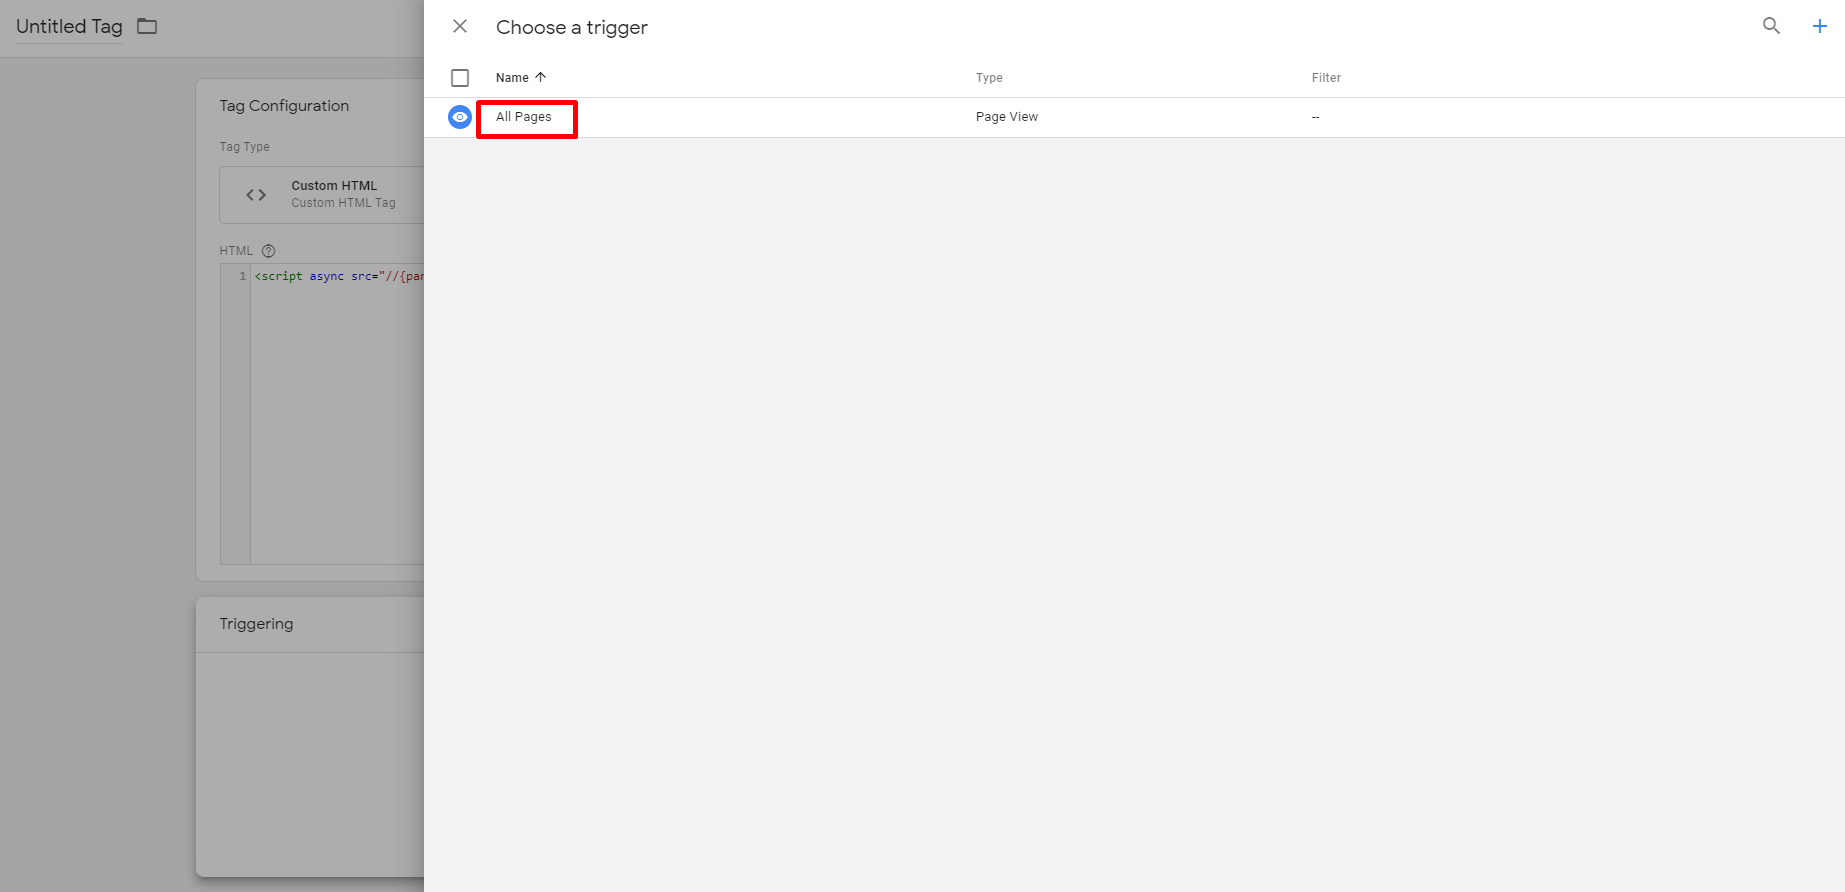
3. Click Triggering to configure triggers and select All Pages.
NOTE: Avoid adding this script to pages containing sensitive information (e.g. payment pages that contain credit card information). If there is another page where the details of purchased products can be captured, add this script to that page instead.
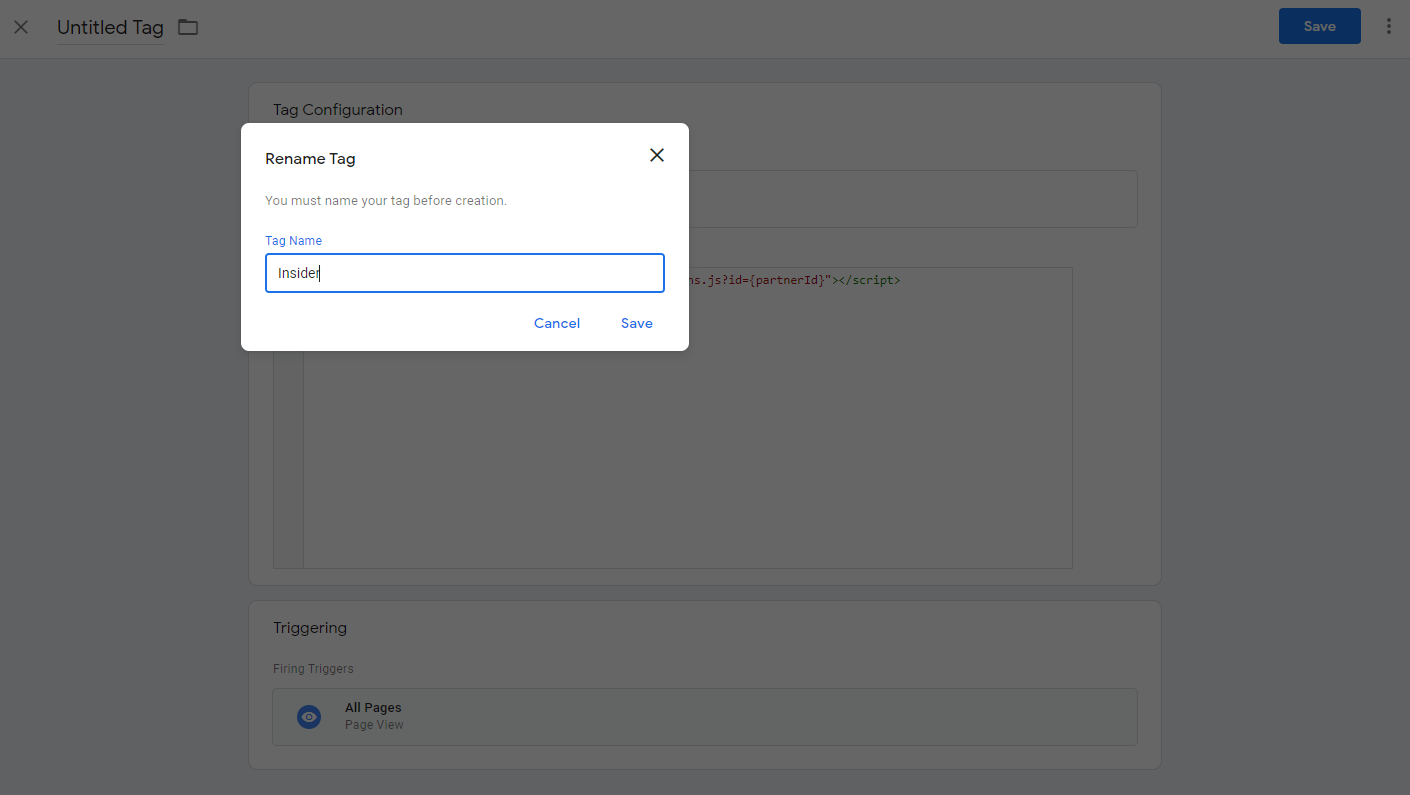
4. Rename your tag and save it. Save it again on the main screen, then publish the final version on your account.
Code for Confirmation Page
After completing a transaction, your customers are directed to a confirmation or success page.
Use the following steps to create a tag for your confirmation page. Add this object, with the stated property, to your confirmation page before the Insider tag.
1. Add a new tag
From your Google Tag Manager (GTM) account, click Add a new tag.

2. Configure your tag
2.1 Click Tag Configuration to configure your tag. In the Choose tag type window, select Custom HTML.


2.2. Copy the code for confirmation page below and paste it in the HTML field.
<script>
    window.insider_object = window.insider_object || {};
    window.insider_object.page = {
            "type": "Confirmation"
    }
</script>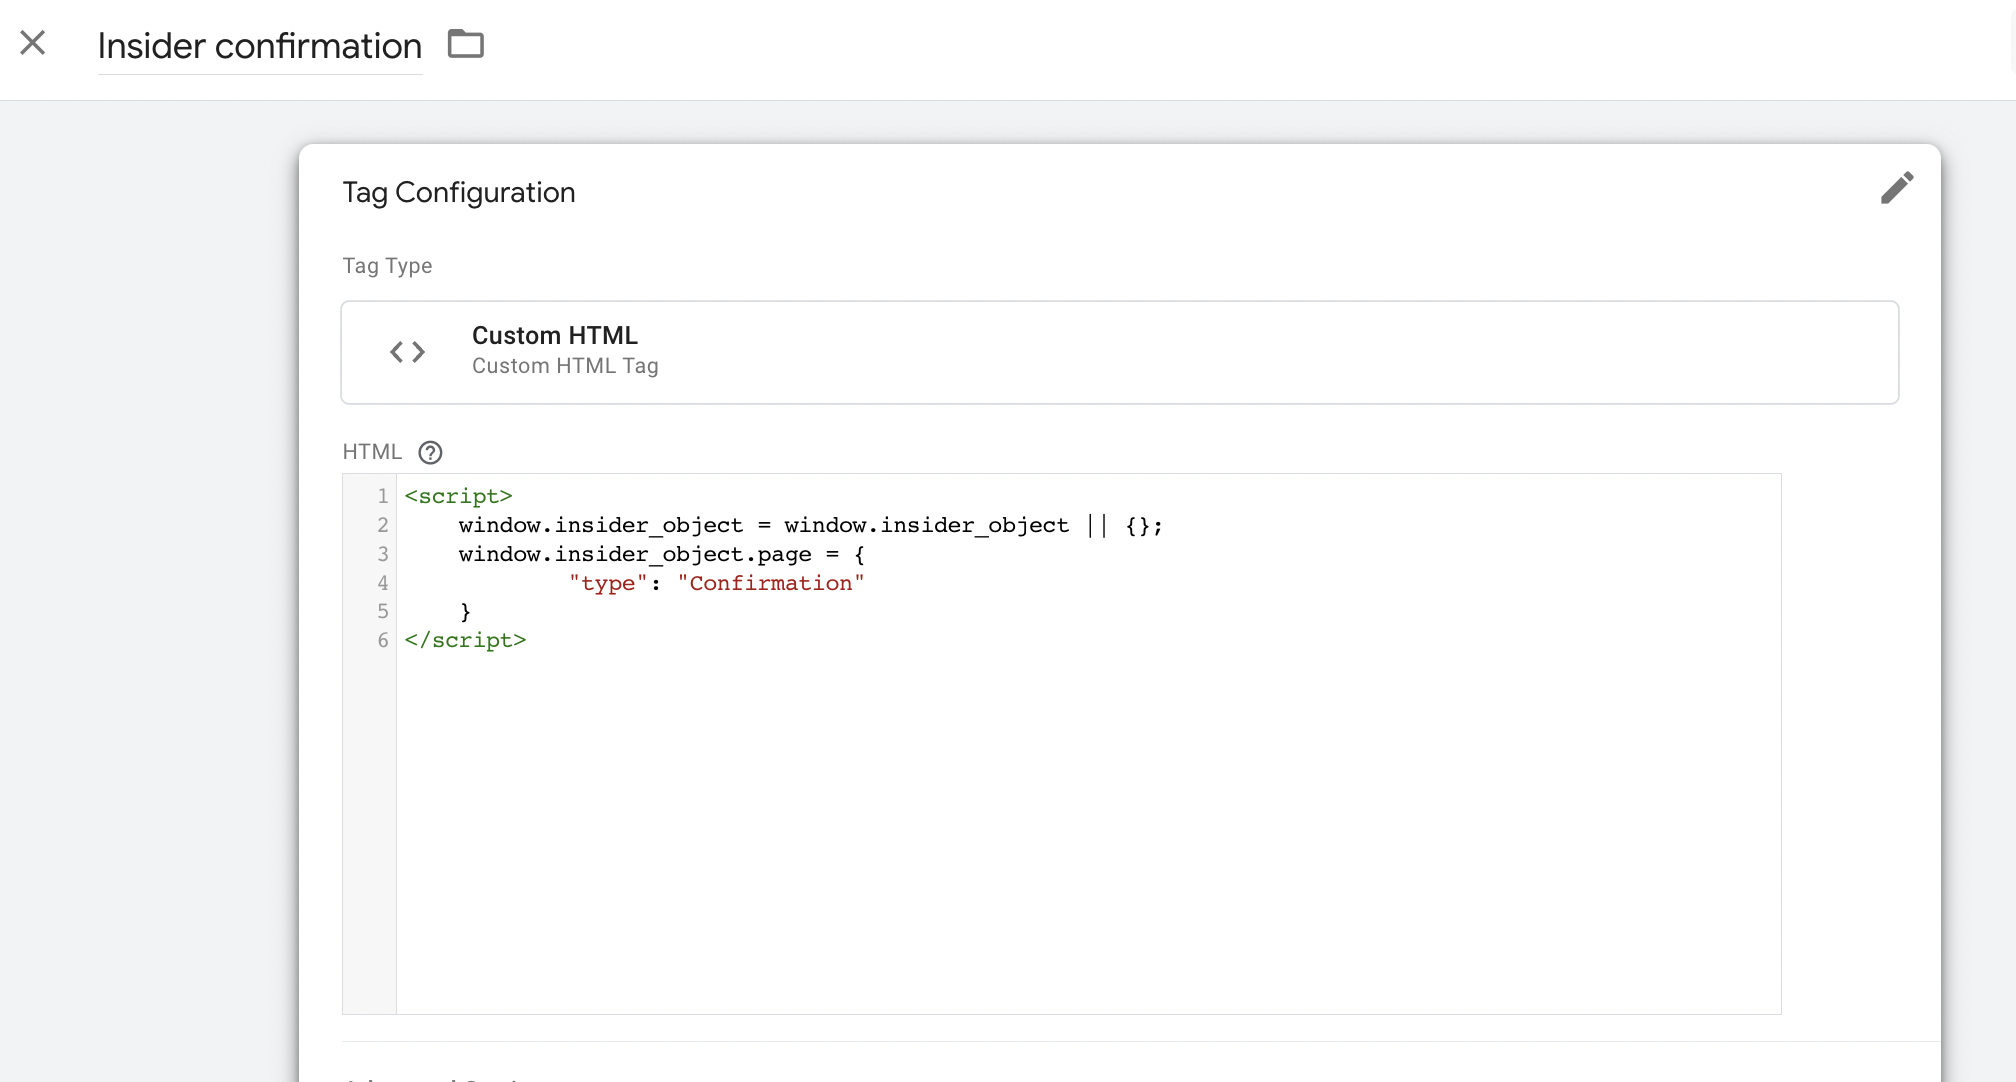
2.3. Click Triggering to configure triggers and select Success Page. Rename your tag and save it. Save it again on the main screen, then publish the final version on your account.

3. Add a new trigger
If you already have a success page, you can skip this step and move on to step 3. If you need to create a success page, follow these steps to create a new trigger.
3.1. Select Triggering on the new tag page. Click New Trigger, then Trigger Configuration to begin setup.

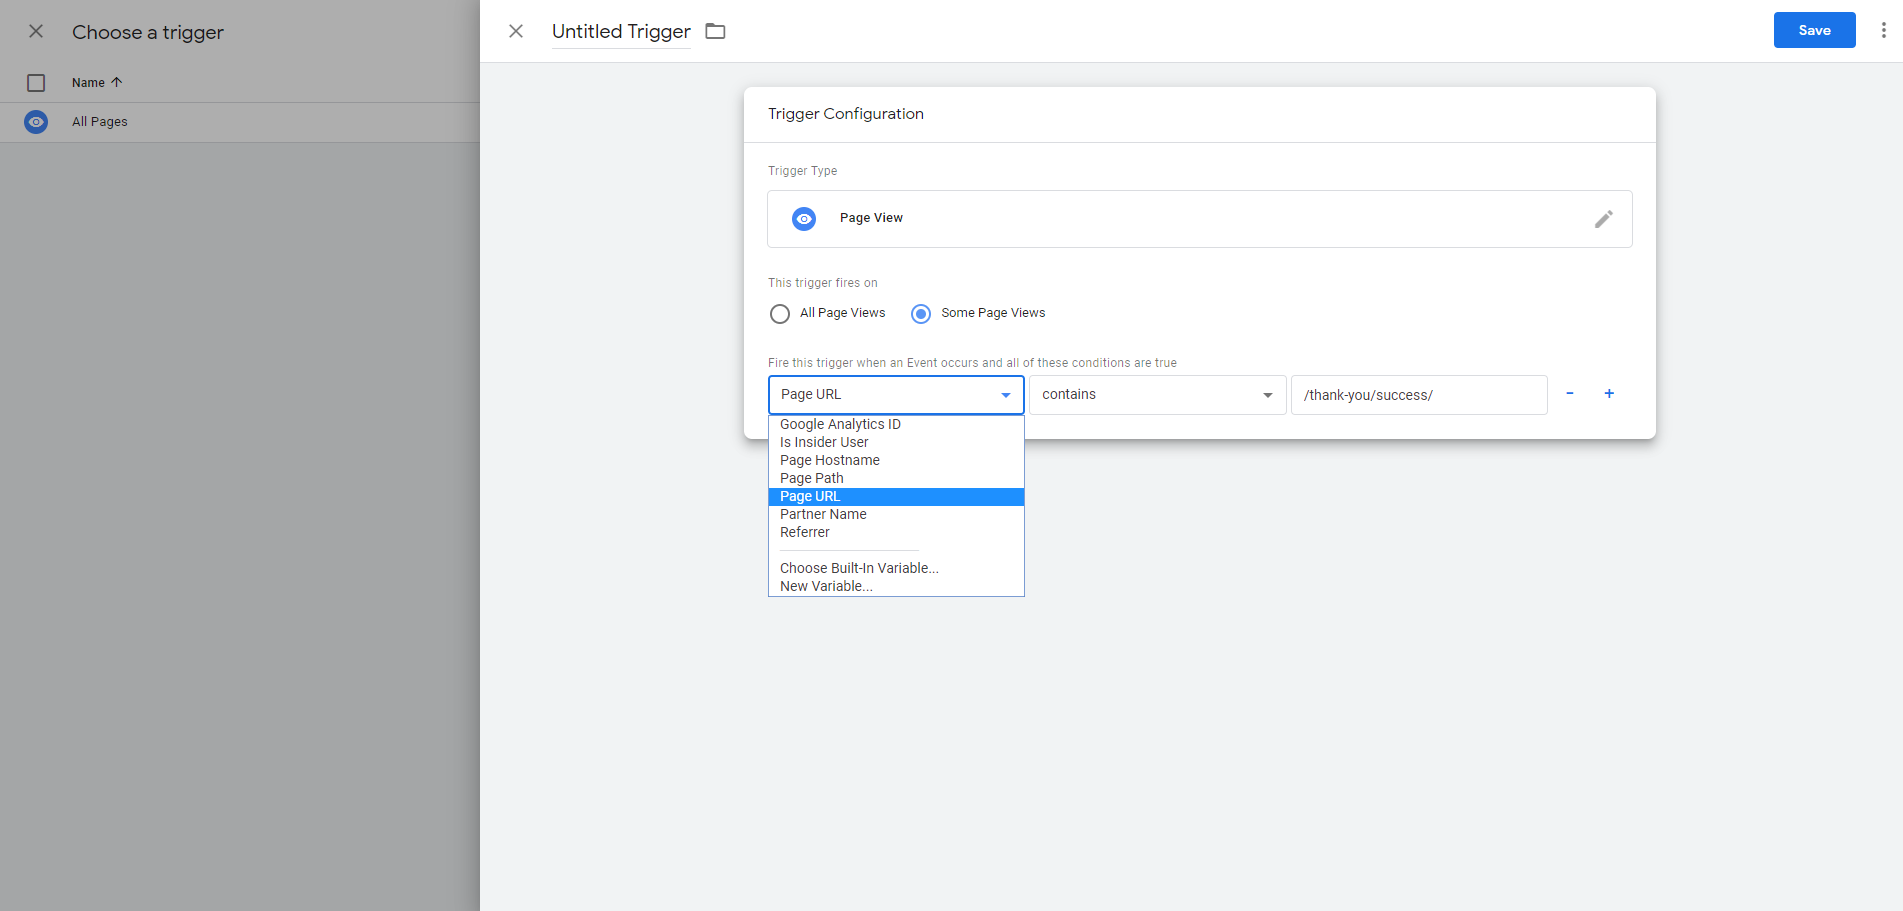
3.2. In the Choose trigger type window, select Page View.

3.3. Configure your trigger for your Success Page. This step may differ depending on how your success page is tracked.
3.4. Name your trigger and save it. The trigger will be automatically selected for your tag.
4. Tag priority
4.1. To enable Code for Confirmation Page to load before Insider Tag, select Advanced Settings.
4.2. The Tag firing priority should be higher than that of Insider Tag. If none is specified for any tag, the default priority is 0, so Code for Confirmation Page can be set to 1 as in the example.
4.3. After setting the priority, click Tag Sequencing and select Fire a tag after Code for Confirmation Page fires. Then select Insider Tag as the Cleanup Tag.

4.4. Rename your tag and save it. Save it again on the main screen, then publish the final version on your account.
Upon adding the Code for Confirmation Page, review to make sure:
- It loads before ins.js,
- The page type is Confirmation for all transactions made with all payment types (payment on delivery, credit card, bank transfer),
- If a transaction fails, the type does not show Confirmation,
- If it is a single page, be sure that the page object includes the correct information. For example, once a user navigates to another page after the Confirmation page, the page object should also state this change and not display the type as Confirmation.
Was this article helpful?